Friday, March 29, 2013

The Awesomeness of NASA

I've been fascinated by astronomy since I was a little girl. I always admired NASA because it did incredible things-- although I never wanted to work there because I like theoretical rather than engineering problems. But NASA is amazing, and not just for astronomy. The type of development that they do for materials that work in space has a real world impact. A recent New York Times article spelled out some of their recent work.

I just thought, since the political world continually talks about slashing spending, I would just post this article as a reminder of some of the things NASA has done recently.

Bad Days

Flowers from the Garden
I had a whole week of bad days last week. It was rough and long. But I got through it. So when my mom had a bad day on Monday, I wanted to help. So Servius and I decided to cheer her up. We made chicken picatta and picked flours from the garden. It seemed like all our purple flowers were in bloom so we made a bouquet out of only purple flowers. We had to eat on the porch because our cats have not yet learned to stay away from flowers, but it was a lovely night-- until I practically fainted, but that is another story...

Thursday, March 28, 2013

Pumpkin Seed Bread (a work in progress)

Pumpkin Seed Bread
When I was in Ireland, Egnatius' father brought home some bread. Usually, I'm not a big fan of sandwich bread, but this bread was fantastic. Really fantastic. It was some kind of multigrain or whole grain bread with pumpkin seeds. However, I couldn't figure out what was in it.

Scrolling though Yeast Spotting, I discovered this bread which looked exactly like it. So, I thought, why not try it?

Pumpkin Seed Spelt Sandwich Bread
Ingredients
  • 250 g whole wheat 100% starter
  • 200 g water + a little bit extra for adjustments and soaking the grains (maybe 50g extra?)
  • 300 g fresh ground spelt flour
  • 50 g bread flour
  • 1 tablespoon flax seeds
  • 1 tablespoon amarneth
  • 4 tablespoons pumpkin seeds (mine were dry roasted, but you can do either)
  • 6 g salt
  • 1 tablespoon honey
  • 2 tablespoons olive oil
Directions
  • Place all ingredients except salt, oil and honey in the bowl of the mixer. Mix for a minute low, cover and let stand 15 minutes. 
  • Repeat a minute of mixing and 15-minute rest. I would do this by hand, because my mixer didn't like the dough for some reason.
  • Add salt and honey and mix on low speed (or mix by hand), when they are integrated add oil, a tablespoon at a time, or five minutes when we got a soft dough up a little speed and knead for another minute. 
  • Remove the dough and place it in a bowl, cover and leave for two hours doing slightly folded table in the same bowl every half hour, a total of three sets of folds. 
  • Remove the dough to a lightly floured surface and spread with the palms of your hands into a rectangle, roll a way that is somewhat shorter than the mold that will be used. 
  • Grease the mold slightly and place the bread inside, paint the surface with water and place a handful of pumpkin seeds over lightly pressing them to make them stick to the wet dough, and cover.
  • Place it in the refrigerator overnight.
  • In the morning, let it sit out for about half an hour while the oven heats up.
  • Bake in preheated oven at 390 ° F, and bake five minutes and lower the temperature to 350 ° -375° F, bake half an hour in total, first 15 minutes under steam.
Bread
The bread still needs a lot of work. If anyone has ideas, I'd love to hear them. While the final proofing was certainly sufficient, I think that the bulk fermentation didn't quite work. Furthermore, I think that I'm still not quite getting the best results out of my home-ground flour. Supposedly adding diastatic malt powder will help. However, I'm up for any ideas.

Also, I think my pumpkin seeds were a bit old so they weren't quite as flavorful as I might have hoped.  I also cooked it way too hot because I wasn't paying proper attention and I didn't steam it properly.

The original version was much lighter and arier, but that might have been because she used white spelt and vital wheat gluten. I think this bread has potential, but I need to do some experimentation.

Wednesday, March 27, 2013

Overnight Challah, the Results

Challah Braid with Flax Seeds

Who caught the error in yesterday's post? Anyone? Well, I didn't and so things went a little differently then I'd planned.
Braided dough in a ring

Let me illustrate the problem. This was the original ingredient list (before modification) for Peter Reinhart's Challah in Artisan Breads Every Day:
  • 510g lukewarm water (about 95 degrees F)
  • 1.5 tablespoons of yeast (14g)
  • 8-10 egg yokes (170g)
  • 5 tablespoons vegetable oil (71g)
  • 4.5 tablespoons honey (85g)
  • 964g unbleached bread flour
  • 19g salt
1.5 tablespoons (14g) is an awful lot of yeast. I'm not sure what Reinhart had in mind for this bread, but I made the bread around 6pm and by about midnight the dough had tripled in size (I was using a half batch and I used less than half of the yeast he asked for-- 0.5tbsp + a small pinch) and was on the verge of collapse. To keep this in perspective, 1.5 tablespoons is the same amount it takes for my old version of challah to raise the bread in 2.5 hours at around 70-72 degrees, which means that the same amount of rising should happen in about 6 -7hours (in my refrigerator which is slightly too warm because it is very old). To be fair, I did also have a bit of sourdough in the dough, but it was primarily for flavoring and usually the sourdough is inhibited by such a large amount of instant yeast. Something obviously went wrong, but I'm not sure what it was.
Servia's traditional braided Challah
So, around 1am, I decided to shape the dough. I was going to stay up and wait for it, but I was too tired, so I put it back in the refrigerator overnight and crossed my fingers that it didn't overproof.
Close up on braiding
Fortunately, when I came down this morning, all seemed to be well. The bread cooked nicely, although the one that was steamed lost its egg sheen during the steaming.
Crumb shot 1

Crumb Shot 2
It doesn't have the same open crumb structure as Reinhart's. Maybe I should have let it rise longer? Who knows. Maybe I'll experiment again sometime. However,  it's not as easy to experiment with challah because it's highly caloric and Servius doesn't like it (i.e. experimentation entails weight gain). However, maybe I'll try it again at some point.
Braiding Close-Up
The Challah tastes amazing. The sourdough didn't taste sour at all, but did definitely add some richness to the flavor.

Tuesday, March 26, 2013

Overnight Challah

In general, I'm not a huge fan of enriched doughs, but I do love Challah. When I was a kid, most of my friends were Jewish so I went to about 52 barmitzvahs and batmitzvahs over the course of 2.5 years. While I enjoyed parts of the ceremonies, I often looked forward to grabbing a piece of challah afterward.

Challah also was one of the first breads that I made back in my early days of bread baking at school. It was the first no-knead bread I ever baked. Most importantly, it was the first successful bread that I made upon returning home after graduation after a series of incredibly disappointing failures. Mostly out of nostalgia, I have always used this recipe, which was the first one I found. However, I decided to try Peter Reinhart's recipe from Artisan Breads Every Day. Except I couldn't help myself-- I had to modify the recipe (quite substantially).


Challah from Artisan Breads Every Day (significantly adapted)
Makes 1 large loaf or 2 small loaves
Ingredients
  • 130g lukewarm water (about 95 degrees F)
  • 1/2 tablespoon + a pinch dry active yeast (approximately 5g)
  • 4-5 egg yokes (85g) Instead, I used 2 egg yokes and 1 egg. However, had I read the recipe notes, I should have realized that I needed to reduce the amount of water. I didn't so I ended up incorporating a lot more flour. If you want to use whole eggs, reduce the water by about 28g per egg. So in reality, I should have used 2 egg yokes and 2 eggs with 74g water
  • 2.5 tablespoons vegetable oil (35g)
  • 2.25 tablespoons honey (43g)
  • 357g bread flour
  • 250g white sourdough starter, 100% hydration
  • 1.25 teaspoons salt (9.5g)
  • 1 egg white and 2 tablespoons water for egg wash
Directions
Day 1:
  • Combine the dry active yeast and the water in a mixing bowl and stir with a whisk to dissolve.
  • Add egg yokes (or eggs or both), oil, and honey. Stir to break up the egg yokes.
  • Add in the sourdough starter, the flour, and the salt and then mix. In a mixer, mix for about 2 minutes on the lowest speed. By hand, mix with a dough whisk or a wooden spoon for a minuter or two until you form a course, shaggy dough.
  • Let the dough rest for 5 minutes.
  • If using a mixer, switch to a dough hook for about 4 minutes on medium-low speed. Or, mix by hand or with a wooden spoon for about 4 minutes. Make sure your hands or the spoon are wet.
  • Turn the dough onto a very lightly floured surface and knead for 1-2 minutes, or until it passes the windowpane test. Incorporate as much flour as needed to make the dough tacky but not sticky.
  • Then, let the dough sit out for about half an hour. It should rise just a little bit. Then put it in the refrigerator overnight or for up to 2 days.
Day 2
  •  Remove the dough for the refrigerator 2h10 before baking.
  • Transfer the dough onto a lightly floured work surface and cut it into the desired number of pieces. Challah loaves are traditionally braided so if you are making 2 small loaves, divide the dough into 6 equal pieces. 
  • Roll the pieces into ropes. The length depends on your own aesthetic, although you want all of the pieces to be the same length. Consider that the bread will increase about 1.5-2 times in size, so don't roll your ropes too thin or too thick.
  • Braid the loaves. Braid out from the middle toward each side. This will ensure the proper tapering of your loaves.
  • Let the loaves rise, covered, for 2 hours.
  • Preheat the oven to 350 degrees F (300 degrees F convection) about 15 minutes before the bread is ready to go in the oven.
  • Brush the loaves with egg wash and sprinkle seeds if desired. You can then either load them onto a pan or a peel to be baked on a stone.
  • Bake for 35-50 minutes, until the internal temperature is 190 degrees F and the bottom sounds hollow when thumped. If you want, you can steam for the first 20 minutes, but it's probably unnecessary. I will steam one and not steam the other so I can demonstrate the difference.
I haven't finished this project. The loaves will come out of the oven tomorrow so I will post pictures then.

Monday, March 25, 2013

Pumpernickel

A while ago, I bought some pumpernickel flour to make some pumpernickel with a group of friends. I was confused when I looked online and in books and found a variety of variation that demonstrated not only a variety of origins, but also a fundamental disagreement between various parties on the nature of pumpernickel.

The pumpernickel bread that I remember from my childhood was really dark rich brown and kind of sweet. I didn't love the flavor-- and now I realize that it was the rye that I didn't like in it-- but I ate it from time to time and understood it's appeal. I remember that my mother used to use it to make grilled cheese sandwiches.

When I went looking for pumpernickel, I found that the recipes split into two distinct varieties: a German pumpernickel and an American pumpernickel. American pumpernickel was what I grew up with and assumed was the real version. I didn't even know that the bread-- in name at least-- came from Europe. German pumpernickel is an entirely different animal. It is a dark, dense and made with wild yeast and without molasses. I believe that this is the kind of rye that my grandfather liked. My dad used to say that if you dropped the bread on the floor, the tiles would crack. I couldn't figure out why two such different loaves had the same name.

Recently, I acquired a copy of Jeffrey Hamelman's Bread: A Baker's Book of Techniques and Recipes. After the initial slew of grad school rejections, I think Servia was trying to cheer me up. Anyway, I didn't get a chance until now to read it. As I was reading this morning, I found a highly vitriolic passage in his book that provided some insight.
"Once it was removed from the pans, the the bread was a rich dark brown, almost black. Over the course of the long slow bake, the starches in the rye were converted to sugars, which provided the intensity of aroma and color. These breads, true pumpernickels, have long been considered in Europe to be highly beneficial to infants and old folks because their starches have undergone so much of a transformation that they are quite easily digested. In any case, how did this time-honored method of bread production become bastardized in the United States and why? I think that few bakers were willing to take the time to produce what at first glance appears to be a fragrant brick. Rather than make the effort to bake using the traditional overnight technoique, American bakers found they could get even blacker bread by the simple addition of caramel color. Apparently the complete  lack of taste was not deemed sufficient reason to  consider abandoning this style of baking." (Hamelman 39)
While I think that Hamelman's prejudice might be clouding his palette, he does provide a pretty good explanation of the difference between the two main types of pumpernickel bread. Whether or not these two distinct loaves should have the same name, they are both legitimate types of bread.

Amusingly enough, the first pumpernickel that I found was in Bernard Clayton's New Complete Book of Breads. It was made with baking soda; I wonder what kind of a diatribe Hamelman would let loose hearing that.

Saturday, March 23, 2013

She Lives!

I finished my finals. I slept in until 2:15pm this afternoon after finishing my final paper just before midnight last night. What a few weeks!

I also wanted to say that I got into a couple of grad schools, which is pretty exciting. I won't say where, but I'm really excited for next fall.

I have big plans for breadmaking in the next few weeks. However, I haven't started yet. Definitely on the list are Jeffrey Hamelman's Irish Soda Bread, Peter Reinhart's Mash bread, bagels, 100% spelt bread, 100% whole wheat version of Tartine Bread, croissants, etc.

In the meantime, I thought I would share something with you all. I really tend to think crafty food things are silly. I like rustic delicious dishes-- I don't tend to care what they look like. And a lot of craft projects are simply inedible. But this project is so beautiful, I thought I would share it with you. Sue posted it on her blog today and I was totally floored...it was so cool. Plus, it looks delicious!
Check out Sue's Blog

Enjoy!

Wednesday, March 20, 2013

Back Soon

So my finals are done on Friday, at which point I should return to the land of the living. One lesson I've learned over the last two weeks is to never write a paper in which I have little interest-- it takes at least four times as long and turns out to be disappointing.

It's weeks like these that I am so glad that i went on a bread making binge and have a stockpile of delicious loaves in my freezer. May I highly suggest this course of action for anyone who bake's bread.

More soon.

Friday, March 8, 2013

100% Spelt Bread

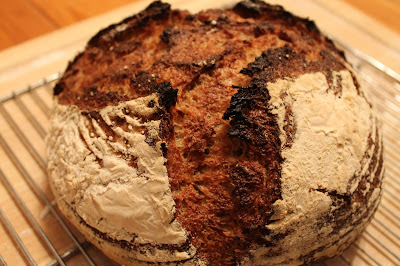
100% Spelt Bread; All pictures by Servia

My plan this weekend was to make some 100% Whole Wheat bread to continue the 100% Whole Wheat project. However, I got sidetracked.
Wondermill Junior Delux
As I mentioned, Egnatius gave me a grain mill for Christmas. I also mentioned that the tork on the grinder was threatening to break the table. Well, Servia went down to our garage and out that we hard a workbench-type-table that we hadn't seen in a few years (because it was upside down). So, we hauled it upstairs and, lo-and-behold, the grain mill works!
When I came back from mixing the dough, Gorgo was by the grain mill
Little Gorgo was so entranced she wanted to pose by it.

Anyway, I bought some whole spelt kernels at whole foods the other day. They were much cheaper than buying the flour, interestingly enough. So I decided to try out the grinder on the workbench last night. And it worked really well! The flour was a little coarser than one might get in a bag (I have had to use the metal grinders instead of the stone ones because there is still grit in anything ground by the stones). However, it was still awesome.
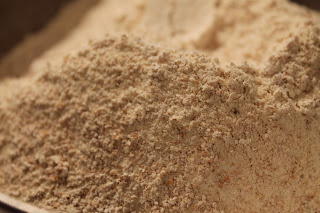
Hand-ground spelt
My father and his friend who was over for dinner said it was the best bread they've ever tasted. I thought it was delicious, but it was a little sweet for me.

First, I'd like to share my research. I decided to make the bread because of txfarmer's amazing bread. I decided that I wanted to make this, but the loaf looked like it was going to be quite small so I doubled it. I didn't want to double the sweetener, though, so I just used 40g of agave. I also stole a few tricks from the breadtopia recipe that she referenced.

Ingredients:
210g Spelt starter (100% hydration)
596g Spelt Flour
400g water
40g agave necter (you can replace this with honey).
14g  salt

Directions:
  •  If you don't have a spelt starter, take a spoonful of your usual starter and feed it with X water and X spelt. Let it ripen until it passes the float test. If you have a spelt starter, skip this step
  • Combine starter, flour, water, salt, and agave in a mixing bowl and mix until completely combined. I mixed a vitamin C tablet in with mine, but I actually don't think this helped the gluten like I thought it would. It didn't seem to negatively impact the flavor.
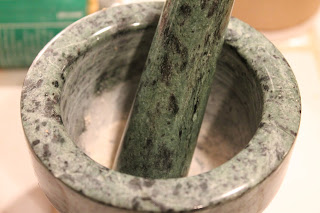
My new mortar and pestle that I used to crush the vitamin C tablet
  • Let the bread autolyse for 20-60 minutes. I let it for 60 minutes because the kitchen was fairly cold.
  • I did a few stretch-and-folds and then let the bread rise for 2h at 80 degrees F, with a stretch-and-fold every half hour.
  • Then I put the bread, covered tightly with plastic wrap, in the refridgerator overnight.
The next morning:
  • I took the bread out and did a preshape.
  • I let the bread bench rest for 45 minutes.
  • Then I did a final shaping and put it in the banneton.
  • I let it do a final proof for 2.5h at 80 degrees.
  • Then I baked it at 440 degrees F convection, under steam for the first 35 minutes and then for another 15 minutes. Unfortunately, this was far too hot, so I had to cover the bread with tin foil and then let it finish until it read at 212 degrees.


Servius and his friend said it was the best bread they've ever had. More information soon.