Showing posts with label Oats. Show all posts

Sunday, June 30, 2013

English Muffins, Reprised: Oat and Barley Varieties

Today it is 103 degrees F. Seriously. Even with fans and a little bit of air conditioning. The last few days have been a hot spell, which has given me more of a chance to experiment with English Muffins.
Barley English Muffin
While English Muffins are traditionally made with recipes that include fat and sweetner, any dough that isn't too wet to hold a clear shape is fine for English Muffins. If you want the English Muffins to have characteristic nooks and crannies, as I've mentioned before, the best way is to make sure that you have a fairly dry dough that yields and open crumb, such as baguette dough.

English Muffins, 2 options
These, as before, are based upon Susan from Wild Yeast Blog's Norwich More Sourdough, but with a modification of the method and the grains. These are wonderful. The barley ones (option 2) especially, although the oat ones are great as well. I think I might try making some with spelt at some point.

Ingredients
Option 1:
Oat English Muffins
  • 480g 100% Hydration whole wheat sourdough starter (red whole wheat)
  • 300g bread flour
  • 475g Red Whole Wheat Flour
  • 180g Oat Flour
  • 650g water
  • 23g Salt

Option 2:
Barley English Muffins
  • 480g 100% Hydration whole wheat sourdough starter (red whole wheat)
  • 300g bread flour
  • 475g White Whole Wheat Flour
  • 180g barley flour
  • 650g water
  • 23g Salt
Method
Day 1:
  • Mix the sourdough starter into 625g of the water and then add the flour.
  • Mix until the dough forms a homogenous ball. You can do this either with a stand mixer or by hand.
  • Cover the dough with plastic ad let it autolyse for half an hour
  • Then add in the salt and the last 25g+ of water
  • Knead until medium development (passes the windowpane test). Should take about 10 minutes by hand or about 3-4 minutes by machine.
  • I found this wasn't sufficient, so I turned it a couple of times by hand and then put it in the refrigerator overnight to let the gluten develop the rest of the way on its own. 
  • It sat in the refrigerator for 12 hours. I turned it 2-3 times in the refrigerator before I went to bed with an 45-60minutes in between each term.
Day 2:
  • Take the dough out of the refrigerator and turn onto a lightly floured surface.
  • Spread it out a little, then cover it and let it sit for 10 minutes.
  • Then roll the dough out to about 1" thick.
  • Sprinkle the dough with flour and spread the four over it gently with your hands
  • Transfer the dough onto a floured cookie sheet, lightly flour the surface of the dough, and cover it with plastic
  • Let it sit for about 2.5 hours at room temperature (around 76 degrees).
  • Heat up a griddle or a cast iron frying pan, lightly oiled with spray oil to about medium-low heat
  • Cut muffins of the desired size. Squares, rectangles, or circles all work. If you don't mind ugly muffins, you can take the excess and push it lightly together. If you let it sit for about 5 minutes, this will make a delicious and perfectly adequate (although not aesthetically pleasing) muffin. Make sure that you dust a little flour on both sides of each muffin. Semolina is traditional, but you can use any flour.
  • When the griddle is hot, place the muffins on it and cover with a metal lid. You do not need to oil the griddle, but you may if you wish.
  • In about 3-9 minutes the muffins should be ready to flip over. They will puff up nicely and they will have a surface on top that is not crusty, but has a skin from the heat. Unfortunately, you have to judge this by your
  • Let them brown on the other side before cooling and eating. You can eat them hot, but they will have more flavor if you let them cool. You may also toast them.
These are delicious and won't heat up your kitchen. Keep in mind, this makes a LOT of English muffins. So, once they are fully cooled, place them in ziplock baggies and freeze them (except for the ones you will eat over the next 2-3 days).


I sent this into Yeast Spotting.

Monday, February 11, 2013

Oatmeal Bread

Two Loaves; Photocredit: Servia
Seriously, more oats? Yes, I just love oats in bread. They are delicious and nutritious. I think my obsession might be because I spent my entire childhood eating cheerios. Anyway, for the moment, anyone reading my blog will be subjected to oats (although I should be doing some other things soon).

I checked Jeffrey Hamelman's Bread out of the library. I've haven't been hearing much good news from Graduate Schools and so I thought it would be a fun distraction. As it turns out, I may even buy a copy of the book because so many of the recipes appeal to me.

One that caught my eye for it's simplicity was the Oatmeal Bread.

Oatmeal Bread (Adapted from Hamelman's Bread)
Ingredients:
  • 680g High-Gluten Flour
  • 227g Whole Wheat Flour
  • 150g Rolled Oats
  • 567g Water, around 75 degrees F (I added another 50g or so because it's very dry here)
  • 100g Milk
  • 68g Honey (3T)
  • 68g Vegitable Oil (5.5T)
  • 20g Salt (3.5tsp)
  • 5g dry active yeast (1.5tsp) I reduced this to 1tsp because I was worried about leaving it too long in the refrigerator because I had class this morning. I think the decision was wise and I highly recommend it.
  • Wheat bran and water for topping (optional)
Directions:

Day 1:
Oats Soaking; Photocredit: Servia
  • Mix the oats and the water. Let it sit for 15-20 minutes.
  • Mix in the remaining ingredients (yeast first, in order to hydrate it). The dough can be mixed by hand or on a mixer at a medium low speed for 3 minutes. The resulting dough is tacky and looser than a typical sandwich bread.
Other Ingredients; Photocredit: Servia
  • Then, knead the dough by hand (using the heals of the hand in the typical kneading style) either in the bowl or on a surface (either oiled or very lightly flowered). By hand, this will take 5-6 minutes to create moderate gluten development (passes the windowpane test). The same effect can be achieved in a mixer for 3-3.5 minutes on medium speed.
Dough, rising; Photocredit: Servia
  • Then let the bread ferment for 1 hour at room temperature (around 72 degrees F) folding once at 30 minutes and once at the hour mark. If you decided to use the full 1.5tsp yeast, you may want to leave it out for 40 min and do a fold at 20 and a fold at 40.
  • Put the bread, covered in plastic wrap or similar, into the refrigerator overnight. Note that if you don't want to take it out first thing in the morning, I would suggest that you use less yeast just so it doesn't overproof.
Day 2:
  • Remove the bread from the refrigerator. Turn the bread out on to a floured work surface and divide into 2-3 pieces (I would suggest 3 pieces if you have regular loaf pans, 2 if you have large loaf pans) I divided it into four, and my loaves are quite small; my mistake.
  • Preshape the dough lightly into rounds.
  • Bench rest the dough seem-side up for 15-20 minutes.
  • During the bench rest, prepare loaf pans. I use spray oil and then coat them lightly with flour. This might be overkill-- oil alone might do the trick.
  • Shape the dough into blunt cylinders and place them seem-side down into the loaf pans.
  • Let them rise for 1-1.5h under plastic wrap or similar at 72-75 degrees F Mine rose for 3h15 at around 68 degrees F, but they only had 1tsp yeast. Make sure you adjust based on your conditions. If you only use 1tsp yeast, increase the time to 150%. If the temperature is cold, remember that for every 17 degrees below temperature, the rising time must double. A calculator is your friend.
  • Optional: When ready to bake, brush the top of the loaves with a tiny bit of water and then sprinkle wheat bran over the top for that finished look.
  • Put them in the over at around 445 degrees F (420 convection) understeam for the first 15 min. Then add about 7-10 minutes at 425 degrees F (400 convection) without steam. Watch them carefully. I overcooked mine by putting them there for 20 min + 10 min without steam. The oil and honey causes them to brown really fast. For steam, you can either try putting the baking pan on a stone with a cover or you can turn another loaf pan upside-down on top of it. They are done when they read 190 degrees F on an instant thermometer.
  • Wait at least 1 hour before cutting.
Photocredit: Servia
Review: 3.5 stars
Slices and Loaf; Photocredit: Servia
The bread is a lot lighter and airier than I anticipated, which is kind of disappointing. I was hoping it would have a little more heft (so it could stand up to something like almond butter). Maybe if I added more whole grains it might be better. However, it's got a lovely slightly oaty flavor and is ideal for a delicate sandwich or butter/jam and a cup of coffee/tea.

*NOTE (02/12/13): While I still think the bread is far too light, I have to say it tastes delicious with almond butter (so my original complaint was totally wrong).

For the similarly oat-obsessed out there, here's a list of other yeasted oat confections I've made:

Saturday, February 9, 2013

A New Kind of "Oat" Bread

I've wanted to make this recipe ever since I received Peter Reinhart's Whole Grain Breads. I finally made it two weeks ago.

Oat Bran Broom Bread

My apologies; I forgot to take a shot of the crumb. However, it was quite a tight crumb...slightly tighter than the other sandwich bread's I've made, but I don't think it was as tight as the picture in Reinhart's book.

Recipe for Oat Bran Broom Bread (modified from original):
Ingredients:
Soaker
  • 184g whole wheat flour (medium to fine grind)
  • 28g Oat Bran (4tbsp)
  • 14g flax seeds (1.5tbsp)
  • 4g salt (1/2 tsp)
  • 198g water
Starter (or starter straight out of the jar if your starter is fairly vital and 75%)
  • 50g starter (100% hydration)
  • 177g whole wheat flour
  • 120g water
Final Dough:
  • All the soaker (429g)
  • All the starter (or 398g starter)
  • 56.5g whole wheat flour
  • 5g salt
  • 1tsp dry active yeast (3g)
  • 20 g water
  • 2 tbsp honey (42.5g)
  • 1 tbsp olive or vegetable oil
Method: 
Day 1: 
  • Mix all of the ingredients for the soaker together in a bowl until they form a reasonably wet dough. Cover it with plastic wrap and let it sit for 12-24 hours. If it will be longer than that, place it in the refrigerator.
  • Mix all of the starter ingredients together and mix them until they form a fairly stiff dough. Knead for a minute or two in the bowl before covering with plastic wrap. Refrigerate for 8-48 hours.
Day 2:
  • About 2 hours before mixing the final dough, take any refrigerated ingredients out of the refrigerator.
  • Chop or tare the soaker and the starter into pieces and dust them with the flour.
  • Hydrate the yeast in a cup or bowl (no need to make it bubble, just mix it with the water). Pour the hydrated yeast, the oil, and the honey over the dough. Mix with wet hands or with a spoon. If you don't like the stickiness, you can also slightly oil your hands. Add water or flour for adjustments-- due to the different protein content of whole wheat flours, you may need to adjust. The dough should be soft and slightly (but not very) sticky.
  • Knead the dough for about two minutes in the bowl.
  • Lightly flour your hands and a work surface with whole wheat flour. Coat the dough in flour and knead by hand for 3-4 minutes. Try to incorporates little flour. I found this step very frustrating. My hands got sticky and the dough didn't cooperate well, so I changed the next few steps from the book.
  • Put the dough in a clean bowl and do a stretch-and-fold. Do the stretch and folds with wet hands.
  • Wait 5 minutes and then do another stretch-and-fold.
  • Wait 10 minutes and do another stretch-and-fold.
  • Wait 10 minutes and do a final stretch-and-fold. By this point, the gluten should be adequately developed.
  • Let the dough rise under plastic wrap for about 2 hours at 75 degrees F.
  • After the 2 hours, turn the dough onto a floured surface.
  • Gently stretch it out into a rectangle and roll it up; then seal the seem.
  • Place it seem-side down into a loaf pan (I tend to spray my loaf pans with oil and then lightly flour them so the dough doesn't stick, but this might be overkill).
  • Let the dough rise for another 2 hours in the loaf pan.
  • 30 minutes before you're ready to bake, preheat the oven to 425 degrees F. If you would like to bake under steam, prepare whatever you will use for steam (this is not really necessary, but I baked it under steam).
  • When ready to bake, turn the oven down to 350 degrees F and place it in the oven for 20 minutes. At the 20 minute mark, take off the steam (if you chose to use it), and rotate the pan 180 degrees. Then bake for another 20 minutes (so 40 minutes altogether).
  • Check the loaf to make sure it's at least 190 degrees F.
  • Transfer the bread to a cooling rack and cool for at least 1 hours before slicing and serving.

Review of Oat Bran Broom Bread: 3 Stars
One of the things that really bothers me about this book is that Reinhart puts absolutely absurd amounts of yeast in everything. It's really unnecessary and it doesn't give the dough the time to develop that wonderful flavor. With bread, quick and delicious very rarely coincide (except maybe with sourdough crumpets). So I slowed this bread down. But even then, it didn't have the flavor I wanted. I need to play with the recipe.

Furthermore, the bread doesn't taste anything like oats. The oat bran in it is minimal. I've decided I will rewrite the recipe and try again.

Monday, February 4, 2013

The Confession: More on Oat Bread

Oat Bread; Photocredit: Servia

So I have a confession to make. I think I switched the dough of the English Muffins and my traditional oat bread. This would explain the fact that the English Muffins didn't taste sweet at all while the bread is sweet and delicious. But it's not sweet in the way that bread sweetened with honey or sugar tastes...it's like the sweetness of barley. Because, well, it is. Non-diastatic malt powder is made out of roasted barley. It's the sweetener that is used in bagels, but this bread is far better than any bagel I've ever had. It tastes like a barley oat bread and it's lovely and moist on the inside (from the oil). This would probably make far better English muffins even then the ones I made with the unaltered dough.
The bread was not nearly as burnt as it looks in this picture-- that was the lighting; Photocredit: Servia
The dough is delicious. I will include a version the recipe because it is so good, you should make it into bread as well as English Muffins. Seriously, you'll love this bread.
Baking in my new combo cooker; Photocredit: Servia
Sulpicia's Sourdough Oat English Muffins (in testing)
Ingredients:

Preferment:
  • 100g starter (very active) 100% hydration white or whole wheat based upon preference
  • 100g whole wheat flour
  • 50g water

Final Dough:
  • All the preferment (250g)
  • 450g bread flour
  • 150g whole wheat flour
  • 130g rolled oats (thickly rolled is better)
  • 470g cold water
  • 17g salt
  • 1.5 tablespoon  non-diastatic malt powder
  • approximately 15g vegetable oil

Day 1:
  • Prepare the pre-ferment by dissolving the starter in water and then mixing in the flour. When it is fully mixed, cover the container and put it in the refrigerator.
  • Let it sit in the refrigerator for 18-24 hours. It should have almost doubled in bulk and it should pass the float test.

Day 2:
  • When the starter is ready to be used, leave it in the refrigerator for one extra hour.
  • Mix together the bread flour, whole wheat flour, rolled oats, non-diastatic, and water together in a bowl into a dough.
  • Let it sit for 1 hour.
  • Then mix in the starter, salt, and oil by hand.
  • Knead by hand for 3-4 minutes.
  • Wait 15 minutes. Then do 1-2 stretch-and-folds.
  • Wait 15 minutes. Then do 2-3 stretch-and-folds.
  • Wait 15 minutes. Then do 1-2 stretch-and-folds.
  • Wait 30 minutes. Then do 1-2 stretch-and-folds. Then put the bowl, covered with plastic wrap, into the refrigerator for 15-18 hours.

Day 3:
  • 1 hour before handling (3.5 hours before baking), take the dough out of the refrigerator.
  • Divide the dough into two pieces and shape each into a boule or batard. Place them into floured bannetons or a bowl lined with a floured linen.
  • Dust with flour and cover with plastic for 2.5 hours (at about 75 degrees F).
  • At the two hour mark, heat the oven to 460 degrees F (435 degrees F convection).
  • At 2.5 hours, scored the dough and put the dough into a combo cooker or onto a baking stone.
  • Bake under steam for 35 minutes. When done, it should be a light golden color with darker brown along the scoring mark.
  • Then, turn the over down to 440 degrees F (415 degrees F convection) and bake for 15 minutes or until it registers an internal temperature of 210 degrees F. Remove the bread from the oven.
  • Let it cool at least 1 hour before slicing and eating.

Saturday, January 26, 2013

The Wonders of Oat Bread

Oat Bread
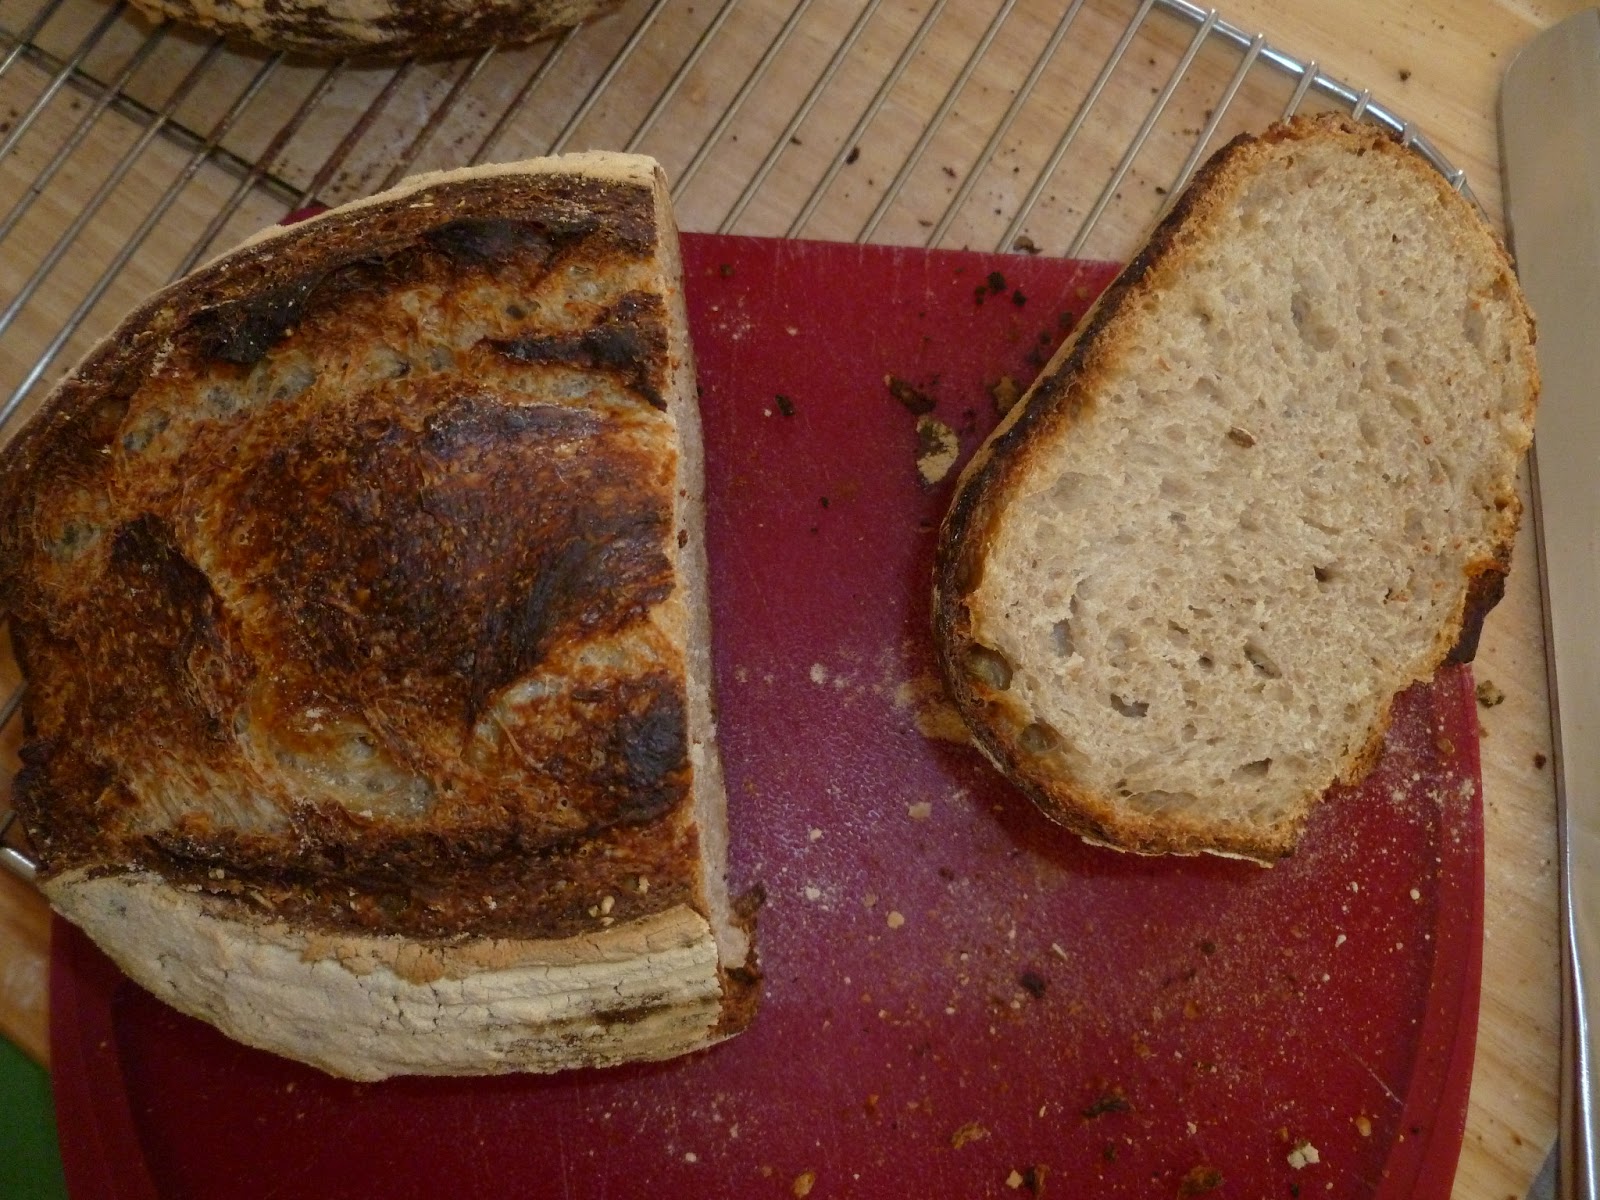
I made Cordata's amazing oat bread twice over winter break. I cannot reiterate enough how much I love this bread. It has an amazing depth of flavor, it takes very little work, it's beautiful, and it's simply delicious. I usually substitute whole wheat starter for both the white an the rye starter.
Two Loaves Again
Crumb
Usually, when I make this bread, I make it in the Kitchen Aid and I add extra water so the kitchen aid can manage to knead the bread (if it's too stiff, the it simple sits on the kitchen aid turns around-and-around).  However, the recipe says not to add more water and to mix it by hand. However, I was suspicious that this might not work. However, while the crumb was a tiny bit smaller, the bread turned out quite well. However, I shaped it slightly oddly so it looked kind of funny. See below.
This loaf didn't shape correctly, but it bloomed beautifully

The crumb was pretty open for such a stiff dough

If you haven't tried this bread, try it now. It's really quite amazing. Oats have a ton of flavor potential.

Thursday, June 2, 2011

The Bread Sings Again: Tartine Style


One of the indications of bread perfection is "the song of the bread" or the bread crust crackling as it hits the cold air coming out of the oven. I have only achieved this once, when my Pain de Campagne was slightly over-proofed during the first fermentation. Once again, somehow, I slightly over-proofed a loaf of Tartine Country Bread during the initial rising period. The bread sang. It was wonderful. It was light and fluffy and tasted amazing. It did not have the irregular crumb that usually characterizes Tartine loaves (as the bulk fermentation was too long), but it's pretty good.
Crust
Crumb
I also made a version of what I have begun to call my "breakfast bread" which is the 70% Whole Wheat Tartine bread with flax seeds and steel-cut oats.
Over-proofed dough.
I hope the whole wheat one is decent.

Saturday, May 21, 2011

Whole Wheat Bread with Oats and Flax Seeds

Wheat Bread with Steel-Cut Oats and Flax Seeds
Let me just say that this bread is fantastic! There is the lovely wheat flavor of the 70% Whole Wheat Tartine Bread and the added flavor of flax seeds and steel but oats. Even my father (who is not the same devotee of whole wheat bread that I am) said that there was "that special something" that added something fantastic to the flavor. I agree. It's fantastic.
Crust
Nice Ear
 Next time, I would add a little more water to ensure the crumb was more open.
Crumb-- not quite as open as I wanted.
 Ingredients

  • 100g Leaven (see instructions)
  • 400g +25g water (75 degrees F)
  • 150g unbleached all-purpose flour
  • 350g whole wheat flour
  • 10g salt
  • 1/6 cup flax seeds
  • 1/6 cup steel cut oats
The Leaven ("young" starter)

  1. Take 1 tablespoon of mature starter and put it in a small bowl.
  2. Add 50g water (about 75degrees F) to the starter.
  3. Then add 50g whole wheat flour and mix them into the water and starter until it comes together as a dough.
  4. Cover the bowl with plastic wrap or similar and let sit until it passes the float test. This should take about 12 hours. When it is ready, it should smell very sweet-- like overripe fruit.
  5. There will probably be 10-20 grams left over.
The Final Dough

  1. Mix 100g of starter (this should be all of it) with the 350g water.
  2. Then add the 500g of flour and mix until the dough comes together.
  3. Cover the dough with plastic wrap or equivalent and let rest (autolyse) for 45-50 minutes.
  4. After the autolyse, add the salt and the last 25g of water in a little bit at a time, using the water to help the salt dissolve and incorporate into the dough. Make sure that you pinch the dough around the salt and incorporate it throughout the dough.
  5. Move the dough into a heavy glass or plastic bowl, preferably a deep on with a fairly small diameter on the opening in order to keep the heat in.
  6. Toast some flax seeds and let them cool.
Directions
  1. Stretch the dough and bring it in toward the center like this. Be careful not to degas the dough too much. Do this all the way around the dough to make sure that you develop the dough evenly.
  2. Place the dough in a place between 78 and 82 degrees F. You can improvise a proofbox by placing a pot of boiling water in an unheated oven beside the dough.
  3. After 30 minutes, stretch and fold the toasted flax seeds into the dough. Incorporate them a few into each fold.
  4. Repeat the stretch and fold this procedure every 30 minutes for 3-4 hours. As the dough rises, be more careful not to degas the dough. The dough should become very billowy on top.
  5. When the bulk rise is complete, turn the dough out onto a floured surface.
  6. Fold the dough in half so that the outer surface is lightly floured (although you want to incorporate as little flour as possible into the dough).
  7. Fold the dough like an envelope. Fold the bottom up 1/3 over the dough. Then fold the left side in 1/3 and the right side over it. Fold the top all the way over the bottom  and pinch it slightly into the bottom.
  8. Turn the dough seam side down and let it sit under an overturned bowl for 20 minutes.
  9. After the 20 minute bench rest, do the final shaping. I usually shape my dough into a boule. To do this, follow the same pattern as the pre-shape, and then gather the corners together to tighten the surface tension and pinch them together.
  10. Put the boule seam side up in a floured branneton or a bowl lined with a floured cloth.
  11. Let the dough sit for half an hour and then put it in the refrigerator for 10-16 hours.
  12. To bake the dough, 30 minutes before baking take the dough out of the refrigerator and preheat the oven with either a stone and a oven-safe pot or a combo cooker.
  13. When the oven is heated, turn the dough onto a peel and score it. Put it onot the stone or into the combo cooker and put the broth pot or lit over it.
  14. Bake for 20 minute sand then remove the lid. Bake for another 20-25 minutes until the outside is an amber color and the interior temperature reads 212 degrees F.
  15. Wait at least 30 minutes before cutting.
Enjoy!

My second loaf was a traditional Country Tartine Loaf. I don't know what happened. It turned out a bit misshapen.
Funny, Mishapen Loaf
Nice Ear

I think I will Yeast Spot this.