Showing posts with label cooking. Show all posts

Tuesday, May 13, 2014

Homemade Vegitable Stock

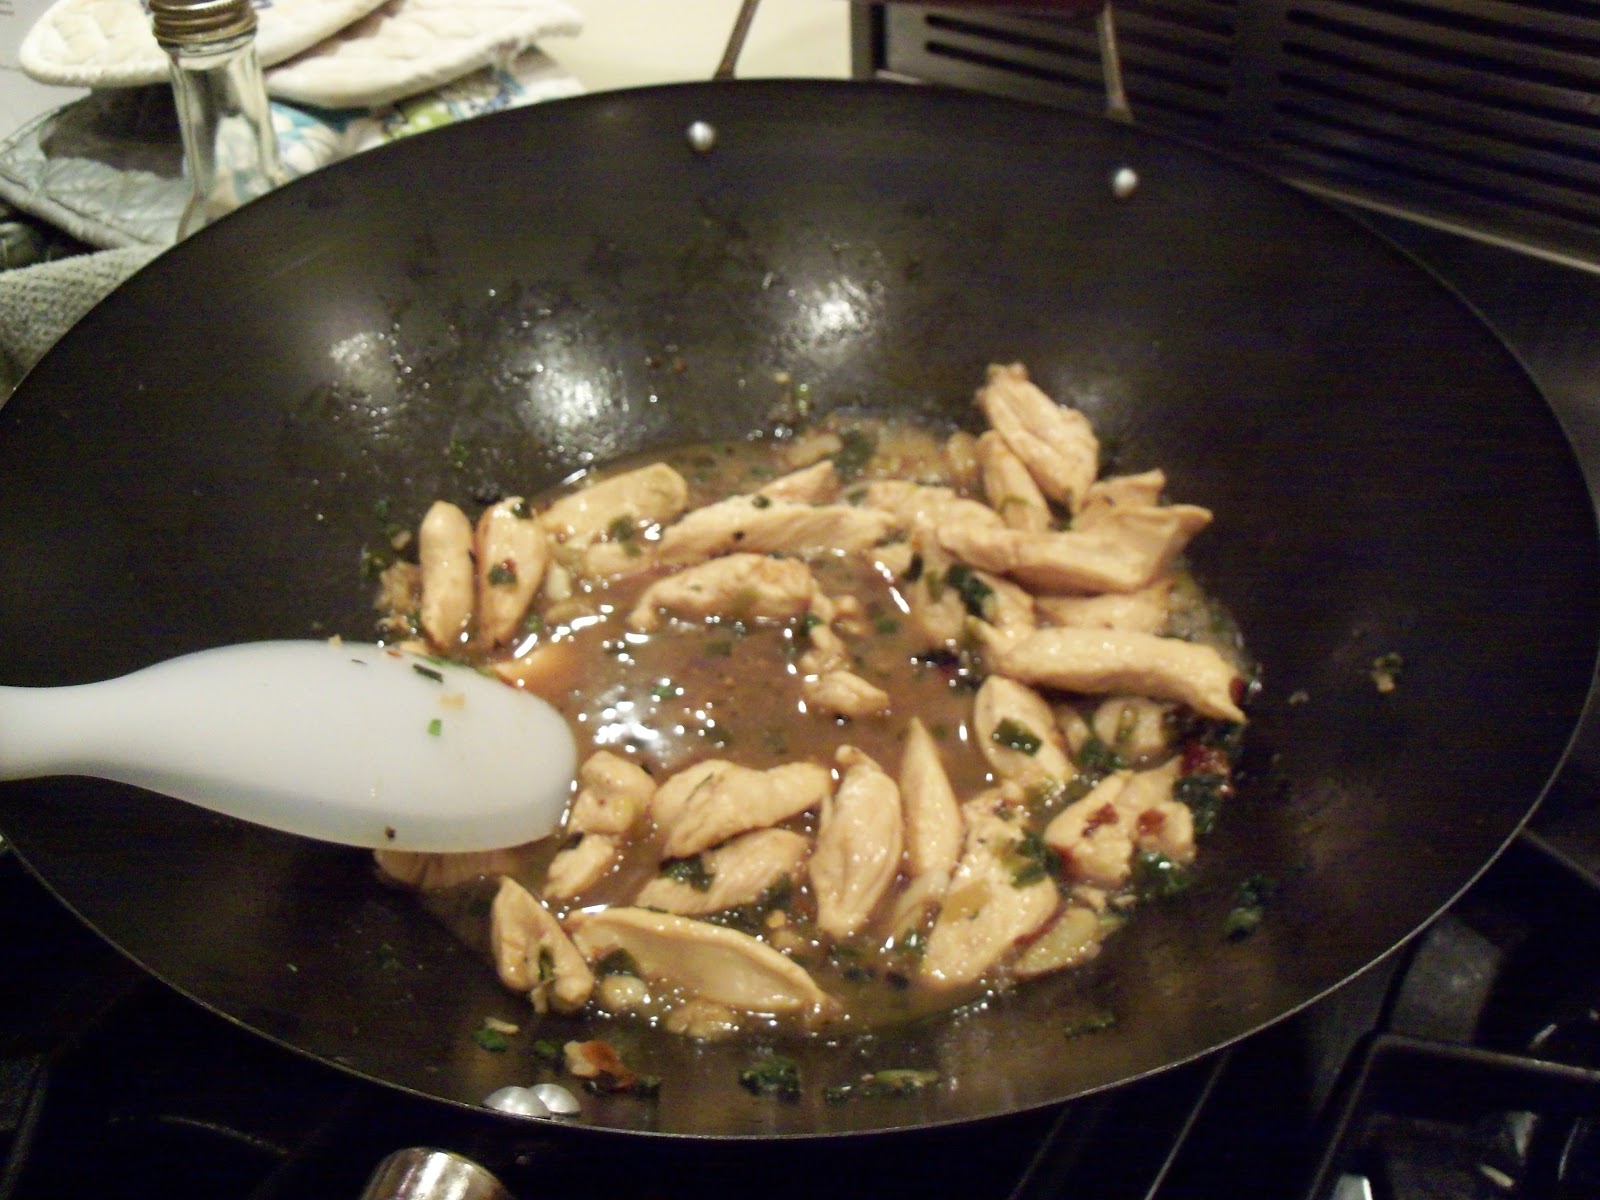
Vegetable Refuse (top left), Vegetable Stock (bottom left), Chicken Marsala (right)
You can see that I took this picture myself (without help from the wonderful Servia who has a much better eye and camera than I do).

This post could also be entitled Graduate School Soup or How Not To Waste Your Vegetables.

Not wasting food is something that is generally important to me. But I'm just one person and there are a lot of things that I have to buy in greater bulk than I can eat it (especially because, one of the nice things about graduate school, is that most events have lots of food). So, how does one solve this problem? I find that vegetables are especially tricky because they go bad so fast.

I found my inspiration for making this vegetable broth from Oh My Veggie and Poor Girl Eats Well.

Freezer Bag Vegetable Stock
  • In the weeks before you make the soup, keep a large plastic ziplock in your freezer. When you have vegetable scraps put them in there.  
  • Please note: you want your vegetables scraps to be edible (i.e. not rotting and washed), and to not include things in the cabbage family which will make your broth very bitter.  You can put in things like herbs, but they will change the flavor of your broth, so keep that in mind. I suggest things like green onion ends, carrots that have dried out, etc.
  • You want to make your stock when  you have about 12 cups of vegetables in the freezer.
  • On the day you make your soup, put two tablespoons of olive oil into a broth pot and heat on medium heat.
  • Chop about half a sweet onion, and sautee it in the bottom of the broth pot.
  • When the onion is aromatic and soft, add the 12 cups of vegetables and 12 cups of water.
  • I then simmered the broth for about 3 hours until it became medium brown and stock-like.
  • If you want to make broth, you can season your stock now with salt, pepper, and whatever other herbs you like. However, you don't need to season it if you want stock.
  • When the stock is done, strain it into a bowl. 
  • Ta da! You have your very own stock.
I made a wonderful mushroom risotto with my stock. According to Egnatius, it was the best risotto I've ever made (although part of that may have been that we were gifted some wonderful shitake mushrooms). We ate it so fast that I didn't even take a picture.

Wednesday, February 13, 2013

Amazing French Toast

So remember when I gave Oatmeal Bread 3.5 stars? Well, that may be true but it makes 5 star French toast.
Commercial Bread (right), Oatmeal Brad (left)
These days, my family buys little to no bread. I make almost all of what we consume. However, with grad apps and school, we bought a loaf of multigrain bread a while ago. It was a little old, so we decided to make French Toast for dinner. We did a side-by-side comparison: my bread vs. the store bought bread. While the store-bought bread made good French Toast, there was no contest-- my bread was head-and-shoulders above the commercial bread.

This brought up some of the issues that Andrew Whitely discusses in his lecture on bread. The commercial bread I used was about 2 weeks old and it was still fairly squishy...that is frightening, he's right. My bread, while it took a little bit of time to make, made better and more wholesome French Toast. While I realize not everyone can make their own bread, Whitley brings up some pressing issues about the current state of commercial baking.
Enjoy!

Sunday, August 28, 2011

Mushroom Ristotto, Take Two

Mushroom Risotto with Parsley and Roasted Pecans
I am trying to perfect my mushroom risotto. My mother and I love the mushroom risotto at one of our favorite local restaurants and we have been trying to copy it since. I made another attempt last night. It was fabulous, although a little different from my last attempt. Warning, this recipe makes enough for about 6-8 people (or four people and 3 leftover meals). You can cut it in half to make a smaller amount. Here's the recipe:


Ingredients:
  • 2 tablespoon olive oil
  • 2 garlic cloves, minced
  • 2 cups mushrooms, chopped, minced, or sliced (personal preference). A mix of mushrooms is usually best. We used a combination of porcini, oyster, and crimini. Make sure that at least half of your mushrooms are very flavorful.
  • 1/3 cups shallots, minced
  • 1 3/4 cups arborio rice
  • 2/3 cup white wine
  • 5-6 cups stock (your choice, I used a vegetable with a mushroom base, but you can also use any other vegetable or chicken or a mix)
  • white pepper and salt, to taste
  • 3/4 tablespoon whipped butter (you can omit this if desired and add slightly more cheese)
  • 1/4 cup Parmesan cheese (although you can add more or less based on how creamy you want it)
  • 2 tablespoons chopped parsley (optional)
  • 2 tablespoons chopped roasted nuts
Directions
  • Heat one tablespoon of olive oil in a large skillet over medium heat and add the mushrooms
  • When the mushrooms are beginning to brown, add the second tablespoon of olive oil and the shallots and garlic.
  • When the shallots are soft, add the arborio rice to the pan and mix the rice into the mushrooms. Cook until the rice is becoming translucent. In a separate pot or in the microwave, warm the broth. If the rice begins to brown, start adding liquid immediately.
  • When the rice is translucent (or has begun to brown) add the white wine.
  • When the rice has soaked up the white wine, begin to add the warmed broth 1/2 a cup at a time. Season with white pepper and salt every second addition of broth. Wait until the first half cup has soaked up the previous half cup.
  • By the time the rice is done, it should be soft and have soaked up at least 5 cups of broth.
  • Then, add the little bit of butter and stir it in. This should make the rice creamier.
  • Once this is stirred in, add the Parmesan cheese. Stir in.
  • Serve the rice hot and sprinkle the
I really enjoyed it.

On another note, I wanted to make some bread recently, but it's about 109 degrees here, so most of my cooking has to be done on the stovetop so it does not heat up the house too much.

Friday, July 29, 2011

My First Gai Pad Gra Prau

My First Attempt
Servia finally found some Holy Basil as I mentioned yesterday. I took a bunch of recipes off line but I made my own combination based on my memory of my favorite Thai restaurant in the city of my Alma Mater. This was my favorite dish. My version of it was way way too salty because the fish sauce we got was insanely salty. I really needed oyster sauce but I couldn't find any at the store where I got the chicken and the peppers. Here is a version of my recipe (serves 4-5 people):

Ingredients
  • 1 lb of chicken breast, cut into bit-sized pieces
  • 2 tablespoons sesame oil
  • 6 sections of garlic, minced
  • 1 shallot, sliced thinly
  • 5 dried jalapenos with seeds, minced
  • 3/4 cup crimini mushrooms, sliced medium-thin
  • 2 red chili peppers (small), sliced into thin strips
  • 1/2 a green bell pepper in thin slices
  • 1/2 a red bell pepper in thin slices
  • 1/4 cup holy basil leaves, fresh
  • 1/2 teaspoon sugar
  • 1/4 cup soy sauce
  • 1/4 cup fish sauce-- this was a complete disaster because of the salt. My suggestion would be 1/4 cup rice wine instead
  • 1 tablespoon fish sauce
  • 1 1/2 tablespoons cooking sherry (optional)
  • 1/4 lime's worth of juice
Directions
  • Do all preparations.
  • Heat 1 tablespoon of sesame oil in a wok
  • Add in the dried jalapinos, garlic, and shallots and cook for 1 minute.
  • Add in the mushrooms and cook for one minute.
  • Add in the peppers and cook for two minutes.
  • Make a whole in the vegetables in the center of the wok. Pour in the sesame oil and then stir in the chicken and the holy basil. Cook the chicken until it is white on all sides but not brown.
  • While the chicken is cooking, mix the sauce together
  • Pour the sauce into the wok and cook for 3-5 minutes (until chicken is cooked through).
  • Serve over jasmine rice.
Anyway, I will continue to experiment. It is my favorite dish and I will make it work eventually.

Saturday, May 28, 2011

General Thoughts...

I'm taking my math final on Tuesday and I just finished up my latest SAT prep class so I will not resume posting in depth for a few days. I am spending my time writing a study guide for the class.

I took the leftover pancake batter from the other day and made apple and cheese crepes for dinner and dark chocolate crepes for dessert. They were great, except I think that next time I will simply used the sourdough for crepes instead of adding the baking soda. Also, I noticed that the slight sour flavor of the crepes requires something with a strong flavor inside-- e.g. the crepes with sharp cheddar and apples were better than those with brie and apples. I forgot to take a photo, but this was the first time I ever made crepes (Servia makes great ones) so they were perhaps not as photogenic as another attempt might be.

Wednesday, March 9, 2011

How to Avoid Bread Weight Gain (Kind of)

I have been making a lot of bread recently. This means, of course, tasting a lot of bread. So how do I avoid gaining massive amounts of weight from all the bread (especially because a recent New York Times article [1] points to carbohydrates rather than fat as the primary culprit in weight gain)? Well, I make croutons. Croutons last a lot longer that bread and make it less appealing to eat on its own [2] and more appealing to eat in a salad. Around my house, we eat a lot of salad so the croutons will definitely get eaten. Finally, croutons make less-appealing bread (either because it's slightly too dense or not flavorful enough) appealing in another context.

When I was baking bread at my Alma Mater, I used to make croutons out of my loaves to send to my parents. This was a way that I could share my fabulous bread with them so that it was still edible by the time they got it. I would send little zip-lock bags of croutons in packages for them to taste.

My Crouton Recipe

  • Stale bread, cut into approximately 1" cubes [3]
  • 1/2 cup olive oil [4]
  • 2 tablespoons dried rosemary
  • 4 cloves fresh garlic, minced or pressed in a garlic press
  • 1/4 teaspoon dried oregano
  • 1/8 teaspoon white pepper
  • 1/8 teaspoon salt (to enhance flavor)
Left-over mixture

Directions
  1. Mix all of the ingredients together.
  2. Put the bread pieces in a large oven-safe pan so that they are 1-2 bread pieces thick, but no more.
  3. Pour the mixture over the breadcrumbs, stirring so that they become evenly coated
  4. Bake at 400 degrees F for 10 minutes (or until golden-brown), stirring every two minutes.
  5. Cool on a cooling rack over paper towels to absorb excess oil.
  6. When cool, serve in a salad.

Note: I think the most creative use of breadcrumbs I have ever seen comes from Wild Yeast.

Endnotes
  1. I searched for the article but I can't seem to find it. I will look again.
  2. Servia is the only person I know who actually snacks on croutons.
  3. If the bread is not stale, cut it and leave it in an open bowl on the counter or stale it at a low temperature in the oven.
  4. If you do not have enough bread crumbs for this much oil, you can save the rest of the mixture in the refrigerator for later.

Friday, March 4, 2011

Mushroom and Pinenut Risotto, A First Attempt

Tonight's Dinner
My mother recently had dental surgery and she cannot eat chewy or crunchy food. One of the foods that she liked that she can eat is risotto. I have never had much risotto but I thought I should give it a try. It actually turned out quite well. I used a modified version of the Diamond Pinenut recipe. It is half of a recipe that serves four, but the half recipe should serve three (this is very filling).

Ingredients
  • 1/4 cup pine nuts
  • 2 tablespoons olive oil
  • 1/4 lb fresh mushrooms, any kind, chopped thickly or sliced
  • 1/4 dry white wine
  • 3.5 cups chicken or vegitable stock
  • 1/2 teaspoon dried time
  • 1/4 cup finely chopped onion
  • 2 garlic cloves, chopped
  • 3/4 cup arborio rice (dry)
  • 1 tablespoons whipped butter (unsalted)
  • 1.5 tablespoons Parmesan cheese.
  • Salt to taste
  • Freshly ground white pepper to taste.
Directions
  1. Preheat an oven or toaster oven to 325 degrees F. Place pine nuts in a small pan and bake, shaking or stirring, until golden but not brown.
  2. In a large high-sided skillet, heat 1 tablespoon olive oil over medium heat. When warm, add the fresh mushroom and cook until the mushrooms are slightly brown.
  3. Add in 1 tablespoon more olive oil and the thyme, shallots, and garlic.
  4. Meanwhile, heat the stock on low in a medium saucepan.
  5. When the onions are soft but not brown, add the rice into the skillet. Cook, stirring, until the rice becomes translucent and coated with oil.
  6. Pour the white wine into the rice. Cook, stirring, until absorbed.
  7. Add the chicken stock, one half cup at a time, until absorbed. Season after every second addition of stock.
  8. Once all of the stock is absorbed, stir in the butter. The mixture should become very creamy.
  9. Add in the Parmesan cheese and the pine nuts. Stir until thoroughly incorporated.
Brown the mushrooms.

Add shallots, thyme, and garlic.

Add in the stock.

Add more stock.
Final product.
The risotto was lovely, creamy, and filling, but it did not have quite enough seasoning.

Monday, February 14, 2011

Updates and Valentines Day Fun

There is a chocolate cake post, a discussion of garlic, and a "Wine Snob" post in the works. I have been busier than usual recently with my new math class and various other obligations so I have not been positing as diligently as usual.

Tomorrow (or I guess later today) is Valentine's Day. Sadly, Cerinthus and I will be spending the first Valentine's Day apart in three years. Since I am at home, I get to witness the modern marvel: Servius cooking. My father does not cook. He burns toast and he once made me "scrambled eggs" that looked like they had been put through a  cheese grater. However, on Valentine's Day a few years ago he actually cooked Chicken Marsala for my mother...and she said it was good! He is going to cook the same dish again this year and I get to witness this highly unusual phenomenon. I love Chicken Marsala, so I am pretty excited.

Monday, February 7, 2011

Kindle Updates and Cooking Updates

There is an exciting new update for the Kindle. There are going to be real page numbers which will correspond to page numbers in the print editions. This is what everyone complained about trying to use kindle books in classes. CNET news posted the story. I believe that this update will be for all kindles (although the article is a little vague on this matter), but apparently the rest of the updates will only before the Kindle Wireless and the Kindle 3G (i.e. not my beloved DX).

Kindle 3G Wireless Reading Device, Free 3G + Wi-Fi, 3G Works Globally, Graphite, 6" Display with New E Ink Pearl Technology
Servia and I made Three Teacup Chicken again tonight and I added pictures to my previous blogpost. It was wonderful. I highly recommend it. We made a few changes to the recipe. We made a 1/2 recipe (for the two of us) but used double the amount of garlic and ginger (i.e. the same amount one would use to make a whole recipe) and 4 instead of 3 shallots.

Saturday, February 5, 2011

Three Teacup Chicken

I finally got with the times a few days ago and made myself an iGoogle account so I could see RSS feeds (not from blogger) in a convenient location. When I made the page, it asked me what my interests were, and I indicated various things, including cooking. Now, on my iGoogle page it provides two recipes each day for my viewing pleasure. This is excellent!

Excited about the recipes and unable to obtain the necessary Holy Basil for my Gai Pad Gra Pow, I decided to try out a dish that showed up on my iGoogle called Three Teacup Chicken. The only modifications to the recipe were forgoing the option anise and adding the optional dried red chili. I got out my barely-used wok that Cerinthus found someone giving away at the end of the last school year and set to work (with lots of help from Servia).
The chicken and "broth" in the wok
Brown jasmine rice.
The chicken and broth poured over the rice.

It was wonderful! We served the dish with jasmine brown rice and were both delighted with the result. I recommend it highly for anyone who likes Asian food: delightful, mildly spicy, and light but filling. Enjoy!

Thursday, February 3, 2011

(Gai) Pad Gra Prau/Prao/Pow

I love a Thai dish called Pad Gra Prau at the Thai restaurant up the street from my Alma Mater. However, i have not been able to find it at any of the other Thai places that I have visited. The reason is that it seems to be called (Gai) Pad Gra Pow, apparently pronounced "Pot kapow" (according to this website) which is usually rendered something like "chicken basil" on American menus. I wanted to make some for myself. Apparently, the key ingredient is something called Holy Basil, which is a spicy basil that flavors the dish. Is there another name for this plant? Grocery stores seem to regard the term with a lack of understanding and I cannot seem to find holy basil anywhere. I may just have to grow my own...

Sunday, January 16, 2011

Champagne Sauce

I was at a lovely little Argintinian place the other night called Malbec. The dinner was lovely-- I went out with one of my best friends and her parents. On the specials menu was a pasta with grilled shrimp and pasta dish in a champagne cream sauce. It sounded too wonderful to resist-- and it was.

While I was napping this afternoon, my mother decided that she would recreate the dish for dinner. Not remembering the details well, she made a Champagne Chicken. It was lovely.

Ingredients
  • 4 4-oz pieces of boneless, skinless chicken breast
  • 1/3 cup flour
  • 1 teaspoon salt (plus to taste)
  • 5 sections garlic, pealed and smashed
  • 1 tablespoon dried rosemary
  • 1/2 teaspoon white pepper (plus to taste)
  • 3 teaspoons olive oil
  • 1 cup champagne
  • 1 cup heavy whipping cream
  • 1/2 cup sliced crimini mushrooms
Directions
  1. Pound chicken to 1/4 inch thick, drag through a mixture of flour, salt, and pepper
  2. In a large skillet, put the olive oil and garlic over medium heat. Heat until it will sear the chicken.
  3. Add the rosemary and the chicken. Saute 5 minutes each side until almost cooked through.
  4. Take the chicken out on a separate plate.
  5. Add the mushrooms. Saute until they begin to brown
  6. Add the champagne. Saute for 2 minutes.
  7. Add the chicken back in. Cook for 10 minutes.
  8. Add the cream and cook until thickened.
  9. Remove chicken to a serving plate, and pour the sauce over it.
It was lovely, although we are still perfecting the idea. enjoy!

Sunday, December 26, 2010

Christmas Traditions of the Servii, Part 3

Happy Boxing Day! Boxing Day is a British tradition (I think from the middle ages) during which Lords would box up their old stuff that they were going to get rid of and give it to their serfs. Our Boxing Day traditions are slightly different, and most of them come from festivities from the previous day.

The Servii throw a large Christmas Day dinner for friends and family who are in town. The preparation (and cooking) begins directly after presents are opened. It is quite a feat to get it all together (especially because of some eccentric food preferences and allergies), but we all pitch in and make it work. This year we got a little behind because of all the baking, but the party was fabulous and all of the food turned out magnificently.

Turkey Soup and Turkey Quesadillas
I never used to like Turkey. As a kid I hated holiday meals because they involved turkey and green beans, neither dish of which I was particularly fond. In my sophomore year in college, a friend of mine hosted a Thanksgiving Dinner (during which, I think, I was very little help). I had one bite of her Turkey and thought "this is what turkey should taste like." I was hooked. As it turned out, she had used an old family recipe to brine the turkey, which ensured that it came out juicy and tender. So, for that Christmas, I took the recipe and did my own. Every year since, we have made the same the same turkey. I will post the brining recipe in a subsequent post.

One really exciting thing about this year's turkey is that I carved it myself-- or at least I carved half of it myself. I wanted to apply the principles in the video I watched after Thanksgiving (see my blogpost) to carving the Turkey. It was not quite as easy as it looked in the video so I thought I was doing it wrong, at first, and I called on the person who had carved the turkey at Thanksgiving Dinner. He came to my rescue by teaching me how to break the bones so I could separate the wings from the turkey, and beautifully sliced the meat from the bones and cut up the breasts as I carved gigantic chunks out of the turkey (as shown in the video). Amazingly, we got much more meat off the turkey than usual and it seems like an enormous amount of the 15lb pound turkey was left after 13 people had eaten it (three of the guests were vegetarians). Everyone said they loved the turkey, and I certainly love it and will enjoy using the leftovers in quesadillas, sandwiches, and enchiladas.

For now, the turkey carcass is in our big soup-pot, being made into broth with some left over vegetables (mostly carrots and celery).
A bowl of our soup. Yum!

The rest of the left-over turkey will be made into quesadillas. We make them very simply:


Ingredients
  • Cheese mixture, shredded, approximately 0.8-1oz, depending upon the size of the tortilla (we usually combine some left-over sharp cheddar from the appetizer at Christmas Dinner with some jalapeno or habanero jack cheese)
  • Green onions, minced
  • Turkey breast meat, sliced about 1/8 of an inch thick or so (we use the left-over brined turkey)
Directions
  1. Very lightly oil a pan with grape-seed or vegetable oil and heat the pan to medium.
  2. Warm the tortilla for about 30 seconds on each side
  3. Sprinkle the cheese over.
  4. Sprinklethe green onions over the cheese.
  5. When the cheese begins to melt, put the turkey on top.
  6. Fold the tortilla in half with a spatula.
  7. When the outside of the tortilla begins to crisp, flip it over to the other side.
  8. When the whole tortilla is slightly crisp, cut and serve.

The Clean-up
The cleaning process is usually a fairly high-spirited affair, although dinner did not finish until 11:45pm this year (well...dessert and conversation did not finish until then), so we were all pretty tired. However, as usual, we made cups of  tea and talked over the evening by the fire before the actual cleaning process. This is a tradition that I really enjoy because we get to exchange anecdotes from the evening and relax in the warm glow.

Happy Boxing Day!

Friday, December 24, 2010

The Disaster that Wasn't: Almond and Chocolate Ganache Thumbprints

I remember as a kid going to the grocery store and begging for a "thumbprint" cookie. These cookies were shortbread thumbprints with chocolate ganache, and they were amazing. However, no piece of shortbread was ever quite like those from the thumbprints.

Recently I discovered in Joy of Cooking Christmas Cookies that they have a thumbprint recipe and the secret is: it's almond shortbread. The recipe in Joy of Cooking Christmas Cookies is a lowfat version (supposedly), but it still tastes great!

There is one problem with the Joy of Cooking Christmas Cookies recipe: it does not hold its shape. Although they looked good when they went into the oven...

Make them into balls and then make a deep knuckle-print in them.
They don't come out looking right unless, about 6 minutes in, you re-print them with a small spoon. When I noticed, I totally freaked out, but they turned out fine.

Baking complete. Now for Ganache!
Ingredients
  • 1 1/2 cups (7.5 oz) all purpose flour
  • 1/3 cup (1.5 oz) cornstarch
  • 3/4 teaspoon baking powder
  • 1/4 teaspoon baking soda
  • 1/4 teaspoon salt
  • 3 1.2 tablespoons (1.75 oz) unsalted butter, softened
  • 3 tablespoons canola oil
  • 1 tablespoon light corn syrop
  • 1/2 cup (3.5 oz) sugar
  • 1 large egg
  • 2 1/2 teaspoons vanilla
  • 3/4 teaspoon almond extract
Directions
  1. Preheat the oven to 375 degrees Fahrenheit.
  2. Stir together flour, cornstarch, baking powder, baking soda, and salt with a fork or wire whisk
  3. Beat together with a fork (or an electric mixer) butter, canola oil, corn syrup, sugar, egg, vanilla extract, and almond extract.
  4. Combine wet and try indgredients and beat until smooth.
  5. Slightly oil hands and pull of chestnut-sized bits of dough and roll them into balls. Place the balls on a non-stick cookie sheet.
  6. Using your thumb or a knuckle, create a deep well in the center of each ball.
  7. Bake for 5-6 minutes.
  8. Take the cookie sheet out of the oven and redo the indents with a small spoon or similar device.
  9. Replace the cookie sheet into the oven until cookies are just barely tinged with brown around the edges.
  10. Take out the baking sheet. Let it sit for 1-2 minutes and then transfer the cookies to a baking sheet to cool.

Then Servia made chocolate ganache. The recipe is easy. The ganache will harden-- don't worry. It took much longer than the recipe suggested, but we let them sit overnight and they were great.

Ganache in process: Step 4.

Ingredients
  • 6 oz semisweet baking chocolate
  • 1 tablespoon butter
  • 1 tablespoon light corn syrop
  • 2 tablespoons heavy whipping cream

Directions
  1. Take two saucepans (one which will fit inside the other) or a saucepan and a heat-proof bowl. Fill the larger saucepan with water and bring the water to a slow simmer
  2. Put the smaller saucepan (or bowl) into the larger one (face up) so that it heats up in the water.
  3. Melt the chocolate in the inner saucepan.
  4. Add the butter, corn syrop, and whipping cream.
  5. Stir until the ingredients until they create a silky smooth ganach.
  6. Using a spoon, fill each thumbprint with 1 teaspoon of ganache.
  7. Let sit to to dry until the ganache is hard to the touch-- at least 1.5 hours, but may take more.
These cookies are amazing. Don't eat too many!

Updates 12/27/10: some pictures of the final stages of the cookies.
Servia fills the indentation with chocolate ganache.
A perfect thumbprint.
The Cookies.
The cookies were lovely, and we gave them away as gifts at Christmas.
Wrapped and ready.

Tuesday, December 21, 2010

Picture Updates for Holiday Recipes (and Reviews), Part II

I tried the Gỏi Cuốn tonight that I talked about in "Touch at Your Own Risk" and updated in the first installment of "Picture Updates for Holiday Recipes (and Reviews)". We are bringing some to a party tomorrow. Here is the review:

They are great! I love salad rolls, so I actually like them plain (we made them with brown rice instead of white rice, so they taste a little more interesting, but I totally forgot the cilantro when I made them). I highly highly recommend them. Also, the peanut sauce is fabulous. I am including the recipe below. I did not really like the spicy sauce, which is funny because I love spice. It's not too hot, it's just not interesting enough. The peanut sauce had a fuller body and more interesting flavors.
Sweet Peanut Sauce from MYOTG. Amazing.
Ingredients
4 tablespoons soy sauce
2 tablespoons peanut butter (smooth or crunchy)
1 tablespoon molasses
1 tablespoon brown sugar
2 teaspoons white wine vinegar
1/8 teaspoon garlic powder
2 teaspoons sesame oil
20 drops hot sauce, habenero
1/8 teaspoon black pepper.

Directions
Whisk together all the ingredients until a relatively homogeneous mixture (with the exception of the peanut pieces if you are using crunchy peanut butter).

I also made the dough for another batch of Icebox Cookies (the cookies I talked about in "Holiday Spirit is all about Cookies").
After Step 3:
Wet ingredients, beaten fluffy by hand.
 After Step 5:
The dough, ready for refrigeration.
 After Step 6:
Ready to go into the freezer.
I will be making these cookies at some point during the Christmas holidays. It's nice to know that I have something I can have ready in 30 minutes.

Monday, December 20, 2010

Picture Updates for Holiday Recipes (and Reviews)

Tonight I made the two sauces for the Gỏi Cuốn (from "Touch at Your Own Risk") and the blond brownies (from "How Early is Too Early for Holiday Cheer").

First, the Gỏi Cuốn:
The Spicy Sauce, with red chillies:
Spicy Sauce with seeds left in for extra heat.

The Sweet Peanut Sauce (using chunky peanut butter):
Peanut Sauce may look funny, but tastes great!


Then, the blond brownies:
Also, update, the blond brownies are excellent! They are very rich and much as I remember them as a child. Note: I used semi-sweet chocolate chips. This is great for dark chocolate and traditional chocolate chip cookie lovers. However, for those with a serious sweet tooth, substitute milk chocolate chips.

After Step 5:
The "wet" ingredients.


After Step 10:
Into the pan, hoping the aluminum foil works!

After Step 13:
Once it came out, cooked through.
After Step 13:
The foil pealed off easily once they cooled.


More Coming Soon!

Tuesday, November 30, 2010

A Lighter Chicken Marsala Part Two: The Comparison

As I mentioned in my recent post, I spoke of my love for chicken masala. I mentioned that "even in our lighter, fabulous version, there is still some debate. Cream or no cream?" A few nights ago we made a version with cream (in which I was the head chef) and tonight, my mom made a cream-less version (in which she is the head chef). The problem is: both were great! So what do we do? I guess we will determine based on whether or not we have cream in the house and how many calories (cream adds calories).

If anyone decides to try out one of the recipes, comment and let me know your feedback!

Chicken Marsala Pasta without Cream (makes 3-4 servings)
Ingredients
  • 9-12oz boneless skinless chicken breast
  • 1/2 tsp ground pepper, white or black (plus some for flavor in sauce)
  • 1/4 tsp salt (plus some for flavor in sauce)
  • 1/4 tsp oregano
  • 1/4 cup all-purpose flour
  • 3 tbsp olive oil
  • 1 cup mushrooms, thinly sliced
  • 1 small head garlic, minced
  • 1 shallot, minced
  • 2/3 cup marsal wine, dry (not sweet)
  • 1/3 cup chicken stock
  • Pasta (usually fettucini or angel hair), a serving per person

Directions
  1. Place the chicken pieces between wax paper and pound to 1/2-1/4 inch thick.
  2. Mix oregano, salt, pepper, and flour. Drag the chicken through the mixture and shake off excess.
  3. Heat 2 tablespoons of oil in the skillet. Fry the chicken until cooked through and slightly browned on the outside. Do not overcook, should be fork tender. If you need to fry the chicken in batches, that is ok.
  4. Remove chicken from pan and cover with aluminum foil
  5. Add last tablespoon of oil to skillet. Add garlic and saute until soft (do not brown), just under 1 minute.
  6. Add scallion to skillet. Saute for 1 minute (do not brown).
  7. Add mushrooms and saute for about 5 minutes. Stir the mushrooms during this process. However, do not stir them too much. And "don't crowd the mushrooms" [1]! Really, let the mushrooms sit flat on the pan so that they brown.
  8. Pour marsala and chicken broth into skillet and let simmer for a few minutes.
  9. Add cream (optional).
  10. Prepare pasta when necessary, per the directions of the pasta, but I usually put it on as the sauce is reducing.
  11. Let the sauce simmer until reduced by half. Add salt and pepper to taste (this does not require much salt or pepper, but white pepper especially brings out the flavor). Add a mix of water and flour if necessary as a thickening agent (more likely to be necessary if you are not using cream).
  12. Replace chicken into pan and reheat on low. Cover the chicken in the sauce and the mushrooms.
  13. Either place pasta in skillet and stir into sauce, then serve, or put pasta on plates and place chicken on top, pouring excess sauce over the pasta. Enjoy!
Endnotes
  1. I just watched Julie & Julia, which is an adorable film, and this is one piece of advice she provides. The Julie character warns: "don't crowd the mushrooms. Otherwise they won't brown."

How Early is Too Early for Holiday Cheer?

I love the holidays. In past years, I mostly loved them because I could listen to holiday music and sit by the fire while I did my homework or read. Now, I am not in school and I have been busy and lazy about getting my work done. When I was in school, I remember how much it bothered me when holiday advertising began too early (especially pre-Thanksgiving). I always had papers or finals and I wanted to only taste the holiday cheer in the last few weeks before vacation, so I did not get too antsy.

So, this year, I decided no holiday music or movies until Decemeber first. But, in terms of baking ideas (one of my favorite parts of the holidays), I figured it was reasonable to search around. Although I really should not eat holiday cookies or deserts anymore, and over the last two years I have been reasonably restrained, I can still enjoy baking them and having the wonderful smells fill the house. I can give the desserts away as gifts or feed them to friends.

This year, I found one thing I probably will not be able to resist having entirely. When I was a kid, one of my favorite desserts (and probably foods) in the whole world was an Angel Kiss. It was a blond brownie with chocolate chips lightly drizzled in a chocolate sauce. Yum! I have not had one, since I was about 10, but I found a recipe for something similar in Joy of Cooking Christmas Cookies and I just cannot resist modifying it into my old favorite. Here is the modified version of their "blondie" recipe. I have not tried it yet, but I will try it in the next few weeks.


Ingredients
1 cup (5 oz) all-purpose flour
1/4 tsp baking powder
1/8 tsp baking soda
1/8 tsp salt
1/2 cup (4 oz) unsalted butter
2/3 cup (5.25 oz) packed light brown sugar
1/4 cup (1.75 oz) sugar
1 large egg + 1 large egg yoke
1 tbsp light corn syrup
1 1/2 tsp vanilla extract
1 cup (1/2 package) semi-sweet chocolate chips

Directions
  1. Heat the oven to 350 degrees F.
  2. Mix together flour, baking powder, baking soda, salt
  3. In a large saucepan, boil butter for about 4 minutes stirring constantly until a light golden brown.
  4. Remove from the heat. Stir in sugar and brown sugar.
  5. Let the mixture cool until barely warm.
  6. Add egg, egg yoke, corn syrup, and vanilla. Stir until thoroughly blended.
  7. Add flour mixture. Stir until entirly mixed in.
  8. Add chocolate chips. Stir until evenly incorporated.
  9. Prepare an 8 inch baking pan. Place a piece of aluminum foil in the bottom of the pan son that it hands over the narrow ends of the pan by about 2 inches.
  10. Spread the batter evenly in the pan.
  11. Bake on the middle rack of the oven for 28 to 33 minutes, or until the top is golden brown and a toothpick inserted into the thickest part comes out clean
  12. Transfer the pan to a wire cooling rack and let stand until cool. 
  13. Using the overhanging foil as handles, lift the bar to a cutting board. Peel off the foil and cut into bars.

I will have to get back to you for a recipe on how to make the chocolate sauce and also as to whether these blond brownies turn out the way that I remember. If anyone tries it out, please comment!

Update from 12/20/10:
I made them. They are excellent and exactly how I remember them (although still without the chocolate sauce). There is a short preliminary review and more pictures on my blogpost "Picture Updates for Holiday Recipes (and Reviews)."

Sunday, November 28, 2010

A Slightly-Lighter-than-Usual Chicken Marsala

I love chicken marsala. I had my first bite when my mother convinced me to try some at New Years when I was around 12 and I just loved it. I used to order it a lot at Italian restaurants until I realized two things: first, every recipe for chicken marsala is different and second that most recipes pack between 700-1000 calories into their versions. Especially as I was trying to lose weight, this was crazy. So my mom and I took a bunch of versions and synthesized them into a fabulous version which substantially cut down the calories.

However, even in our lighter, fabulous version, there is still some debate. Cream or no cream? A few nights ago we made a version with cream (in which I was the head chef) and later this week, my mom is going to make a cream-less version (in which she is the head chef). I will let you know the results, but for now, this is my recipe.

Chicken Marsala Pasta with Cream (makes 3-4 servings)
Ingredients
  • 9-12oz boneless skinless chicken breast
  • 1/2 tsp ground pepper, white or black (plus some for flavor in sauce)
  • 1/4 tsp salt (plus some for flavor in sauce)
  • 1/4 tsp oregano
  • 1/4 cup all-purpose flour
  • 3 tbsp olive oil
  • 1 cup mushrooms, thinly sliced
  • 1 small head garlic, minced
  • 1 shallot, minced
  • 2/3 cup marsala wine, dry (not sweet)
  • 1/3 cup chicken stock
  • 2-3 tbsp heavy whipping cream (optional)
  • Pasta (usually fettucini or angel hair), a serving per person

Directions
  1. Place the chicken pieces between wax paper and pound to 1/2-1/4 inch thick.
  2. Mix oregano, salt, pepper, and flour. Drag the chicken through the mixture and shake off excess.
  3. Heat 2 tablespoons of oil in the skillet. Fry the chicken until cooked through and slightly browned on the outside. Do not overcook, should be fork tender. If you need to fry the chicken in batches, that is ok.
  4. Remove chicken from pan and cover with aluminum foil
  5. Add 1tbsp of oil to skillet. Add garlic and saute until soft (do not brown).
  6. Add scallion to skillet. Saute for 1 minute (do not brown)
  7. Add mushrooms and saute for about 5 minutes. Stir the mushrooms during this process.
  8. Pour marsala and chicken broth into skillet and let simmer for a few minutes.
  9. Add cream (optional)
  10. Prepare pasta when necessary, per the directions of the pasta, but I usually put it on as the sauce is reducing.
  11. Let the sauce simmer until reduced by half. Add salt and pepper to taste (this does not require much salt or pepper, but white pepper especially brings out the flavor). Add a mix of water and flour if necessary as a thickening agent (more likely to be necessary if you are not using cream).
  12. Replace chicken into pan and reheat on low. Cover the chicken in the sauce and the mushrooms.
  13. Either place pasta in skillet and stir into sauce, then serve, or put pasta on plates and place chicken on top, pouring excess sauce over the pasta. Enjoy!

Sunday, September 26, 2010

My Favorite Summer Dinner

When I was little, I was a very picky eater. The only dish I could rely on at restaurants was pasta with olive oil and garlic. That was one of the very small number of things that I ate for years.

Now, my palate has expanded significantly. My oil and garlic pasta has become whole-wheat fusilli instead of my traditional angel hair. Instead of asking for "no green stuff" I pile it on adding fresh basil from the garden and broccoli (and depending upon my food-supplies and my mood, green onions or frozen spinach). However, to this day it still remains one of my favorite dishes.

This dish can be made with any variety of vegetable substitutions and pretty much any type of pasta. Bell and sweet peppers are always a nice addition, if you have them around. Also, chicken is a lovely addition to this dish. I had it with chicken just last night.  Experiment!

Oil and Garlic Pasta Stir-Fry 2 servings
Pasta
Prepare 2 servings of pasta. I suggest a rigatoni, fuscilli, or an linguini, but it's your choice.


Stir-Fry
2 tablespoons Extra Virgin Olive Oil
5 or so garlic sections, either finely chopped or pressed into the pan
1/4-1/3 cup fresh basil
1/4 cup sun-dried tomatoes sliced into thin slices
1 cup broccoli, chopped
Parmesan cheese, to taste

Directions
  1. If pasta will take about 10 minutes to cook (as it does with dry fuscilli), start pasta first.
  2. Heat a large skillet over medium heat with olive oil and garlic.
  3. Once the garlic has been sizzling for 45 seconds or so, but is not yet golden, add sun dried tomatoes. Move everything around in the pan for 1-2 minutes.
  4. Add basil. Stir for about 1-2 minutes.
  5. Blanch broccoli so it is a little bit al-dante (in the microwave or by whatever means necessary). Then add the broccoli to the pan. Stir and let finish cooking for 1-2 minutes.
  6. Then add the pasta. Add a little more olive oil if needed.
  7. Sprinkle Parmesan over the top. Stir for 30 seconds. Serve.