Showing posts with label Sourdough Starter. Show all posts

Friday, October 4, 2013

70+% Easy Sourdough

I could have also titled this post PhD bread, since it was the first bread that I made since I started my PhD program. It was somewhat difficult adjusting to my new stone (an 18x18" piece of slate) and my new oven). I think my oven runs quite hot, which means it will be good for pizza, but I burnt the bottom of the bread. Other than that, the bread was delicious. I also made a set of English muffins. On the first day, I divided the dough into two parts after the initial set of stretch-and-folds to make one part English muffins and the other part a loaf of bread.

70+% Whole Wheat Easy Sourdough 

Ingredients
  • 556 g whole wheat
  • 240 g Unbleached King Arthur All Purpose Flour
  • 400 g whole wheat starter
  • 495 g water
  • 23g salt
Method
For Bread
    Day 1
  • Mix the sourdough starter, flours, and water in a bowl. Mix until it forms a homogenous dough.
  • Let the bowl sit for a 30 minute autolyse period under plastic wrap or similar.
  • Then mix in the amarnath, salt, and water. Mix a little and then let it sit for 5-10 minutes to allow the bread to soak up the water. 
  • Knead the bread for 2-3 minutes. Then do a stretch-and-fold.
  • Wait 10 minutes and do another stretch-and-fold.
  • Wait 10 minutes and do another stretch-and-fold.
  • Wait 10 minutes and do another stretch-and-fold. (so 4 times total)
  • Cover the bowl for 45 minutes (at around 75 degrees F) and  do another stretch-and-fold.
  • Cover the bowl for 45 minutes (at around 75 degrees F) and  do a final stretch-and-fold (2 times total)
  • Cover the bowl for 20 minutes  (at around 75 degrees F) to finish the bulk fermentation.
  • Preshape the ball lightly into round.
  • Bench rest for 20 minutes. Cover them with something. If you live in a dry climate, make sure to cover them in an airtight fashion-- I usually turn large bowls over them. While they are resting, flour bannetons or similar shaping devices for the final proofing.
  • Then shape the loaves into your desired shape and place them into bannetons.
  • They need to proof for 1 hour and 45 minutes before they are placed in the refrigerator overnight.
  • Make sure they go into the refrigerator for 16 hours or less.
    Day 2
  • Preheat the oven to 475 degrees F about 30 minutes before you take the dough out of the refrigerator.
  • Take them out of the refrigerator, score them, and immediately place them into the oven under steam.
  • After 20-35 minutes under steam (depending upon how tightly the steam container closes. I would suggest trying about 25 minutes. It is done when it begins to be golden and the tips of the score marks are beginning to be brown.
  • Cook for another 10-15 minutes or until the crust is a rich brown and the internal temperature reaches 210 degrees F.
  • Cool for 45 minutes before eating.
The crumb on the bread was tighter than I might have wished
but the crumb on the English muffins was perfect

For English Muffins
    Day 1
  • Mix the sourdough starter into the water and then add the flour.
  • Mix until the dough forms a homogenous ball. You can do this either with a stand mixer or by hand.
  • Cover the dough with plastic ad let it autolyse for half an hour
  • Then add in the salt and the last 25 of water
  • Knead until medium development (passes the windowpane test). Should take about 10 minutes by hand or about 3-4 minutes by machine.
  • I found this wasn't sufficient, so I turned it a couple of times by hand and then put it in the refrigerator overnight to let the gluten develop the rest of the way on its own. 
  • It sat in the refrigerator for 12 hours. I turned it 2-3 times in the refrigerator before I went to bed with an 45-60minutes in between each term.
    Day 2
  • Take the dough out of the refrigerator and turn onto a lightly floured surface.
  • Spread it out a little, then cover it and let it sit for 10 minutes.
  • Then roll the dough out to about 1" thick.
  • Sprinkle the dough with flour and spread the four over it gently with your hands
  • Transfer the dough onto a floured cookie sheet, lightly flour the surface of the dough, and cover it with plastic
  • Let it sit for about 2.5 hours at room temperature (around 76 degrees) under plastic wrap, bowls, or something else that will prevent a skin from forming.
  • Heat up a griddle or a cast iron frying pan, lightly oiled with spray oil to about medium-low heat
  • Cut muffins of the desired size. Squares, rectangles, or circles all work. If you don't mind ugly muffins, you can take the excess and push it lightly together. If you let it sit for about 5 minutes, this will make a delicious and perfectly adequate (although not aesthetically pleasing) muffin. Make sure that you dust a little flour on both sides of each muffin. Semolina is traditional, but you can use any flour.
  • When the griddle is hot, place the muffins on it and cover with a metal lid. You do not need to oil the griddle, but you may if you wish.
  • In about 3-9 minutes the muffins should be ready to flip over. They will puff up nicely and they will have a surface on top that is not crusty, but has a skin from the heat. Unfortunately, you have to judge this by your
  • Let them brown on the other side before cooling and eating. You can eat them hot, but they will have more flavor if you let them cool. You may also toast them or let them cool and freeze them.
Enjoy!

Sunday, September 29, 2013

Forthcoming

So classes recently started in my PhD program. The last little while has been a whirlwind of orientation, meeting new people, setting up all of the administrative things, and trying desperately to navigate a new public transportation system (which seems to me to make very little sense). In fact, things have been so crazy I missed 2 out of the three trains home on Friday due to inexperience and bad luck.

I did bake my first bread in my new oven as well as a set of English muffins with the same dough.  I will be posting that in the next few days. They were very simple but very delicious.

Also, I just wanted to say that I made some pumpernickel bread with Sue today (I will be posting that bread soon as well). It was a lot of fun and it tasted pretty good for a rye bread, although the loaves were really ugly. She brought over some of her baking for the blog for Servia and me to try. I won't spoil the surprise because she's posting it later this week, but I have to say that it was absolutely delicious. I will put up some sort of alert when she posts it.

However, it may be a few days before I post because I'm buried under all of the reading that I put off this weekend (oops). For now, check out Sue's microwavable chocolate cupcake recipe, which I'll probably succumb to making some night when I'm up late studying.

Friday, August 30, 2013

SFBI Bread Follow up-- Delicious

SFBI Type 70 Bread
I decided to make the bread recipe that I posted. It was a thousand times easier than the Poilâne miche and absolutely delicious. I highly recommend it.
Lovely Crust
One thing to note, first clear flour (at least the King Arthur version and the Great River version) smells funny. I always end up second guessing myself and tasting it to make sure it hasn't gone rancid. Usually, the strange smell goes away when it's baked into bread. This time, it lingered a little, in the bread (although it doesn't smell bad-- just a slight odd hint), but the bread tastes incredible.
Slightly Lopsided Blunt Batard
Here's my scaled down version of the recipe. My only modification was to feed my starter with first clear flour instead of feeding it with bread flour. This meant that my dough was a little drier than the SFBI version. It was delicious and had a nice crumb anyway, but I might add a little more water next time.

Makes 3 medium-large or 2 very large loaves
Ingredients
  • 1024g first clear / type 70 / high extraction flour (I used Great River organic unbleached bread flour)-- divided: 204 to feed the starter, 1000 for the bread mix
  • 1074g water (around 75 degrees F)-- divided: 204 to feed starter, 870 for bread mix. As a note, mine was a lot drier than the one in the video. You may add more water if you want a softer dough, or you may need to hold back water, depending upon the absorbancy of your flour.
  • 42 g whole wheat starter (or white-- whatever you have lying around)
  • 25 g salt
Method
Day 1: *if you have 450g of young, ripe sourdough starter, you can skip this step*
  • Mix the starter with 204g flour and 204 g water until it is homogeneous
  • Cover with plastic wrap and allow to rise until fully mature (should smell kind of like overripe fruit and a spoonful should float in water). This should take somewhere between 8-16 hours at room temperature, depending upon how fast your starter rises and how hot your room is. Mine took about 12 hours.
Day 2:
  • When the starter is ready, mix the flour and the salt in a large mixing bowl.
  • Add the water and the starter to the dry ingredients. One of the cool things in the SFBI video was that the baker poured water into the starter to lift it up and make it easier to remove from it's container. I tried this and it worked well. I suggest it. I don't specify how much water because it is going to depend upon the size of your container.
  • Mix the ingredients together by hand until it forms a homogeneous mixture. Scrape down the sides of the bowl or tub with a plastic pastry scraper and make sure the dough has picked up all excess flour and water.
  • Let the mixture rest for five minutes to fully hydrate.
  • Using your hand as a shovel, cut gently through the bread to increase gluten strength. I'm not sure how to describe this properly. See SFBI video.
  • The dough will now begin the bulk fermentation. I bulk fermented my bread for 2h45 at 77 degrees F. The video calls for 1.5h at 81-82 degrees, but I think the starter is a faster-working starter than mine is. Calculate your time based on this formula: for every 17 degrees below desired temperature, double the time. Then guess based on the rapidity of your starter.
    • For the first 45 minutes, you will stretch-and-fold the dough once every fifteen minutes (for a total of three times). By the end of this, your dough should be able to pass the windowpane test. If not, do a fourth stretch-and-fold.
  • Take the dough out onto a and divide it into 2-3 loaves. Round the loaves so that you develop some surface tension (See SFBI video).
  • Let the dough bench rest for 30 minutes.  Make sure you cover it with something so that it does not form a skin. I bench rest my dough under large overturned bowls, but other things work. If you use plastic wrap, you should probably oil it to keep from sticking. If you're in a particularly forgiving, fairly humid climate, you can probably just use a dishtowel.
  • Then do a final shaping. The video suggests blunt batards. Fold the dough almost in half. Stretch out the two sides and fold them  across one another. Then roll the dough three times to complete the batard. Pinch any extra seams. I need some more practice with this shaping method, and my dough wasn't as pliable because it was drier, so my loaves came out a bit lopsided.
  • Place the dough seam-side up in proofing baskets or in a couche and cover with plastic wrap or similar for 2 h (in his case 1 hour. Basically until an indent in the dough sticks.) If you can't bake your loaves simultaneously, remember to put your extra loaves in the refrigerator for the last half an hour of proofing and during the entirity of the baking process of the other loaf or loaves. This will ensure that your bread doesn't overproof while you're waiting to bake it.
  • Preheat your oven half an hour before baking to 450 degrees F.
  • Bake for 35-40 minutes under steam (I used an iron combo cooker and an overturned broth pot on a stone to create steam for my loaves). Then cook the last 10-15 minutes until the internal temperature reads 212 degrees F and the crust is lovely and brown.
  • Let the bread cool for at least 30 minute before slicing, but the best flavor will develop around 1-3 hours out of the oven.
Two of my 3 loaves (the third one was in the oven baking)
I highly highly suggest this formula. You'll have to play around with the times a bit given your environment and your particular sourdough starter, but this bread is delicious.

Wednesday, May 22, 2013

When It's Too Hot to Bake Bread: English Muffins

Almost Whole Grain English Muffins

So I ran out of my morning toast bread, but it's definitely too hot to bake around here. For this reason, I decided to make some English muffins. However, I didn't want to wait a full three days for my awesome oat recipe, so I decided to try something new.

I've been experimenting with oat flour. I know you can't add much to a bread recipe before it compromises the gluten structure, but I wanted to also make the bread as oaty as possible. I'm still working on figuring out the best way to do this. These muffins were not stunningly oaty (I think because most of the flour was whole wheat and it overshadowed a lot of the oat flavor), but they did have a little bit of an oaty taste and they held together pretty well at about 15% oat flour.
English Muffin Crumb
These are not as open and beautiful as my last set, but that may be because I didn't get the gluten structure developed enough last night. However, I might recommend using a little bit more water.

I also had to cheat on the recipe a bit because I forgot to start it until late last night. I'll give my actual version and advice. Adapted from Susan at Wild Yeast's amazing Norwich More Sourdough.

Oaty Mostly Whole Grain Sourdough English Muffins
Ingredients
  • 480g Whole Wheat Sourdough Starter (100% hydration)
  • 400g First Clear Flour
  • 375g Whole Wheat Flour
  • 180g Whole Oat flour
  • 625g Water adding a little bit more than this, say 650ish might make the crumb more open.
  • 23g salt 

Method
Day 1:
  • Mix the sourdough starter into 600g of the water and then add the flour.
  • Mix until the dough forms a homogenous ball. You can do this either with a stand mixer or by hand.
  • Cover the dough with plastic ad let it autolyse for half an hour
  • Then add in the salt and the last 25g+ of water
  • Knead until medium development (passes the windowpane test). Should take about 10 minutes by hand or about 3-4 minutes by machine.
  • If you don't have time (like I didn't) to wait another few hours, put it in the refridgerator immediately (covered in plastic wrap). Or, follow alternative below
Day 1 alternative ending:
  • Let is sit for 2.5 hours at room temperature (about 72-75 degrees), folding at 45 min, 1.5 hours, and 2h 15 min.
  • Turn the dough out onto a floured surface and spread it a little bit. Cover it and let it sit for 10 minutes.
  • Then roll the dough out to about 1" thick.
  • Transfer the dough onto a floured cookie sheet, lightly flour the surface of the dough, and cover it with plastic
  • Let it sit for an hour and a half at room temperature before transferring it into the refrigerator
Day 2:
Alternative method:
  • If you used the alternative method: take the dough out of the refrigerator right before you plan to bake (although no more than 16 hours after you put it in).
  • Heat up a griddle or a cast iron frying pan, lightly oiled with spray oil to about medium-low heat
  • Cut muffins of the desired size. Squares, rectangles, or circles all work. If you don't mind ugly muffins, you can take the excess and push it lightly together. If you let it sit for about 5 minutes, this will make a delicious and perfectly adequate (although not aesthetically pleasing) muffin.
  • When the griddle is hot, place the muffins on it and cover with a metal lid.
  • In about 3 minutes, the muffins should be ready to flip over. They will puff up nicely.
  • Let them brown on the other side before cooling and eating.
My method:
  • Take the dough out of the refrigerator and turn onto a lightly floured surface.
  • Spread it out a little, then cover it and let it sit for 10 minutes.
  • Then roll the dough out to about 1" thick.
  • Transfer the dough onto a floured cookie sheet, lightly flour the surface of the dough, and cover it with plastic
  • Let it sit for about 2.5 hours at room temperature.
  • Heat up a griddle or a cast iron frying pan, lightly oiled with spray oil to about medium-low heat
  • Cut muffins of the desired size. Squares, rectangles, or circles all work. If you don't mind ugly muffins, you can take the excess and push it lightly together. If you let it sit for about 5 minutes, this will make a delicious and perfectly adequate (although not aesthetically pleasing) muffin.
  • When the griddle is hot, place the muffins on it and cover with a metal lid.
  • In about 3 minutes, the muffins should be ready to flip over. They will puff up nicely.
  • Let them brown on the other side before cooling and eating.
These are delicious and won't heat up your kitchen. Keep in mind, this makes a LOT of English muffins. I mean a LOT. So, once they are fully cooled, place them in ziplock baggies and freeze them (except for the ones you will eat over the next 2-3 days).

For reference, if you pick any rustic dough that is not too loose, you can make English muffins just by following the day 2 instructions under "my method."

Monday, February 18, 2013

What Not to Do: Adventures in Sourdough Crumpets

Crumpets
So remember when I said crumpets were so easy? Well, it turns out, it's still pretty easy to make mistakes. So here are some tips from my recent experience:
  • Don't use baking powder instead of baking soda in the recipe. I decided I had the recipe memorized, so I made this accidental switch. What I realized is two things 1) baking powder does not cause rising nearly as quickly as baking soda, so the crumpets burn before they rise properly and 2) if you're using really sour starter (like I was), it makes much more sour crumpets. Baking soda, on the other hand, is activated by acidity, and so it counteracts a little bit of the sour flavor and rises quite quickly.
  • Don't use a mild sweetner like non-diastatic malt powder-- use a real serious sweetener like honey, agave, or sugar, especially when counteracting a very sour batch of starter.
  • I also found that the 100% whole wheat crumpets were less sour than my 25% whole wheat crumpets. This may be because of the origin of my starters: my white starter is from Portland, while my whole wheat starter is a hybrid between Portland and my current locality I accidentally used up the end of my Portland whole wheat one day, but the white can easily be changed into whole wheat.
After my tips, I thought I would reiterate my crumpet recipe. Fortunately, I had a ton of sourdough starter left, so I was able to make another batch correctly:
  • 270g sourdough starter, 125% hydration or 100% hydration + water or nonfat milk (I used whole wheat, but you can use white or a mix)
  • 1 tablespoon honey (you can add another half a tablespoon if your starter is really sour.
  • 1/2 teaspoon salt
  • 1/2 tsp baking soda
  • vegetable oil for greasing pan and rings
Note: you don't have to use crumpet rings, but I tried this and the crumpets really don't look much like crumpets. I don't have crumpet rings, I have some kind of egg rings for making breakfast sandwiches or something. They seem to work fine. When I made yeasted crumpets in college I used a can with both the top and bottom cut off of it. This works too.
  • Mis the starter, honey, and salt together. Stir. Let the starter begin to bubble on it's own.
  • Grease the pan and the rings and then heat them to medium. Be very careful with temperature. It is easy to burn the bottom of the crumpets if you're not careful, so be ready to regulate.
  • Then add the baking soda to the batter and mix. It should begin to bubble quite quickly.
  • When hot, fill each ring with batter so that you can see half a centimeter of ring over the top. They will puff up.
  • Then, wait until they bubble. When you see that the edges are cooked, extract them from the rings and flip them over.
  • Wait until they finished cooking (there should be some brown among the bubble as shown in the picture at the top), take them off, and repeat the process with the rest of the dough.
  • Crumpets can be eaten hot plain or with butter, jam, almond butter, etc. After fully cooled, they can be saved in an airtight container for a few days and toasted or frozen in an airtight container (preferably a baggie) and then toasted.
Delicious crumpet

I took a picture of the crumb:
Mostly White Crumpet Crumb

Whole Wheat Crumpet Crumb
The crumb of the white crumpets was slightly less moist and had larger holes for a slightly lighter crumpet. The whole wheat one was more moist

Sourdough griddle cakes are a lot of fun-- I want to try sopapillas soon.

Friday, February 15, 2013

Amarnath Wheat Sourdough

Boule
One of the bread recipes that I use for experimentation is Wild Yeast's Norwich-More Sourdough. It's a wonderfully easy recipe, once I realized a few things (such as that it requires 20-35 minutes under steam rather than the 8 in the recipe and, in my oven at least, it needs a higher oven temperature), things actually work out fairly well. Usually, I just post modifications, but today because the bread is so good and is quite different from the recipe.

Crust and Crumb
 Amarnath Wheat Sourdough
Ingredients
  • 480g of sourdough starter 100% hydration (I used about 75% white starter and 25% whole wheat starter) May I suggest using some fairly lively sourdough starter. Mine was about 50-50 of starter from the refrigerator and starter that had been newly refreshed a few hours before.
  • 500g white whole wheat starter
  • 175g bread flour I ended up using bleached because I bought it by accident but, as always, I suggest unbleached
  • 150g barley flour This gives a lovely sweetness to the crust. Delicious, seriously.
  • 130g red whole wheat flour
  • 610g + 50g water around 75 degrees F (total 660g)
  • 50g Amarnath (the seeds, not flour)
  • 23g salt
Directions
Day 1:
  • Mix the sourdough starter, flours, and 610g water in a bowl. Mix until it forms a homogenous dough.
Dough
  • Let the bowl sit for a 30 minute autolyse period under plastic wrap or similar.
  • Then mix in the amarnath, salt, and water. Mix a little and then let it sit for 5-10 minutes to allow the bread to soak up the water. 
  • Knead the bread for 2-3 minutes. Then do a stretch-and-fold.
  • Wait 10 minutes and do another stretch-and-fold.
  • Wait 10 minutes and do another stretch-and-fold.
  • Wait 10 minutes and do another stretch-and-fold. (so 4 times total)
  • Cover the bowl for 45 minutes (at around 75 degrees F) and  do another stretch-and-fold.
  • Cover the bowl for 45 minutes (at around 75 degrees F) and  do a final stretch-and-fold (2 times total)
  • Cover the bowl for 20 minutes  (at around 75 degrees F) to finish the bulk fermentation.
  • Turn the dough onto a lightly floured surface and divide into 3 medium loaves or 2 quite large loaves.
  • Preshape the balls lightly into round.
  • Bench rest for 20 minutes. Cover them with something. If you live in a dry climate, make sure to cover them in an airtight fashion-- I usually turn large bowls over them. While they are resting, flour bannetons or similar shaping devices for the final proofing.
  • Then shape the loaves into your desired shape and place them into bannetons.
  • They need to proof for 1 hour and 45 minutes before they are placed in the refrigerator overnight.
  • Make sure they go into the refrigerator for 16 hours or less.
Day 2:
  • Preheat the oven to 475 degrees F about 30 minutes before you take the dough out of the refrigerator.
  • Take them out of the refrigerator, score them, and immediately place them into the oven under steam.
  • After 20-35 minutes under steam (depending upon how tightly the steam container closes. I would suggest trying about 25 minutes. It is done when it begins to be golden and the tips of the score marks are beginning to be brown.
Golden with a hint of brown on the tips of the score marks.
  • Cook for another 10-15 minutes or until the crust is a rich brown and the internal temperature reaches 210 degrees F.
  • Cool for 45 minutes before eating.
Bread with Brie (it also goes well with almond butter)
Flavor Notes: I totally forgot (until a comment reminded me) that I hadn't talked about the flavor of this bread. it is absolutely delicious. It's wheaty (from the white whole wheat), but it doesn't have that usual bitterness that I associate with white whole wheat. Instead it's got this warm, complex, nutty richness too it (which I believe comes from the amarnath) and a hint of sweetness (from the barley). Five stars.

While I share with you the wonderful success I had today, I should also explain two things that went wrong (although they didn't keep it from being a success).

First, a small mistake, I messed up the autolyse period (I extended it it an hour because I wasn't paying attention). As such, when I mixed in the salt, water and amarneth, I messed up the gluten structure. Being a reasonably practiced at breadmaking, I was able to manipulate the dough in such a way that I got the gluten structure back together (mostly), but the crumb was still a lot tighter than it should have been.
Tight Crumb
However, the crumb did have a wonderful gelatinized structure and it was moist and delicious.
Cool picture of the crumb
I highly suggest making this bread and the crumb structure will be a lot better if you don't make mistakes :)

Second, I messed up on the shaping of the two batards. At first, I thought that I had underproofed the dough, but I quickly realized that I had not when the boule came out fine. This is what happens when you don't shape a batard well. Seriously, I need lessons. Advice anyone?
Comparison of the two loaves
Even the less pretty one will taste delicious.

Tasting Note 02/18/13: This bread makes some of the best toast that I have ever tasted. Toasting brings out the barley sweetness of the bread creating an amazing depth of flavor with the warm wheaty taste. Seriously delicious. You will not regret making this bread, I promise. I'm so excited that I have two more loaves of this in my freezer!

I am submitting this to Yeast Spotting.

Monday, February 4, 2013

The Confession: More on Oat Bread

Oat Bread; Photocredit: Servia

So I have a confession to make. I think I switched the dough of the English Muffins and my traditional oat bread. This would explain the fact that the English Muffins didn't taste sweet at all while the bread is sweet and delicious. But it's not sweet in the way that bread sweetened with honey or sugar tastes...it's like the sweetness of barley. Because, well, it is. Non-diastatic malt powder is made out of roasted barley. It's the sweetener that is used in bagels, but this bread is far better than any bagel I've ever had. It tastes like a barley oat bread and it's lovely and moist on the inside (from the oil). This would probably make far better English muffins even then the ones I made with the unaltered dough.
The bread was not nearly as burnt as it looks in this picture-- that was the lighting; Photocredit: Servia
The dough is delicious. I will include a version the recipe because it is so good, you should make it into bread as well as English Muffins. Seriously, you'll love this bread.
Baking in my new combo cooker; Photocredit: Servia
Sulpicia's Sourdough Oat English Muffins (in testing)
Ingredients:

Preferment:
  • 100g starter (very active) 100% hydration white or whole wheat based upon preference
  • 100g whole wheat flour
  • 50g water

Final Dough:
  • All the preferment (250g)
  • 450g bread flour
  • 150g whole wheat flour
  • 130g rolled oats (thickly rolled is better)
  • 470g cold water
  • 17g salt
  • 1.5 tablespoon  non-diastatic malt powder
  • approximately 15g vegetable oil

Day 1:
  • Prepare the pre-ferment by dissolving the starter in water and then mixing in the flour. When it is fully mixed, cover the container and put it in the refrigerator.
  • Let it sit in the refrigerator for 18-24 hours. It should have almost doubled in bulk and it should pass the float test.

Day 2:
  • When the starter is ready to be used, leave it in the refrigerator for one extra hour.
  • Mix together the bread flour, whole wheat flour, rolled oats, non-diastatic, and water together in a bowl into a dough.
  • Let it sit for 1 hour.
  • Then mix in the starter, salt, and oil by hand.
  • Knead by hand for 3-4 minutes.
  • Wait 15 minutes. Then do 1-2 stretch-and-folds.
  • Wait 15 minutes. Then do 2-3 stretch-and-folds.
  • Wait 15 minutes. Then do 1-2 stretch-and-folds.
  • Wait 30 minutes. Then do 1-2 stretch-and-folds. Then put the bowl, covered with plastic wrap, into the refrigerator for 15-18 hours.

Day 3:
  • 1 hour before handling (3.5 hours before baking), take the dough out of the refrigerator.
  • Divide the dough into two pieces and shape each into a boule or batard. Place them into floured bannetons or a bowl lined with a floured linen.
  • Dust with flour and cover with plastic for 2.5 hours (at about 75 degrees F).
  • At the two hour mark, heat the oven to 460 degrees F (435 degrees F convection).
  • At 2.5 hours, scored the dough and put the dough into a combo cooker or onto a baking stone.
  • Bake under steam for 35 minutes. When done, it should be a light golden color with darker brown along the scoring mark.
  • Then, turn the over down to 440 degrees F (415 degrees F convection) and bake for 15 minutes or until it registers an internal temperature of 210 degrees F. Remove the bread from the oven.
  • Let it cool at least 1 hour before slicing and eating.

Sunday, February 3, 2013

English Muffins, Part 2

My English Muffins worked! They were actually quite amazing. So were Sue's.

English Muffins, Photocredit: Servia
I took the hypothesis from Tartine Bread that one needs to use some kind of dough that has a reasonably low hydration but also produces a bread with fairly large holes. Corudata's Oat Bread was perfect (which was the base for my English Muffin Recipe) because it is a low hydration bread that acts like a high hydration bread (see crumb shot of oat bread).
English Muffins, Photocredit: Servia

English Muffins, Exterior; Photocredit: Servia
Muffins baking in the skillet, the ugly one was made from leftover dough; Phodocredit: Servia

Sue and I had a day planned to do a taste test between sourdough and commercial yeast English Muffins as I mentioned in yesterday's post. It was a lot of fun. Both of our muffins turned out amazingly, although hers turned out much prettier than mine (see below). Totally coincidentally, both of us added oats to the recipe. Sue also added buckwheat to hers which gave them a delicious earthy flavor and a beautiful color.
Sue's English Muffins; Photocredit: Servia
We both ended up baking them on griddles (her on a real griddle, me in a my great-grandfather's cast iron skillet-- yes, the really do last that long). I was convinced it could never work, but it worked great.
Sue's Crumb; Photocredit: Servia
Sue's muffins, cooking on the griddle; Photocredit: Servia
Try these for yourself. I highly recommend it. And/Or try Sue's recipe. I posted this to Yeast Spotting.

Saturday, February 2, 2013

English Muffins, Part 1

So a long time ago I promised that I would make English Muffins with Sue. She is going to make muffins with commercial yeast and I was going to make muffins with sourdough so that we could compare the flavors. I thought it would be a really interesting experiment, especially since I found so many different versions of the recipes online.

However, when I looked more closely, I realized that almost all of them have a chemical rising agent such as baking powder or baking soda which entirely ruins the quest for the difference in taste between sourdough and commercial yeast muffins, so I realized that I had to come up with something different.

When I was thinking about it, I wasn't sure what kind of dough I could use to make good English Muffins. I've never made them before and I'm simply not sure what makes them work. However, I knew that the dough had to be fairly stiff, so that it could survive the cutting, and probably would need to be slightly sweetened. Now that I think about it, the recipe should have oil to soften the crust, but I forgot to put that in at the beginning. In this instantiation of the recipe I will just oil my hands for kneading, but next time I will probably add some into the dough itself to make things easier.

Sulpicia's Sourdough Oat English Muffins (in testing)
Ingredients:

Preferment:
  • 100g starter (very active) 100% hydration white or whole wheat based upon preference
  • 100g whole wheat flour
  • 50g water

Final Dough:
  • All the preferment (250g)
  • 450g bread flour
  • 150g whole wheat flour
  • 130g rolled oats (thickly rolled is better)
  • 470g cold water
  • 17g salt
  • 1.5 tablespoon  non-diastatic malt powder
  • approximately 15g vegetable oil

Day 1:
  • Prepare the pre-ferment by dissolving the starter in water and then mixing in the flour. When it is fully mixed, cover the container and put it in the refrigerator.
  • Let it sit in the refrigerator for 18-24 hours. It should have almost doubled in bulk and it should pass the float test.

Day 2:
  • When the starter is ready to be used, leave it in the refrigerator for one extra hour.
  • Mix together the bread flour, whole wheat flour, rolled oats, non-diastatic, and water together in a bowl into a dough. I put the non-disastatic malt powder in with the salt because I forgot to put it in earlier.
  • Let it sit for 1 hour.
  • Then mix in the starter, salt, and oil by hand. I put in the oil later because I forgot it.
  • Knead by hand for 3-4 minutes.
  • Wait 15 minutes. Then do 1-2 stretch-and-folds.
  • Wait 15 minutes. Then do 2-3 stretch-and-folds.
  • Wait 15 minutes. Then do 1-2 stretch-and-folds.
  • Wait 30 minutes. Then do 1-2 stretch-and-folds. Then put the bowl, covered with plastic wrap, into the refrigerator for 15-18 hours.

Day 3:
  • 1 hour before handling (3.5 hours before baking), take the dough out of the refrigerator.
  • Thoroughly flour a towel or a piece of parchment
  • Turn the dough onto the floured surface and press it into a 1" thick disk from the center outward
  • Dust with flour and cover with plastic for 2.5 hours.
  • Use a cookie cutter about 3" in diameter or a bench knife to cut 3" squares (if you don't mind the odd shape) and cut the muffins.
  • Coat the bottom of the pan with vegetable oil and heat on medium-low heat.
  • Once the pan is hot, add the muffins. Cover them with a lid.
  • In 5-6 minutes, they should puff 2" high. When the undersides are golden brown, flip the muffins and cook until the other side is golden brown/
I am doing the third day stuff today. Cross your fingers that it works!

Thursday, December 20, 2012

Sourdough Crumpets

So have you ever wondered what to do with your left over sourdough starter? If you're like me, you hate throwing out a whole bunch of sourdough starter every time you feed it. Also, I have trouble getting rid of starter to refresh my starter if it's sat for too many days (and therefore is overly sour [1]). However, this starter is not always the best for bread and it will make waffles or pancakes taste like vinegar. So, make crumpets.

I used very sour starter when I made these and they tasted great. This recipe is slightly modified from the recipe on Chocolate & Zucchini.

Whole Wheat Sourdough Crumpet


Sourdough Crumpets:
  • 270g sourdough starter (I used whole wheat, but you can use white or a mix)
  • 1 tablespoon honey
  • 1/2 teaspoon salt
  • 1/2 tsp baking soda
  • vegetable oil for greasing pan and rings
Note: you don't have to use crumpet rings, but I tried this and the crumpets really don't look much like crumpets. I don't have crumpet rings, I have some kind of egg rings for making breakfast sandwiches or something. They seem to work fine. When I made yeasted crumpets in college I used a can with both the top and bottom cut off of it. This works too.

  • Grease the pan and the rings and then heat them to medium. Be very careful with temperature. It is easy to burn the bottom of the crumpets if you're not careful, so be ready to regulate.
  • When hot, fill each ring with batter so that you can see half a centimeter of ring over the top. They will puff up.
  • Then, wait until they bubble. When you see that the edges are cooked, extract them from the rings and flip them over.
Mixture bubbling
Mixture bubbling with cooked edges

  • Wait until they finished cooking (there should be some brown among the bubble as shown in the picture at the top), take them off, and repeat the process with the rest of the dough.
  • Crumpets can be eaten hot plain or with butter or jam. After fully cooled, they can be saved in an airtight container for a few days and toasted or frozen in an airtight container (preferably a baggie) and then toasted.
These are delicious. They have that wonderful honey-wheat flavor. They're only very slightly sour, even when using very sour starter.

This post is a prelude to my post on English Muffins which will be coming soon. I plan on making sourdough English Muffins with a friend of the family who is going to make a version with commercial yeast so we can compare and contrast.

NOTES:
  1. Keep in mind that sourdough that smells really weird or is crusty or moldy should be discarded. Unless it's molded all the way through, you don't need to discard the whole thing. Just make sure you carefully discard anything around/under/touching the mold and then feed the starter a bunch. If it smells bad, you can try taking a single tablespoon of it out and creating a "new" starter out of that with plenty of flour and water. If it still seems off, throw it out and start over. In order to prevent issues like this, if you need to leave it for long periods of time, freeze it in an airtight container.

Wednesday, December 19, 2012

The "au Levain" experiment

The boule bloomed nicely, allaying my fears about it being overproofed
So I spent the last quarter hardly making bread at all. It's been a rough time. It's been really nice to be able to start baking bread again. I still have a lot of work to do, but I'm taking breaks to bake some bread and do some Christmas things. I started off by baking a version of my Sourdough Imitation Prophet Bread. It was good, but not quite as fluffy as the last time. The house has been really cold lately so maybe I underproofed  it.

One of the other things that I've been meaning to try is this bread mix I got: Bob's Redmill 10-Grain bread mix. Usually, I would not use a bread mix. I like picking out my own ingredients for recipes. However, I was excited because it contained "7 grain cereal, whole wheat flour, rolled oats,...dark rye flour, brown rice flour, corn flour, millet flour, oat flour, barley flour, white bean flour, triticale flour, corn grits, millet grits,...active dry yeast, and soy lecithin" (Bob's Redmill). I had seen a post on Au Levain about using a bread mix that had lost of interesting grains but no additives. However, I didn't realize that in contrast to her mix which was basically just flour with added gluten, mine contained dry milk, salt, and evaporated cane juice. The salt was unfortunate, only because I didn't know how much was in their. More importantly, the milk and sugar would soften the crust and change the texture of the bread.

However, since I had bought the mix, I made it anyway. Like in the Au Levain's version, I added 30% sourdough starter by weight (whole grain, 161g), and 4 grams of salt which seemed like it would get it to approximately 2% salt content. Then I used the following method:
  1. Mix starter, flour, and 350g of water (making the hydration about 70% because of my 100% hydration starter). I mixed it in my kitchen aid. I realized the bread was basically the consistency of thick batter so I started adding in bread flour until it turned back into the consistancy of bread. It must have been 6 or so ounces of flour.
  2. I let it autolyse for 40 minutes.
  3. Then I added the 4g salt and needed the bread for about 2 minutes on low. It didn't seem to help in the least in developing the gluten.
  4. As such, I did a set of stretch-and-folds, 2 every 10 minutes for an hour. It finally, grudgingly, passed the windowpane test.
  5. My house was cold...maybe 65 degrees or so. I let it sit out for 2 hours before I put it in the refrigerator overnight.
  6. In the morning, I let it sit out for 2 hours.
  7. Then I shaped it, but it in a banneton, and let it sit for 3 hours.
  8. I baked it for 50 minutes at 425 degrees F, the first 30 minutes under steam.
  9. The bread registered at 210 degrees F and I took it out. I let it cool for an hour before slicing.
Ultimately, while the bread seemed like it was going to be a failure  plenty of times throughout the process, it turned out ok. I added a huge amount of flour so the bread turned out to have a really closed crumb. However, it was still nice and crusty, despite the milk, and the flavor was good. It wasn't overwhelmingly dense either. There was one funny flavor that I couldn't quite pick out in there that I didn't like, but with so many grains I had no idea which one was responsible.
It had a very tight crumb, probably because much of the dough had non-gluten flours.

The experiment was interesting certainly, and tasty, but I'm going to check the ingredients more carefully before I buy another bread mix.
The texture was nice, even though the crumb was tight
 An interesting experiment.

Monday, August 20, 2012

Too Hot for Bread

Waffles

It has been too hot for bread over the last two weeks. The heat is ridiculous and I never want to turn on my oven. However, I have a bunch of sourdough starter languishing in the refridgerator. So I decided to make waffles.

Recently I've been on a big waffle kick. I started over the last 4 months or so making waffles on the weekends with my sourdough starter using a slightly modified version of this recipe from Wild Yeast. I usually half the recipe when I'm just making waffles for two people, but this time I doubled the recipe and made enough waffles to store in the freezer and toast whenever I wanted a nice crispy waffle. They are delicious!

Waffles on the Cooling Rack

Recipe for Sourdough Toaster Waffles:
  1. Make sure your sourdough starter is viable but also that it is young and sweet smelling like overripe fruit. If it smells wine-y or vinigar-y, your waffles will taste like vinegar. If it is not young smelling, refresh it and leave it out on the counter for a few hours until it's ready.
  2. Heat a waffle iron and grease it (I use a small amount of spray canola oil)
  3. Follow the Wild Yeast pancake batter recipe (I put in 2 tbsp of honey instead of maple syrup and I made the waffles half with whole wheat starter). The batter should be slightly thinner than muffin batter but thicker than crepe batter. I usually have to add a couple of splashes of nonfat milk to achieve my desired consistency. If you want a large stash, double the recipe.
  4. Ladle in enough batter for one waffle.
  5. Cook until it is cooked through, but not until it is crispy.
  6. Take out and let the waffle cool completely. Repeat this process until all of the batter is used up.
  7. Place the cooled waffles in freezer bags (air tight) and remove all excess air from the bag.
  8. Throw them in the freezer and stick them into your toaster as needed!
Bag of cooled waffles for the freezer

I have been really enjoying them. I'm planning on trying sourdough crumpets before the heat dies down.

Friday, July 13, 2012

Sourdough Imitation Prophet Bread Recipe

sourdough, crust and crumb

Here is the sourdough version. I came up with it myself, for which I am pretty proud of myself. While I am verging on being a good bread maker, I still have certain problems with consistency, especially when it comes to chaning recipes from baker's yeast into sourdough so it was nice that this came out perfect the first time.

Ingredients
  • 170g white starter
  • 42g whole wheat starter
  • 231g bread flour
  • 8.5g salt
  • 170g milk
  • 14g sesame seeds
  • 14g hulled millet
  • 14g poppy seeds
  • 14g flax seeds (I forgot to toast these, but they're probably better toasted)
  • 14g sunflower seeds (toasted)
  • Egg white for brushing the top
  • Extra millet, poppy seeds and sunflower seeds for sprinkling over the top.
Method

Day 1
  • Measure all the ingredients into a the bowl of a stand mixer.
  • Mix with the paddle attachment until the dough comes together. It should be slightly sticky.
  • Let the dough rest for 5 minutes.
  • Use the bread hook and mix for 4 minutes.
  • Remove the dough from the bowl and fold a few times for good measure
  • Let the dough rest for two hours covered by plastic wrap or similar.
  • After, the two hours, place it in the refrigerator overnight.
Day 2
  • Take the dough out of the refrigerator. Just over four hours before baking.
  • Let it warm up for two hours.
  • Turn it on to a floured surface
  • Shape it:
    • Separate the dough into three equal pieces
    • Roll these pieces between the hands into ropes about 15 inches long (approximately).
    • Braid the loaf from the middle to the exterior.
    • Turn the braid onto its side and bring the two ends together. Pinch them together.
    • Fold the braided ring such that the pinched-together portion is on the bottom. Place it in an oiled loaf pan (mine was oiled and then floured, but i don't think the flouring was necessary).
  • Let it rise for 2 hours at room temperature (about 75 degrees F) or until the dough feels light and puffy to the touch (covered with plastic wrap or similar)
  • Brush the top with egg white and sprinkle extra seeds on top right before baking.
  • Bake at 350 degrees F (325 degrees F convection) for 50 minutes. I baked mine at 300 degrees F convection per the instructions, but I had to extend the baking time immensely and so I think baking them at a higher temperature is better. Bake under steam the first 25 minutes for maximum oven spring, according to the lovely people on the Fresh Loaf. Bake until the internal temperature is between 180-200 degrees F.
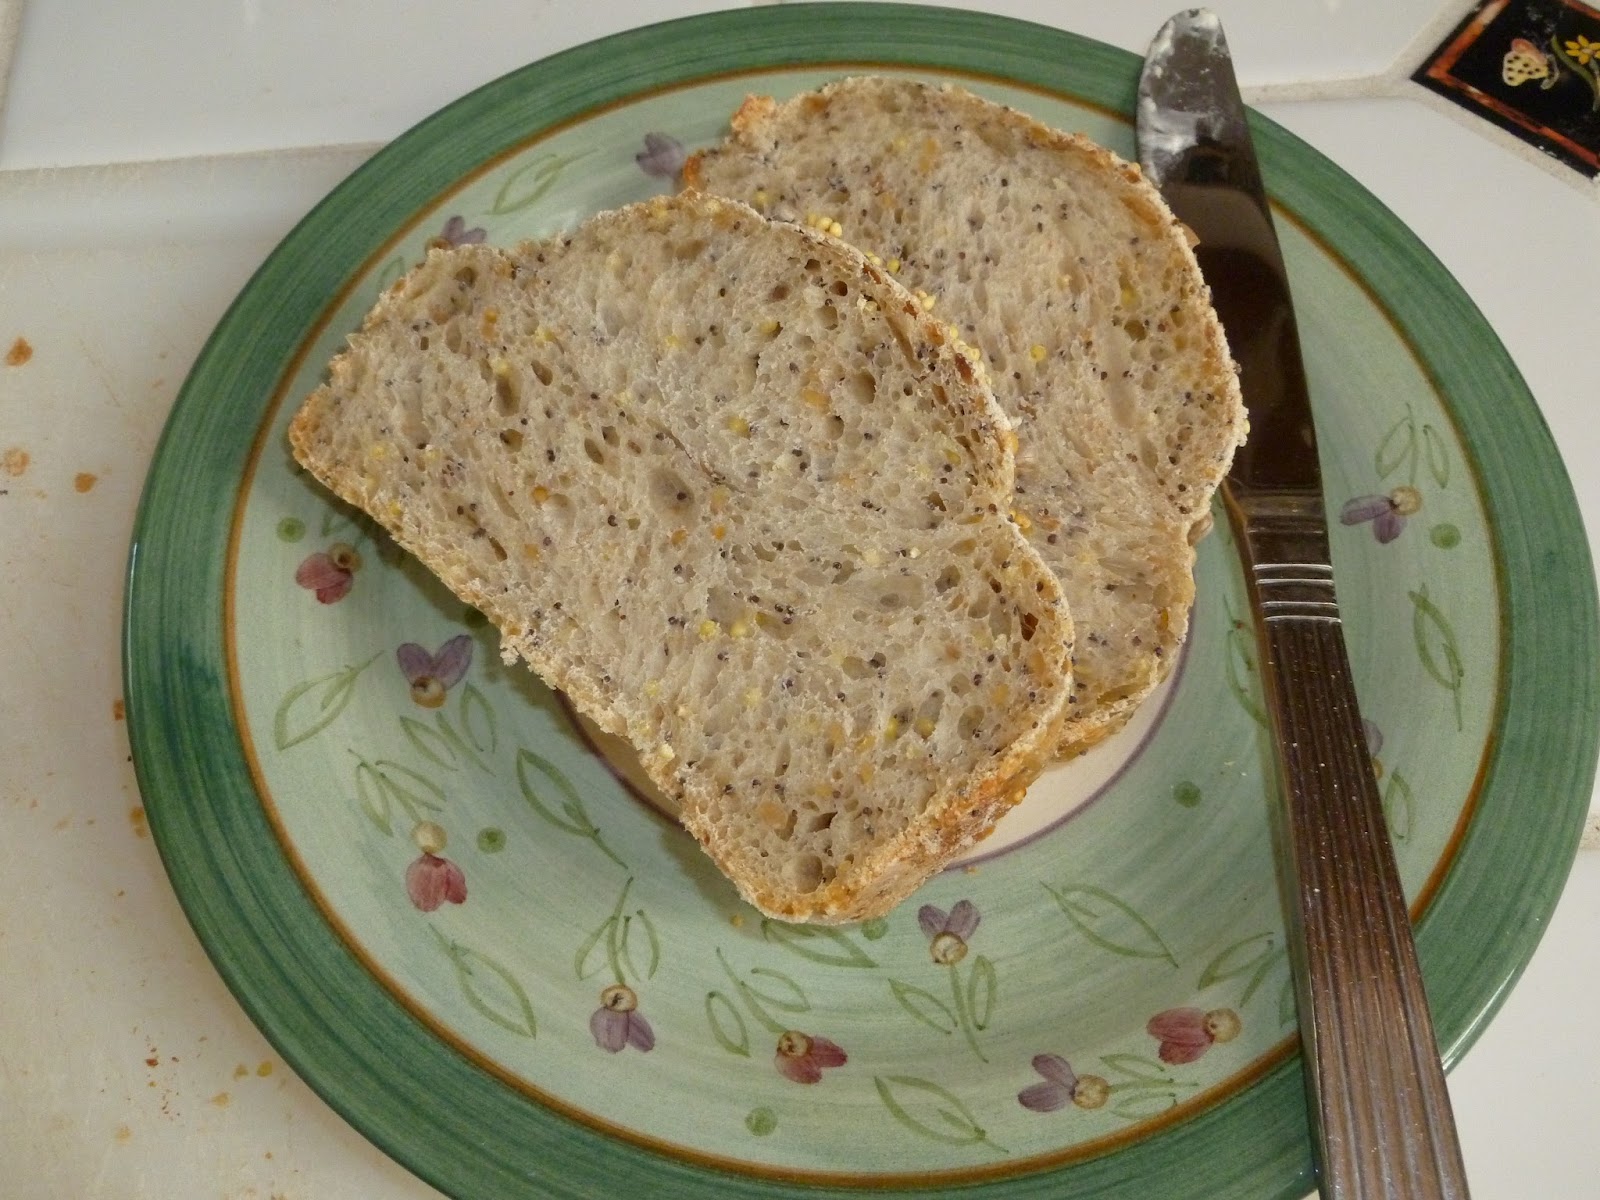
Sourdough, crumb, close up
You can see here, the crumb is more open and creamier than the baker's yeast counterpart
Crumb Comparision: Baker's Yeast (left), Sourdough (right and top)
The bread was delicious. I liked it better than the baker's yeast one because it had a creamier taste and texture and it had just the slightest hint of acidity. However, they were both delicious.

Lunch the other day: Sourdough toast with egg whites
I highly suggest everyone tries one of these two versions. You can make the seed mixture depending upon your own personal taste. And, even for those who do not appreciate multigrain bread, the base is almost entirely white flour, so it shouldn't be too hard on the palate. Enjoy!

Wednesday, July 11, 2012

Follow-up: Imitation Prophet Bread

Sourdough, crumb
I mentioned the other day that I tried to make a bread from one of my favorite coffee shops. In order to do this, I tried two different tactics. In one, I stayed close to the recipe from Peter Reinhart's Artisan Breads Every Day that seemed most similar to the bread I had. In the other, I made a sourdough version with a couple of key modifications. First, when I at the bread at the coffee shop, I thought that it was only sweetened by milk and not by honey, sugar, or some other sweetness. Although the version from the coffee shop was clearly not sourdough, it tasted much more like the sourdough version because it did not have a sweetener and had more milk (yielding a creamier taste and texture). I will post the sourdough recipe soon.

Ingredients for the Baker's Yeast Bread (makes 1 loaf)
  • 316 g bread flour
  • 42.5 g whole wheat flour
  • 14 g sesame seeds
  • 14 g poppy (the recipe omits this but rather doubles the sesame seeds)
  • 14 g flax seeds (I lightly toasted these, even though the recipe does not)
  • 14 g sunflower seeds (lightly toasted)
  • 14 g hulled millet (this is not in the recipe, I added it)
  • 14 g toasted pumpkin seeds
  • 8.5 g salt
  • 7 g dry active yeast
  • 170 g water, warm (approximately 95 degrees F)
  • 85 g nonfat milk, warm (approximately 95 degrees F)
  • 28.5 g honey (1.5 tablespoons)
  • Extra millet, poppy seeds and sunflower seeds for sprinkling over the top. 
Method
Day 1
  • Measure all the ingredients into a the bowl of a stand mixer.
  • Mix with the paddle attachment until the dough comes together. It should be slightly sticky.
  • Let the dough rest for 5 minutes.
  • Use the bread hook and mix for 4 minutes.
  • Remove the dough from the bowl and fold a few times for good measure. Then put in the refrigerator.
Day 2
  • Take the dough out of the refrigerator. Just over two hours before baking.
  • Turn it on to a floured surface
  • Shape it:
    • Separate the dough into three equal pieces
    • Roll these pieces between the hands into ropes about 15 inches long.
    • Braid the loaf from the middle to the exterior.
    • Turn the braid onto its side and bring the two ends together. Pinch them together.
    • Fold the braided ring such that the pinched-together portion is on the bottom. Place it in an oiled loaf pan (mine was oiled and then floured, but i don't think the flouring was necessary).
Sourdough, just placed in the baking pan
  • Let is rest for 1.5 to 2 hours at room temperature (about 75 degrees F) or until the dough feels light and puffy to the touch.
Baker's Yeast, during the second rise
Baker's yeast at the end of the second rise
  • Bake at 350 degrees F (325 degrees F convection) for 50 minutes. I baked mine at 300 degrees F convection per the instructions, but I had to extend the baking time immensely and so I think baking them at a higher temperature is better.
Baker's Yeast out of the oven

Baker's Yeast, side view

Baker's Yeast, on cooling rack


Baker's yeast, crumb

Sourdough directions and ingredients coming tomorrow. Sorry...too much to do. I will write and explanatory post soon.