Showing posts with label Baker's Yeast. Show all posts

Tuesday, March 26, 2013

Overnight Challah

In general, I'm not a huge fan of enriched doughs, but I do love Challah. When I was a kid, most of my friends were Jewish so I went to about 52 barmitzvahs and batmitzvahs over the course of 2.5 years. While I enjoyed parts of the ceremonies, I often looked forward to grabbing a piece of challah afterward.

Challah also was one of the first breads that I made back in my early days of bread baking at school. It was the first no-knead bread I ever baked. Most importantly, it was the first successful bread that I made upon returning home after graduation after a series of incredibly disappointing failures. Mostly out of nostalgia, I have always used this recipe, which was the first one I found. However, I decided to try Peter Reinhart's recipe from Artisan Breads Every Day. Except I couldn't help myself-- I had to modify the recipe (quite substantially).


Challah from Artisan Breads Every Day (significantly adapted)
Makes 1 large loaf or 2 small loaves
Ingredients
  • 130g lukewarm water (about 95 degrees F)
  • 1/2 tablespoon + a pinch dry active yeast (approximately 5g)
  • 4-5 egg yokes (85g) Instead, I used 2 egg yokes and 1 egg. However, had I read the recipe notes, I should have realized that I needed to reduce the amount of water. I didn't so I ended up incorporating a lot more flour. If you want to use whole eggs, reduce the water by about 28g per egg. So in reality, I should have used 2 egg yokes and 2 eggs with 74g water
  • 2.5 tablespoons vegetable oil (35g)
  • 2.25 tablespoons honey (43g)
  • 357g bread flour
  • 250g white sourdough starter, 100% hydration
  • 1.25 teaspoons salt (9.5g)
  • 1 egg white and 2 tablespoons water for egg wash
Directions
Day 1:
  • Combine the dry active yeast and the water in a mixing bowl and stir with a whisk to dissolve.
  • Add egg yokes (or eggs or both), oil, and honey. Stir to break up the egg yokes.
  • Add in the sourdough starter, the flour, and the salt and then mix. In a mixer, mix for about 2 minutes on the lowest speed. By hand, mix with a dough whisk or a wooden spoon for a minuter or two until you form a course, shaggy dough.
  • Let the dough rest for 5 minutes.
  • If using a mixer, switch to a dough hook for about 4 minutes on medium-low speed. Or, mix by hand or with a wooden spoon for about 4 minutes. Make sure your hands or the spoon are wet.
  • Turn the dough onto a very lightly floured surface and knead for 1-2 minutes, or until it passes the windowpane test. Incorporate as much flour as needed to make the dough tacky but not sticky.
  • Then, let the dough sit out for about half an hour. It should rise just a little bit. Then put it in the refrigerator overnight or for up to 2 days.
Day 2
  •  Remove the dough for the refrigerator 2h10 before baking.
  • Transfer the dough onto a lightly floured work surface and cut it into the desired number of pieces. Challah loaves are traditionally braided so if you are making 2 small loaves, divide the dough into 6 equal pieces. 
  • Roll the pieces into ropes. The length depends on your own aesthetic, although you want all of the pieces to be the same length. Consider that the bread will increase about 1.5-2 times in size, so don't roll your ropes too thin or too thick.
  • Braid the loaves. Braid out from the middle toward each side. This will ensure the proper tapering of your loaves.
  • Let the loaves rise, covered, for 2 hours.
  • Preheat the oven to 350 degrees F (300 degrees F convection) about 15 minutes before the bread is ready to go in the oven.
  • Brush the loaves with egg wash and sprinkle seeds if desired. You can then either load them onto a pan or a peel to be baked on a stone.
  • Bake for 35-50 minutes, until the internal temperature is 190 degrees F and the bottom sounds hollow when thumped. If you want, you can steam for the first 20 minutes, but it's probably unnecessary. I will steam one and not steam the other so I can demonstrate the difference.
I haven't finished this project. The loaves will come out of the oven tomorrow so I will post pictures then.

Monday, February 11, 2013

Oatmeal Bread

Two Loaves; Photocredit: Servia
Seriously, more oats? Yes, I just love oats in bread. They are delicious and nutritious. I think my obsession might be because I spent my entire childhood eating cheerios. Anyway, for the moment, anyone reading my blog will be subjected to oats (although I should be doing some other things soon).

I checked Jeffrey Hamelman's Bread out of the library. I've haven't been hearing much good news from Graduate Schools and so I thought it would be a fun distraction. As it turns out, I may even buy a copy of the book because so many of the recipes appeal to me.

One that caught my eye for it's simplicity was the Oatmeal Bread.

Oatmeal Bread (Adapted from Hamelman's Bread)
Ingredients:
  • 680g High-Gluten Flour
  • 227g Whole Wheat Flour
  • 150g Rolled Oats
  • 567g Water, around 75 degrees F (I added another 50g or so because it's very dry here)
  • 100g Milk
  • 68g Honey (3T)
  • 68g Vegitable Oil (5.5T)
  • 20g Salt (3.5tsp)
  • 5g dry active yeast (1.5tsp) I reduced this to 1tsp because I was worried about leaving it too long in the refrigerator because I had class this morning. I think the decision was wise and I highly recommend it.
  • Wheat bran and water for topping (optional)
Directions:

Day 1:
Oats Soaking; Photocredit: Servia
  • Mix the oats and the water. Let it sit for 15-20 minutes.
  • Mix in the remaining ingredients (yeast first, in order to hydrate it). The dough can be mixed by hand or on a mixer at a medium low speed for 3 minutes. The resulting dough is tacky and looser than a typical sandwich bread.
Other Ingredients; Photocredit: Servia
  • Then, knead the dough by hand (using the heals of the hand in the typical kneading style) either in the bowl or on a surface (either oiled or very lightly flowered). By hand, this will take 5-6 minutes to create moderate gluten development (passes the windowpane test). The same effect can be achieved in a mixer for 3-3.5 minutes on medium speed.
Dough, rising; Photocredit: Servia
  • Then let the bread ferment for 1 hour at room temperature (around 72 degrees F) folding once at 30 minutes and once at the hour mark. If you decided to use the full 1.5tsp yeast, you may want to leave it out for 40 min and do a fold at 20 and a fold at 40.
  • Put the bread, covered in plastic wrap or similar, into the refrigerator overnight. Note that if you don't want to take it out first thing in the morning, I would suggest that you use less yeast just so it doesn't overproof.
Day 2:
  • Remove the bread from the refrigerator. Turn the bread out on to a floured work surface and divide into 2-3 pieces (I would suggest 3 pieces if you have regular loaf pans, 2 if you have large loaf pans) I divided it into four, and my loaves are quite small; my mistake.
  • Preshape the dough lightly into rounds.
  • Bench rest the dough seem-side up for 15-20 minutes.
  • During the bench rest, prepare loaf pans. I use spray oil and then coat them lightly with flour. This might be overkill-- oil alone might do the trick.
  • Shape the dough into blunt cylinders and place them seem-side down into the loaf pans.
  • Let them rise for 1-1.5h under plastic wrap or similar at 72-75 degrees F Mine rose for 3h15 at around 68 degrees F, but they only had 1tsp yeast. Make sure you adjust based on your conditions. If you only use 1tsp yeast, increase the time to 150%. If the temperature is cold, remember that for every 17 degrees below temperature, the rising time must double. A calculator is your friend.
  • Optional: When ready to bake, brush the top of the loaves with a tiny bit of water and then sprinkle wheat bran over the top for that finished look.
  • Put them in the over at around 445 degrees F (420 convection) understeam for the first 15 min. Then add about 7-10 minutes at 425 degrees F (400 convection) without steam. Watch them carefully. I overcooked mine by putting them there for 20 min + 10 min without steam. The oil and honey causes them to brown really fast. For steam, you can either try putting the baking pan on a stone with a cover or you can turn another loaf pan upside-down on top of it. They are done when they read 190 degrees F on an instant thermometer.
  • Wait at least 1 hour before cutting.
Photocredit: Servia
Review: 3.5 stars
Slices and Loaf; Photocredit: Servia
The bread is a lot lighter and airier than I anticipated, which is kind of disappointing. I was hoping it would have a little more heft (so it could stand up to something like almond butter). Maybe if I added more whole grains it might be better. However, it's got a lovely slightly oaty flavor and is ideal for a delicate sandwich or butter/jam and a cup of coffee/tea.

*NOTE (02/12/13): While I still think the bread is far too light, I have to say it tastes delicious with almond butter (so my original complaint was totally wrong).

For the similarly oat-obsessed out there, here's a list of other yeasted oat confections I've made:

Saturday, February 9, 2013

A New Kind of "Oat" Bread

I've wanted to make this recipe ever since I received Peter Reinhart's Whole Grain Breads. I finally made it two weeks ago.

Oat Bran Broom Bread

My apologies; I forgot to take a shot of the crumb. However, it was quite a tight crumb...slightly tighter than the other sandwich bread's I've made, but I don't think it was as tight as the picture in Reinhart's book.

Recipe for Oat Bran Broom Bread (modified from original):
Ingredients:
Soaker
  • 184g whole wheat flour (medium to fine grind)
  • 28g Oat Bran (4tbsp)
  • 14g flax seeds (1.5tbsp)
  • 4g salt (1/2 tsp)
  • 198g water
Starter (or starter straight out of the jar if your starter is fairly vital and 75%)
  • 50g starter (100% hydration)
  • 177g whole wheat flour
  • 120g water
Final Dough:
  • All the soaker (429g)
  • All the starter (or 398g starter)
  • 56.5g whole wheat flour
  • 5g salt
  • 1tsp dry active yeast (3g)
  • 20 g water
  • 2 tbsp honey (42.5g)
  • 1 tbsp olive or vegetable oil
Method: 
Day 1: 
  • Mix all of the ingredients for the soaker together in a bowl until they form a reasonably wet dough. Cover it with plastic wrap and let it sit for 12-24 hours. If it will be longer than that, place it in the refrigerator.
  • Mix all of the starter ingredients together and mix them until they form a fairly stiff dough. Knead for a minute or two in the bowl before covering with plastic wrap. Refrigerate for 8-48 hours.
Day 2:
  • About 2 hours before mixing the final dough, take any refrigerated ingredients out of the refrigerator.
  • Chop or tare the soaker and the starter into pieces and dust them with the flour.
  • Hydrate the yeast in a cup or bowl (no need to make it bubble, just mix it with the water). Pour the hydrated yeast, the oil, and the honey over the dough. Mix with wet hands or with a spoon. If you don't like the stickiness, you can also slightly oil your hands. Add water or flour for adjustments-- due to the different protein content of whole wheat flours, you may need to adjust. The dough should be soft and slightly (but not very) sticky.
  • Knead the dough for about two minutes in the bowl.
  • Lightly flour your hands and a work surface with whole wheat flour. Coat the dough in flour and knead by hand for 3-4 minutes. Try to incorporates little flour. I found this step very frustrating. My hands got sticky and the dough didn't cooperate well, so I changed the next few steps from the book.
  • Put the dough in a clean bowl and do a stretch-and-fold. Do the stretch and folds with wet hands.
  • Wait 5 minutes and then do another stretch-and-fold.
  • Wait 10 minutes and do another stretch-and-fold.
  • Wait 10 minutes and do a final stretch-and-fold. By this point, the gluten should be adequately developed.
  • Let the dough rise under plastic wrap for about 2 hours at 75 degrees F.
  • After the 2 hours, turn the dough onto a floured surface.
  • Gently stretch it out into a rectangle and roll it up; then seal the seem.
  • Place it seem-side down into a loaf pan (I tend to spray my loaf pans with oil and then lightly flour them so the dough doesn't stick, but this might be overkill).
  • Let the dough rise for another 2 hours in the loaf pan.
  • 30 minutes before you're ready to bake, preheat the oven to 425 degrees F. If you would like to bake under steam, prepare whatever you will use for steam (this is not really necessary, but I baked it under steam).
  • When ready to bake, turn the oven down to 350 degrees F and place it in the oven for 20 minutes. At the 20 minute mark, take off the steam (if you chose to use it), and rotate the pan 180 degrees. Then bake for another 20 minutes (so 40 minutes altogether).
  • Check the loaf to make sure it's at least 190 degrees F.
  • Transfer the bread to a cooling rack and cool for at least 1 hours before slicing and serving.

Review of Oat Bran Broom Bread: 3 Stars
One of the things that really bothers me about this book is that Reinhart puts absolutely absurd amounts of yeast in everything. It's really unnecessary and it doesn't give the dough the time to develop that wonderful flavor. With bread, quick and delicious very rarely coincide (except maybe with sourdough crumpets). So I slowed this bread down. But even then, it didn't have the flavor I wanted. I need to play with the recipe.

Furthermore, the bread doesn't taste anything like oats. The oat bran in it is minimal. I've decided I will rewrite the recipe and try again.

Wednesday, July 11, 2012

Follow-up: Imitation Prophet Bread

Sourdough, crumb
I mentioned the other day that I tried to make a bread from one of my favorite coffee shops. In order to do this, I tried two different tactics. In one, I stayed close to the recipe from Peter Reinhart's Artisan Breads Every Day that seemed most similar to the bread I had. In the other, I made a sourdough version with a couple of key modifications. First, when I at the bread at the coffee shop, I thought that it was only sweetened by milk and not by honey, sugar, or some other sweetness. Although the version from the coffee shop was clearly not sourdough, it tasted much more like the sourdough version because it did not have a sweetener and had more milk (yielding a creamier taste and texture). I will post the sourdough recipe soon.

Ingredients for the Baker's Yeast Bread (makes 1 loaf)
  • 316 g bread flour
  • 42.5 g whole wheat flour
  • 14 g sesame seeds
  • 14 g poppy (the recipe omits this but rather doubles the sesame seeds)
  • 14 g flax seeds (I lightly toasted these, even though the recipe does not)
  • 14 g sunflower seeds (lightly toasted)
  • 14 g hulled millet (this is not in the recipe, I added it)
  • 14 g toasted pumpkin seeds
  • 8.5 g salt
  • 7 g dry active yeast
  • 170 g water, warm (approximately 95 degrees F)
  • 85 g nonfat milk, warm (approximately 95 degrees F)
  • 28.5 g honey (1.5 tablespoons)
  • Extra millet, poppy seeds and sunflower seeds for sprinkling over the top. 
Method
Day 1
  • Measure all the ingredients into a the bowl of a stand mixer.
  • Mix with the paddle attachment until the dough comes together. It should be slightly sticky.
  • Let the dough rest for 5 minutes.
  • Use the bread hook and mix for 4 minutes.
  • Remove the dough from the bowl and fold a few times for good measure. Then put in the refrigerator.
Day 2
  • Take the dough out of the refrigerator. Just over two hours before baking.
  • Turn it on to a floured surface
  • Shape it:
    • Separate the dough into three equal pieces
    • Roll these pieces between the hands into ropes about 15 inches long.
    • Braid the loaf from the middle to the exterior.
    • Turn the braid onto its side and bring the two ends together. Pinch them together.
    • Fold the braided ring such that the pinched-together portion is on the bottom. Place it in an oiled loaf pan (mine was oiled and then floured, but i don't think the flouring was necessary).
Sourdough, just placed in the baking pan
  • Let is rest for 1.5 to 2 hours at room temperature (about 75 degrees F) or until the dough feels light and puffy to the touch.
Baker's Yeast, during the second rise
Baker's yeast at the end of the second rise
  • Bake at 350 degrees F (325 degrees F convection) for 50 minutes. I baked mine at 300 degrees F convection per the instructions, but I had to extend the baking time immensely and so I think baking them at a higher temperature is better.
Baker's Yeast out of the oven

Baker's Yeast, side view

Baker's Yeast, on cooling rack


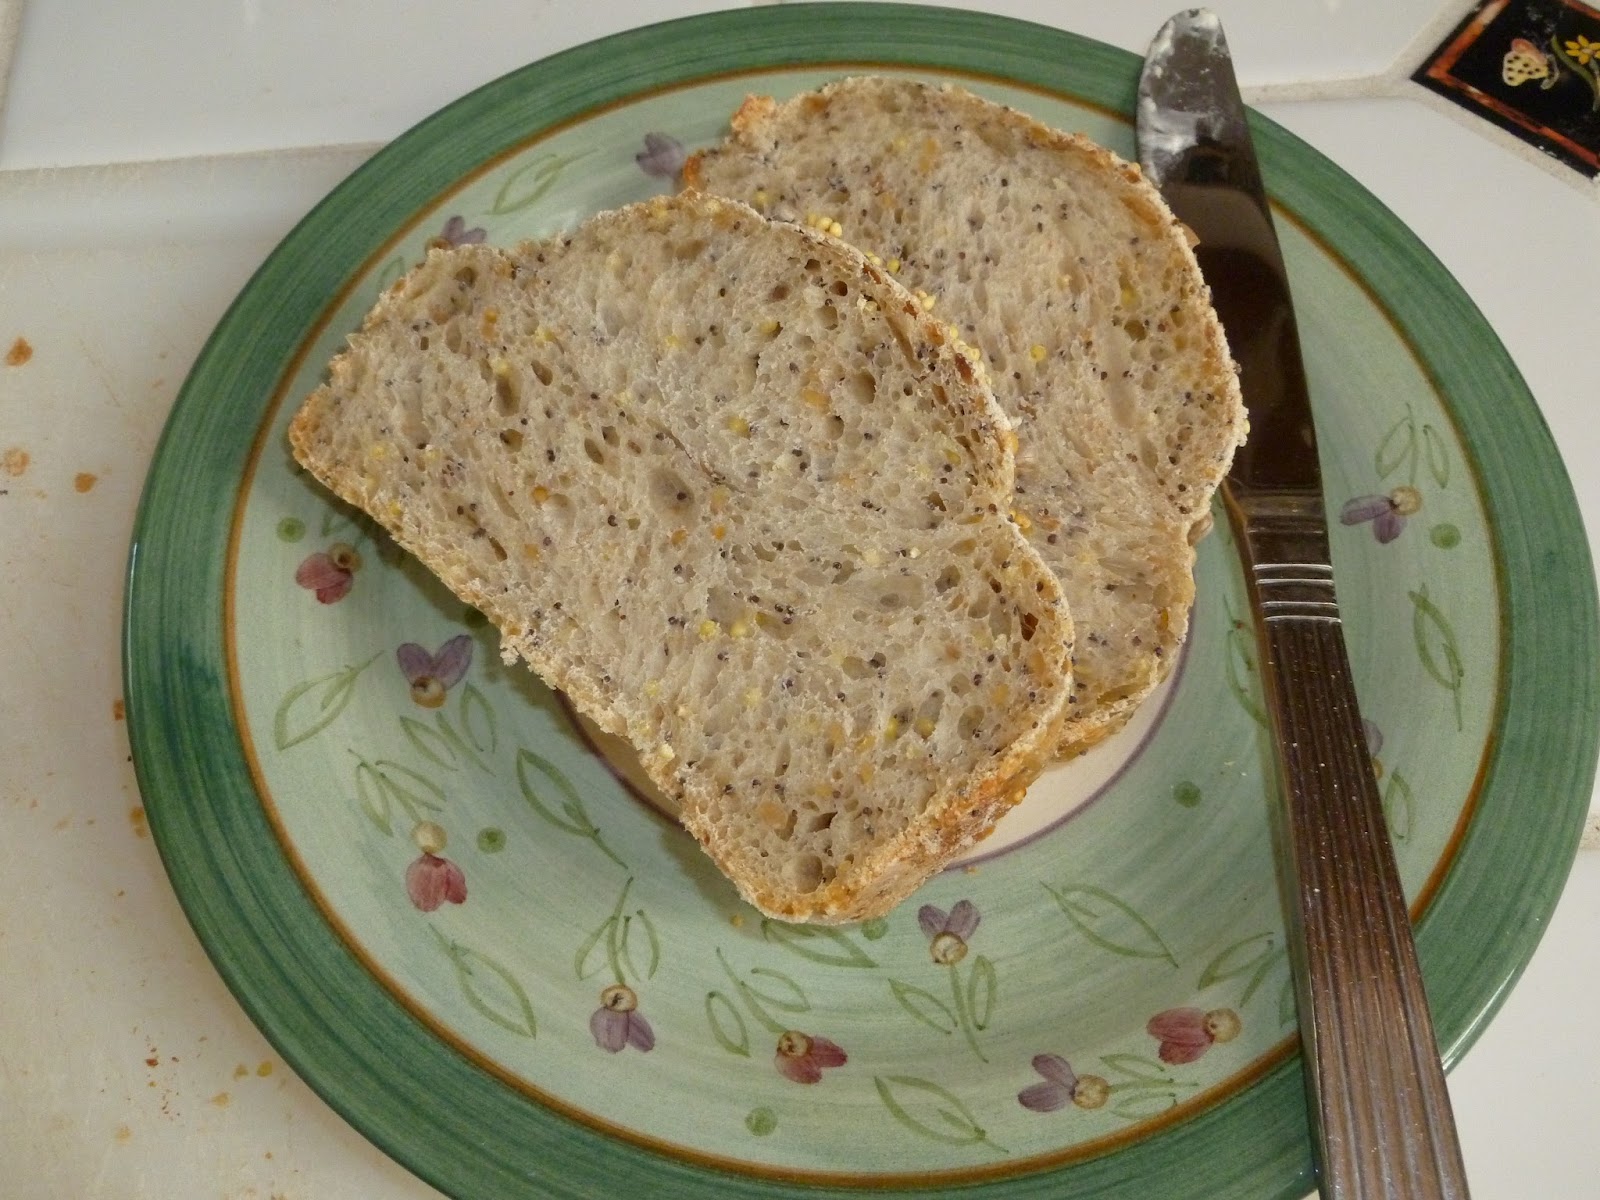
Baker's yeast, crumb

Sourdough directions and ingredients coming tomorrow. Sorry...too much to do. I will write and explanatory post soon.

Tuesday, July 10, 2012

A Question for Serious Bakers

So I have an annoying habit of tasting bread at a restaurant or a bakery with some friends and saying "pop quiz!" I then proceed to ask my unlucky compatriots about the ways in which the bread is identifiable, e.g. what kind of rising agent is used, if it is proofed in correctly, what kinds of grains compose it, etc. But oftentimes I also run into questions for which I have no answer.

One question that came up when I was making my Many-Seed Bread/Imitation Prophet Bread is: do I need to put a sandwich loaf under steam? I have never seen any indication that a sandwich loaf should be steamed. On the other hand, I haven't baked a sandwich loaf since I made my first successful rustic loaf, so I have no idea. Here was my experience recently that makes me think I might need it. When I made the side by side comparison of the commercial yeast bread and the sourdough version, the final rise time was the same (2 hours). The commercial yeast one rose a lot and filled the loaf pan. The sourdough loaf did not. It only increased a small amount in size, but it had the same light and airy texture as the commercial yeast version so it seemed ready to bake. As there was no mention of steam in the instructions, I cooked the commercial yeast loaf without it. There was almost no oven spring at all. On the sourdough loaf, I didn't want it to come out as a brick so I baked it for the first 25 minutes under steam. Surprisingly, the sourdough had massive oven spring. It did not get quite as bid as the commercial yeast loaf. However, I thought the crumb of the sourdough was better. It was still small and regular, as in a good sandwich loaf, but it was slightly more open and creamier than in the commercial yeast loaf.
Commercial Yeast (left), Sourdough (right and top)
Did the oven spring occur because I put the sourdough loaf under steam or was it just because the sourdough needed that final push to expand while the commercial yeast version did not? Does anyone know?

Formulas for both loaves coming tomorrow.

Wednesday, May 25, 2011

Croissants!

My Little Croissant!
After 4 days of labor (I slowed down the process so I did not have to commit as much time each day) I have finally achieved croissants! And the best part is that they're great! Light and fluffy on the inside and amber-colored and flaky on the outside: just like they are supposed to be.

The first time I made croissants, they peeled off layer by layer, but they were not fluffy and light in the same way. Cerinthus said "they're not bad, but they're not croissants." Even Cerinthus would have to admit that these are croissants. Sure, they don't have the perfect honeycomb crumb, but they still look and taste as ordered:
Croissants
Light and Fluffy Interior
Crumb-- a better photo
I posted the croissant recipe here. This is the halfed recipe from Tartine Bread.

Thursday, April 7, 2011

Pain de Campagne: My Midweek Bread

Pain de Campagne
This is my most recent bread: Pain de Campagne. It's not aesthetically perfect, but it was flavorful and light (all the water cooked out of it).I wanted the holes in the bread to be larger and more irregular like they used to be when I baked it at my alma mater. I will try another loaf next week or the following week. Today I have to start another country loaf from Tartine Bread (I am making one as a thank-you gift for a friend who helped me resurrect my computer last week and partook of my second, quite successful attempt at the recipe).

The main problem that I ran into with this country loaf was that it got so big. It was so big it wouldn't fit under my broth pot and the edges got slightly squished. This is probably because my shaping technique is still not good enough and I did not develop enough surface tension for the final proofing (I tried to make a boule instead of a bouton d'ore). I also added an autolyse to the recipe (only 15 minutes) to see if that might make the kneading easier (which it did), but I am worried that this essentially worked as an extension to bulk fermentation and the baker's yeast. Thoughts?
Crust

Crumb
Another attempt will be coming soon. However, this one tasted fantastic, so I shall consider it a medium-grade success.