Showing posts with label Cookies. Show all posts

Monday, September 30, 2013

Amazingly Delicious Cookies

In my last post, I mentioned that I had tasted some of Sue's food from her blog. It was these almond butter chocolate chip cookies. They are absolutely incredible. I recommend them most highly.

I will be posting more of my own food just as soon as I get back on my feet with my work.

Friday, December 21, 2012

Holiday Cookies

One of my favorite things about the holidays is holiday baking. I get the excuse to make a lot of things that I don't need to eat in order to give them to friends and family (i.e. I can make things with lots of calories without feeling nearly as guilty).

Here are some pictures of my newest batch of cookies. Servia decorated them. I will post a recipe soon.


 I hope everyone is having a happy holiday season. I know that mine has been pretty hectic, but also a lot of fun. I just need to get my work done on top of all this...


Saturday, December 10, 2011

The Philosophy of Baking

So yesterday our Kitchen Aid mixer came. Servia and I decided that would be our early Christmas present and we could use it for some holiday baking. We searched around for a while and found a refurbished one on the Kitchen Aid website. Excited to try it out, we made two batches of cookie dough last night.

The Kitchen Aid is shockingly efficient. In about 30 seconds it can cream butter and sugar to a consistency that it would take me at least 10 minutes to achieve. It was amazing.
Creamed Butter and Sugar
The one thing that bothers me is that with this machine baking is a streamlined process. Although I certainly sample the fruits of my baking, I started baking in order to relieve stress. Baking is very physical-- creaming butter or kneading bread requires strength and skill. Even though I have been remiss on hitting the gym (and I primarily do cardio when I have), I have little muscles in my arms from kneading bread dough. Without the physicality of baking, it turns the stress relief from stress baking to stress eating, which can be very dangerous. So is this appliance going to ruin how I bake?

No. In reality, the efficiency can be extremely helpful. I often have to make a dessert for my final class of a session, etc when I'm stressed and have other things to do. Furthermore, one of the batches of cookies I made last night are my dark chocolate shortbread cookies. These cookies are a big hit, but they are actually more frustrating to bake than I would like. The dough is extremely dry and very hard to combine to the correct consistency. The Kitchen Aid made them without the frustration and they were suddenly both simple and delicious.

Thus, I have (quickly) made peace with the mini-factory in the kitchen. I will still probably make almost all of my bread by hand (with the exception of trying this amazing loaf of deliciousness that I've been eying for ages). However, over the holidays when efficiency is paramount, I have a feeling the new Kitchen Aid and I will become fast friends.

Monday, February 14, 2011

Valentines Day Cookies


Before Cerinthus, Valentine's Day was, for me, a chocoholic holiday. Although I am no longer a real chocoholic (see my blogpost on the subject) I do occasionally indulge myself. Today I decided to make some chocolate shortbread to celebrate the holiday, since Cerinthus is not around. A recipe came up on my iGoogle and I decided to modify it and try it. If you love chocolate, these are the cookies for you. They are rich and delicious-- but not too sweet-- and can be made into hearts for a special occasion.

Chocolate Shortbread
Ingredients
  • 1 cup all-purpose flour
  • 3/4 cup unsweetened baking cocoa (the recipe suggested Hershey's Special Dark because it makes the cookies black and they look really cool).
  • 1 tsp salt
  • 3/4 cup butter (room temperature)
  • 1/2 cup + 2 tablespoons sugar
  • 2.5 tsp vanilla
Directions
  • Preheat oven to 325F and take out two non-stick baking sheets or line two baking sheets with parchment paper.
  • Sift together the flour, cocoa powder, and salt in a bowl. (Do not skip this step as cocoa powder has a tendency to clump. You want the dry ingredients sifted to ensure a tender cookie.) Set aside.
  • Cream the butter and sugar by hand. Then add the vanilla and mix in. If you do not want to cream by hand, follow the instructions in the original recipe.
  • To make hearts, I placed the dough on wax paper rolled the dough into a log with about a 2 inch diameter. Then I left it in the refrigerator (wrapped in the wax paper) for about an hour. After the hour, I took it out and pressed two of the sides into the counter, making the log a triangle with one rounded side. Then make a small indentation int he rounded side, running the length of the log. Cut the log into 1/4 inch thick cookies and tweak the shape to make them hearts. Alternatively, roll to about 1/4 inch thick and cut into desired shapes and place on the baking sheets about 1-inch apart
    A finished cookie, one cut from the log, and the log.
    • Bake the cookies for 15min 30sec (or that's what I did) or until they are sightly hard around the edges and smell like fresh-baked cookies.
    • When they cool slightly, sprinkle with powdered sugar.
    Enjoy! These cookies are VERY RICH. Be warned.

      Friday, January 21, 2011

      Cornstarch? We Don't Have Cornstarch!

      I spoke in a previous blogpost about an easy recipe for vanilla shortbread, which I dipped in chocolate. Since these cookies went over so well during the holidays, I decided I would make a batch to bring to my Alma Mater when I visit this coming week and give the cookies out to friends like Propertius II and Ponticus. When I was making the dough last night, I only had 3/4 of the corn starch necessary to make the cookies. Industrius as always, Servia thought we should replace the missing cornstarch with either flour or powdered sugar. We settled on a half and half mixture of the two in order to try to preserve the fine grain of the cornstarch with the powdered sugar but not make them too sweet (hence the flour).

      The cookies looked similar, but did not feel quite as heavy coming out of the oven. Tasting one, I realized that the flavor of the cookie is actually enhanced by the powdered sugar, but the texture is too light for the cookies.
      Cookies, waiting to be dipped.

      Update 02/01/11: Cookies were a hit amongst my friends at my Alma Mater, although I still ended up with some left over. Even Cerinthus liked them.

      Note: The reason this blogpost is titled "Cornstarch! We Don't Have Constarch!" is because Servia went to Trader Joe's and remembered that we needed cornstarch for the cookies. When she asked, the employee said in a very severe tone: "We don't have cornstarch."

      Friday, December 24, 2010

      The Disaster that Wasn't: Almond and Chocolate Ganache Thumbprints

      I remember as a kid going to the grocery store and begging for a "thumbprint" cookie. These cookies were shortbread thumbprints with chocolate ganache, and they were amazing. However, no piece of shortbread was ever quite like those from the thumbprints.

      Recently I discovered in Joy of Cooking Christmas Cookies that they have a thumbprint recipe and the secret is: it's almond shortbread. The recipe in Joy of Cooking Christmas Cookies is a lowfat version (supposedly), but it still tastes great!

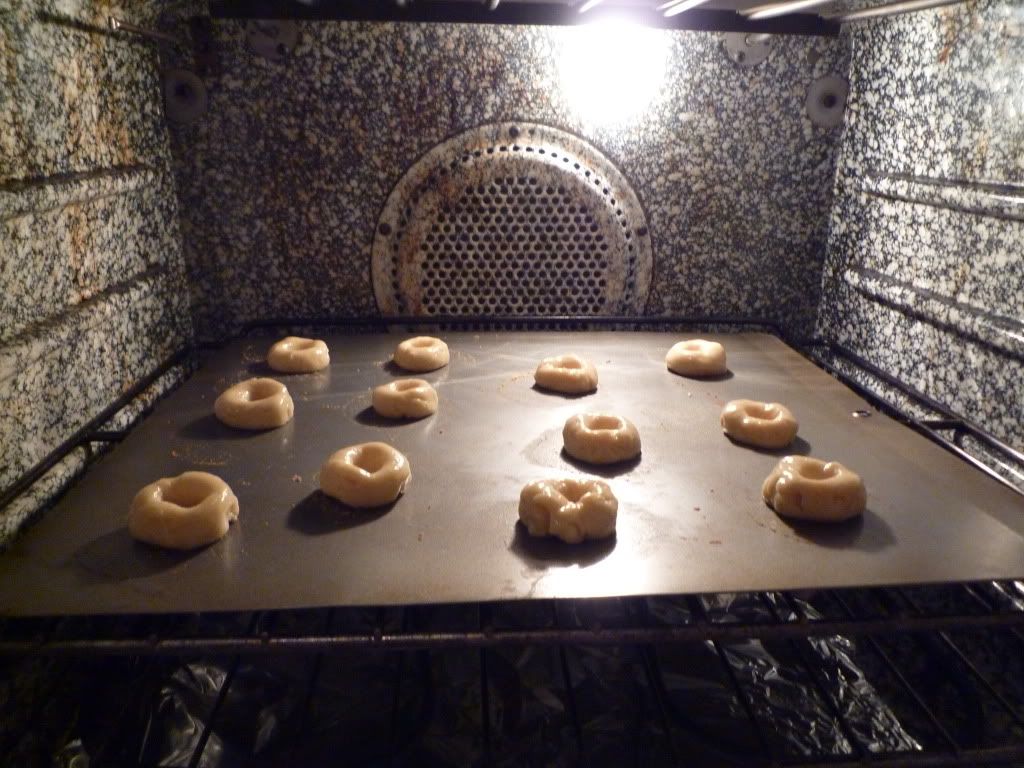
      There is one problem with the Joy of Cooking Christmas Cookies recipe: it does not hold its shape. Although they looked good when they went into the oven...

      Make them into balls and then make a deep knuckle-print in them.
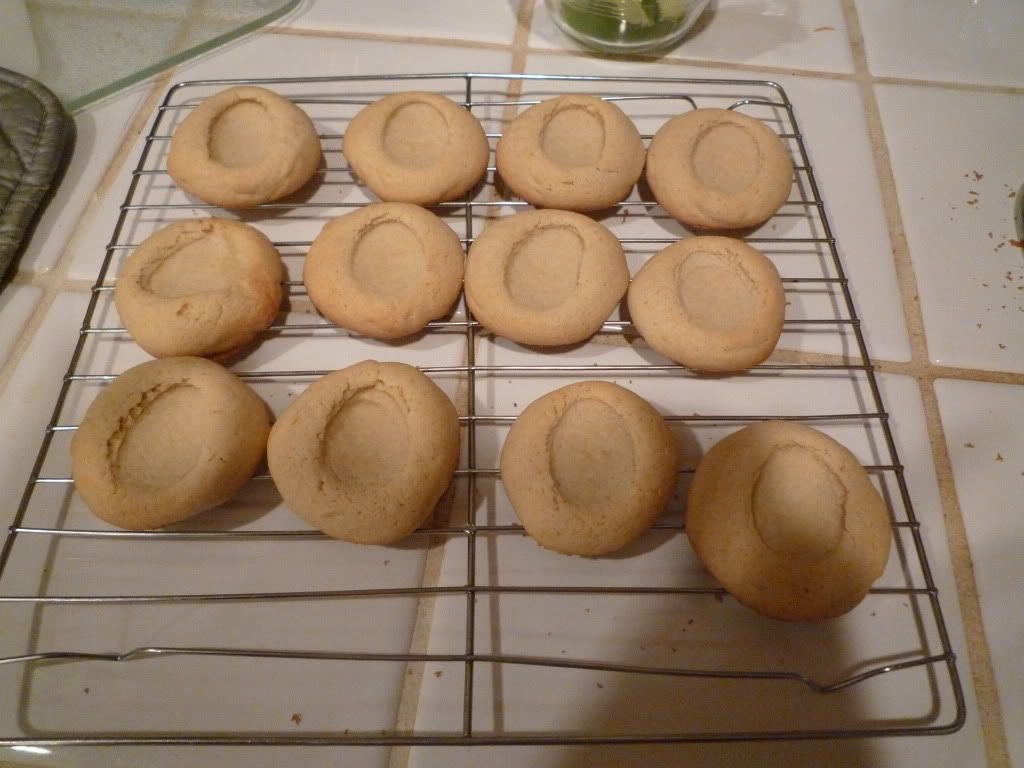
      They don't come out looking right unless, about 6 minutes in, you re-print them with a small spoon. When I noticed, I totally freaked out, but they turned out fine.

      Baking complete. Now for Ganache!
      Ingredients
      • 1 1/2 cups (7.5 oz) all purpose flour
      • 1/3 cup (1.5 oz) cornstarch
      • 3/4 teaspoon baking powder
      • 1/4 teaspoon baking soda
      • 1/4 teaspoon salt
      • 3 1.2 tablespoons (1.75 oz) unsalted butter, softened
      • 3 tablespoons canola oil
      • 1 tablespoon light corn syrop
      • 1/2 cup (3.5 oz) sugar
      • 1 large egg
      • 2 1/2 teaspoons vanilla
      • 3/4 teaspoon almond extract
      Directions
      1. Preheat the oven to 375 degrees Fahrenheit.
      2. Stir together flour, cornstarch, baking powder, baking soda, and salt with a fork or wire whisk
      3. Beat together with a fork (or an electric mixer) butter, canola oil, corn syrup, sugar, egg, vanilla extract, and almond extract.
      4. Combine wet and try indgredients and beat until smooth.
      5. Slightly oil hands and pull of chestnut-sized bits of dough and roll them into balls. Place the balls on a non-stick cookie sheet.
      6. Using your thumb or a knuckle, create a deep well in the center of each ball.
      7. Bake for 5-6 minutes.
      8. Take the cookie sheet out of the oven and redo the indents with a small spoon or similar device.
      9. Replace the cookie sheet into the oven until cookies are just barely tinged with brown around the edges.
      10. Take out the baking sheet. Let it sit for 1-2 minutes and then transfer the cookies to a baking sheet to cool.

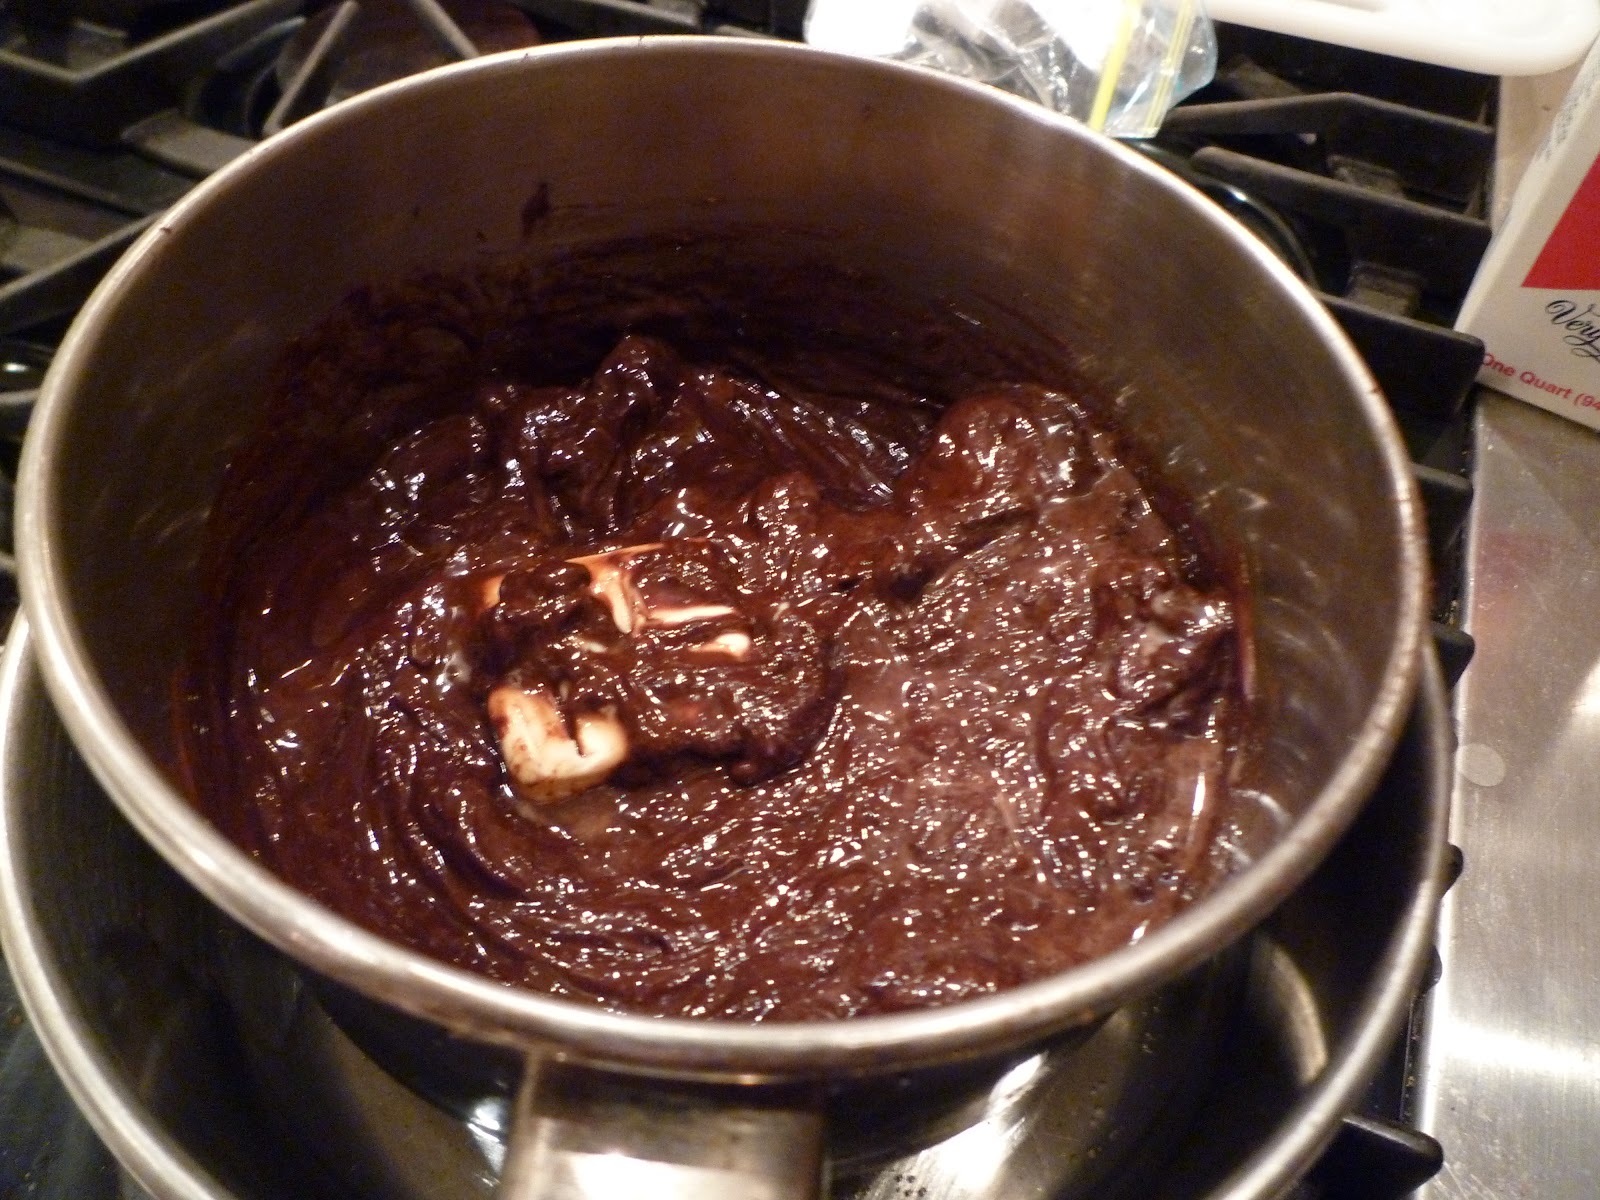
      Then Servia made chocolate ganache. The recipe is easy. The ganache will harden-- don't worry. It took much longer than the recipe suggested, but we let them sit overnight and they were great.

      Ganache in process: Step 4.

      Ingredients
      • 6 oz semisweet baking chocolate
      • 1 tablespoon butter
      • 1 tablespoon light corn syrop
      • 2 tablespoons heavy whipping cream

      Directions
      1. Take two saucepans (one which will fit inside the other) or a saucepan and a heat-proof bowl. Fill the larger saucepan with water and bring the water to a slow simmer
      2. Put the smaller saucepan (or bowl) into the larger one (face up) so that it heats up in the water.
      3. Melt the chocolate in the inner saucepan.
      4. Add the butter, corn syrop, and whipping cream.
      5. Stir until the ingredients until they create a silky smooth ganach.
      6. Using a spoon, fill each thumbprint with 1 teaspoon of ganache.
      7. Let sit to to dry until the ganache is hard to the touch-- at least 1.5 hours, but may take more.
      These cookies are amazing. Don't eat too many!

      Updates 12/27/10: some pictures of the final stages of the cookies.
      Servia fills the indentation with chocolate ganache.
      A perfect thumbprint.
      The Cookies.
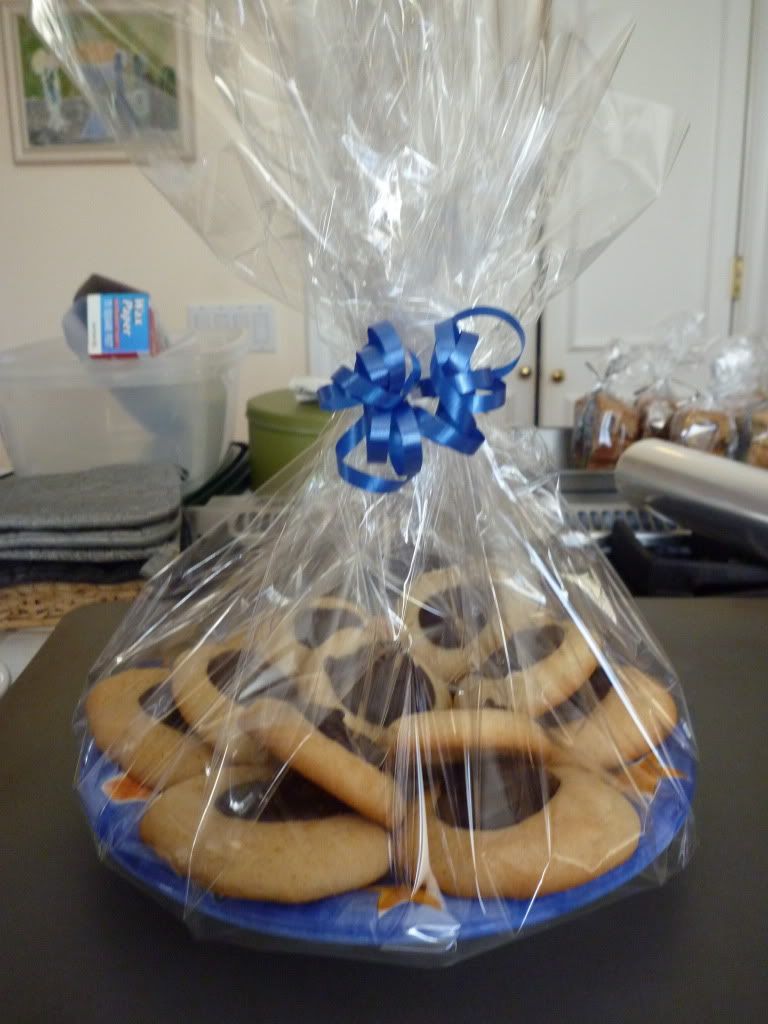
      The cookies were lovely, and we gave them away as gifts at Christmas.
      Wrapped and ready.

      Thursday, December 23, 2010

      Picture Updates for the Holiday Recipes (and Reviews), Part III

      The Gỏi Cuốn rolls were a smash hit at the Christmas party last night! I made them correctly with white rice and cilantro and cut them in half so they were finger-food size. A number of people asked me for the recipe. I felt pretty awesome.
      The bed of spinach and rice on the rice wrapper.

      Add the cilantro and the carrots.

      Add the cucumber, fold in the edges, and roll.

      The first few rolls on the platter.
      Fairly easy to make and an absolute hit. I highly recommend them.

      I also made vanilla shortbread the other night, which we are going to dip in chocolate. It's a very simple recipe. We got real vanilla beans-- my favorite-- from Costco. When I was a little kid, I always shied away from things with vanilla bean in them because I thought the little black specs looked like-- and possibly were-- bugs legs. In reality, vanilla bean lends a wonderful, strong vanilla flavor, and makes your dishes look very fancy. Here is the recipe:

      Ingredients
      • 1 cup butter
      • 1 cup sugar
      • 1 1/2 cup flour
      • 1/2 cup cornstarch
      • 1 tsp vanilla extract
      • 1 vanilla bean
      Directions
      1. Cream sugar and butter together. Mix until fluffy.

      3. Add flour and cornstarch. Mix until it becomes a smooth dough.
      4. Add vanilla extract. Slice open the vanilla bean and scrape out the black granuals from within and add them to the dough. Mix until they are distributed through.
      A vanilla bean. Slice open and scrape.

      5. Either make into a log and wrap in wax paper to put in the refrigerator or make into walnut-sized drops and bake for 20-23 minutes at 325 degrees Fahrenheit.

      Update 12/23/10: No idea why I said 450 degrees-- the cookies should actually be baked at 325 degrees Fahrenheit. Also, I made them today so I took some pictures:

      I only made half the log because I might want to make some more later, so I cut half into just under 1/4 inch cookies, and rolled the rest in wax paper and put it back in the refrigerator. 
      Half the log returns to the fridge.
      I put these in for almost 28 minutes. The edges should change slightly in color, but the color of the cookie will not change very much.
      Shortbread, just out of the oven


      As a good omen for the holidays, after several days of rain, there was a beautiful double rainbow yesterday.

      Tuesday, December 21, 2010

      Picture Updates for Holiday Recipes (and Reviews), Part II

      I tried the Gỏi Cuốn tonight that I talked about in "Touch at Your Own Risk" and updated in the first installment of "Picture Updates for Holiday Recipes (and Reviews)". We are bringing some to a party tomorrow. Here is the review:

      They are great! I love salad rolls, so I actually like them plain (we made them with brown rice instead of white rice, so they taste a little more interesting, but I totally forgot the cilantro when I made them). I highly highly recommend them. Also, the peanut sauce is fabulous. I am including the recipe below. I did not really like the spicy sauce, which is funny because I love spice. It's not too hot, it's just not interesting enough. The peanut sauce had a fuller body and more interesting flavors.
      Sweet Peanut Sauce from MYOTG. Amazing.
      Ingredients
      4 tablespoons soy sauce
      2 tablespoons peanut butter (smooth or crunchy)
      1 tablespoon molasses
      1 tablespoon brown sugar
      2 teaspoons white wine vinegar
      1/8 teaspoon garlic powder
      2 teaspoons sesame oil
      20 drops hot sauce, habenero
      1/8 teaspoon black pepper.

      Directions
      Whisk together all the ingredients until a relatively homogeneous mixture (with the exception of the peanut pieces if you are using crunchy peanut butter).

      I also made the dough for another batch of Icebox Cookies (the cookies I talked about in "Holiday Spirit is all about Cookies").
      After Step 3:
      Wet ingredients, beaten fluffy by hand.
       After Step 5:
      The dough, ready for refrigeration.
       After Step 6:
      Ready to go into the freezer.
      I will be making these cookies at some point during the Christmas holidays. It's nice to know that I have something I can have ready in 30 minutes.

      Monday, December 20, 2010

      Picture Updates for Holiday Recipes (and Reviews)

      Tonight I made the two sauces for the Gỏi Cuốn (from "Touch at Your Own Risk") and the blond brownies (from "How Early is Too Early for Holiday Cheer").

      First, the Gỏi Cuốn:
      The Spicy Sauce, with red chillies:
      Spicy Sauce with seeds left in for extra heat.

      The Sweet Peanut Sauce (using chunky peanut butter):
      Peanut Sauce may look funny, but tastes great!


      Then, the blond brownies:
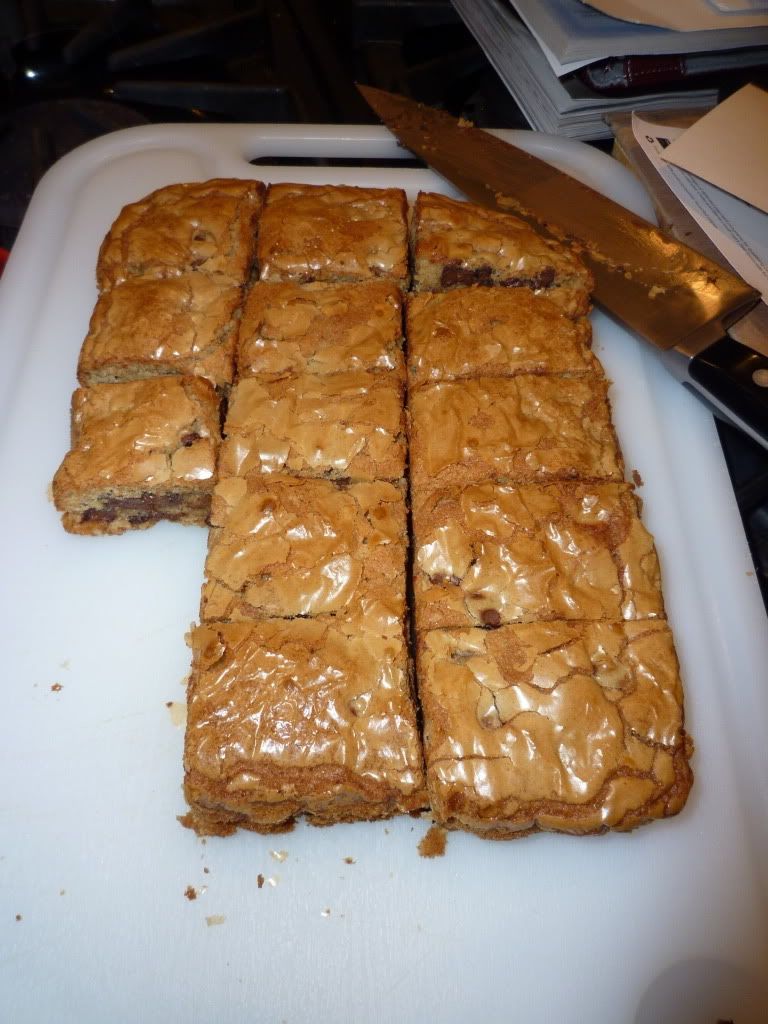
      Also, update, the blond brownies are excellent! They are very rich and much as I remember them as a child. Note: I used semi-sweet chocolate chips. This is great for dark chocolate and traditional chocolate chip cookie lovers. However, for those with a serious sweet tooth, substitute milk chocolate chips.

      After Step 5:
      The "wet" ingredients.


      After Step 10:
      Into the pan, hoping the aluminum foil works!

      After Step 13:
      Once it came out, cooked through.
      After Step 13:
      The foil pealed off easily once they cooled.


      More Coming Soon!

      Holiday Spirit is all about Cookies

      More than ever, this year, holiday spirit seems to be tied to cookies. My perspective may be skewed slightly by the websites that I read, many of which are cooking blogs, as well as a recurring theme of trying to make the holidays healthier by either modifying cookie recipes or abstaining from cookies on Sparkpeople.com. Consequently, I recently made a batch of my first holiday sugar cookies and brought them to my class. As it turns out, homemade sugar cookies (in combination with the majority of the class hardly sleeping the previous night) can make grammar really exciting! Who would have thought.

      I used the icebox sugar cookie recipe in the Joy of Cooking Christmas Cookies (with very slight modifications, found here) and the students loved it (they were shocked the the cookies were homemade). They finished every last one.

      Warning: the cooking time and the active preparation do not take a long time, but there is at least 3.5 hours worth of waiting involved. Plan accordingly.
      Ingredients:
      • 1 1/2 cups (7.5 ounces) all-purpose flour
      • 1 1/2 teaspoons baking powder
      • 1/4 teaspoon salt
      • 2/3 cup (5.25 ounces) unsalted butter.
      • 2/3 cup (4.75 ounces) sugar
      • 1 large egg
      • 2 teaspoons vanilla

      Directions:
      1. Thoroughly stir together and set aside the flour, baking powder, and salt.
      2. Cream the butter and sugar and beat until fluffy. (The recipe says with an electric mixer and it says to soften the butter. I took the butter straight out of the refrigerator, chopped it into small pieces put it in and made it fluffy by hand with a fork. Either way works).
      3. Add to the creamed butter and sugar mixture the egg and vanilla. Continue beating until these are incorporated.
      4. Mix in the flour mixture until just smoothly incorporated.
      5. Cover and refrigerate until slightly firm, 20-30 minutes.
      6. Upon removing from the refrigerator, place the dough on a long sheet of wax paper. With lightly oiled hands, shape into an even, 11-inch long log. Roll up the wax paper and twist the end to prevent unrolling.
      7. Place on a tray and put in the freezer until completely frozen. You can also leave the log in the freezer for up to three weeks, but if you are going to do this, wrap the log in an airtight bag before placing it in the freezer.
      8. To bake, preheat the oven to 375 degrees Fahrenheit. Lightly grease the cookie sheets or use a non-stick baking sheet.
      9. Carefully peel the wax-paper off the log and cut into 1/8-1/4 of an inch slices, immediately transferring them to the cookie sheet and spacing about 2 inches apart.
      10. Decorate the cookies with colored crystal sugar.
      11. Bake the cookies on the upper oven rack for 7-10 minutes (note:: I experimentally verified that they do not work out so well in a toaster oven-- they puff up and burn).
      12. When the cookies are golden all over, remove them from the oven. Transfer the cookies to wire racks to cool.
      13. NOTE: these cookies do not taste good warm. I don't know why. They taste much better when fully cooled. They can also be stored, airtight, for up to 3 weeks.


      Joy of Cooking Christmas Cookies 

      I thought I would also share some other Christmas cookie fun for the sake of your holiday cheer. Two recipes one for sugar cookies and one for "butter cookies" from My Year on the Grill. One Perfect Bite also did a holiday cookie roundup.

      My mom also sent me this cute piece by a "dough artist" the other day. I have to say, as a kid, I was always disappointed watching the ball drop on TV. The ball dropping depicted by this artist is much more along the lines of what I expected.

      Happy Holidays, everyone!

      Tuesday, November 30, 2010

      How Early is Too Early for Holiday Cheer?

      I love the holidays. In past years, I mostly loved them because I could listen to holiday music and sit by the fire while I did my homework or read. Now, I am not in school and I have been busy and lazy about getting my work done. When I was in school, I remember how much it bothered me when holiday advertising began too early (especially pre-Thanksgiving). I always had papers or finals and I wanted to only taste the holiday cheer in the last few weeks before vacation, so I did not get too antsy.

      So, this year, I decided no holiday music or movies until Decemeber first. But, in terms of baking ideas (one of my favorite parts of the holidays), I figured it was reasonable to search around. Although I really should not eat holiday cookies or deserts anymore, and over the last two years I have been reasonably restrained, I can still enjoy baking them and having the wonderful smells fill the house. I can give the desserts away as gifts or feed them to friends.

      This year, I found one thing I probably will not be able to resist having entirely. When I was a kid, one of my favorite desserts (and probably foods) in the whole world was an Angel Kiss. It was a blond brownie with chocolate chips lightly drizzled in a chocolate sauce. Yum! I have not had one, since I was about 10, but I found a recipe for something similar in Joy of Cooking Christmas Cookies and I just cannot resist modifying it into my old favorite. Here is the modified version of their "blondie" recipe. I have not tried it yet, but I will try it in the next few weeks.


      Ingredients
      1 cup (5 oz) all-purpose flour
      1/4 tsp baking powder
      1/8 tsp baking soda
      1/8 tsp salt
      1/2 cup (4 oz) unsalted butter
      2/3 cup (5.25 oz) packed light brown sugar
      1/4 cup (1.75 oz) sugar
      1 large egg + 1 large egg yoke
      1 tbsp light corn syrup
      1 1/2 tsp vanilla extract
      1 cup (1/2 package) semi-sweet chocolate chips

      Directions
      1. Heat the oven to 350 degrees F.
      2. Mix together flour, baking powder, baking soda, salt
      3. In a large saucepan, boil butter for about 4 minutes stirring constantly until a light golden brown.
      4. Remove from the heat. Stir in sugar and brown sugar.
      5. Let the mixture cool until barely warm.
      6. Add egg, egg yoke, corn syrup, and vanilla. Stir until thoroughly blended.
      7. Add flour mixture. Stir until entirly mixed in.
      8. Add chocolate chips. Stir until evenly incorporated.
      9. Prepare an 8 inch baking pan. Place a piece of aluminum foil in the bottom of the pan son that it hands over the narrow ends of the pan by about 2 inches.
      10. Spread the batter evenly in the pan.
      11. Bake on the middle rack of the oven for 28 to 33 minutes, or until the top is golden brown and a toothpick inserted into the thickest part comes out clean
      12. Transfer the pan to a wire cooling rack and let stand until cool. 
      13. Using the overhanging foil as handles, lift the bar to a cutting board. Peel off the foil and cut into bars.

      I will have to get back to you for a recipe on how to make the chocolate sauce and also as to whether these blond brownies turn out the way that I remember. If anyone tries it out, please comment!

      Update from 12/20/10:
      I made them. They are excellent and exactly how I remember them (although still without the chocolate sauce). There is a short preliminary review and more pictures on my blogpost "Picture Updates for Holiday Recipes (and Reviews)."