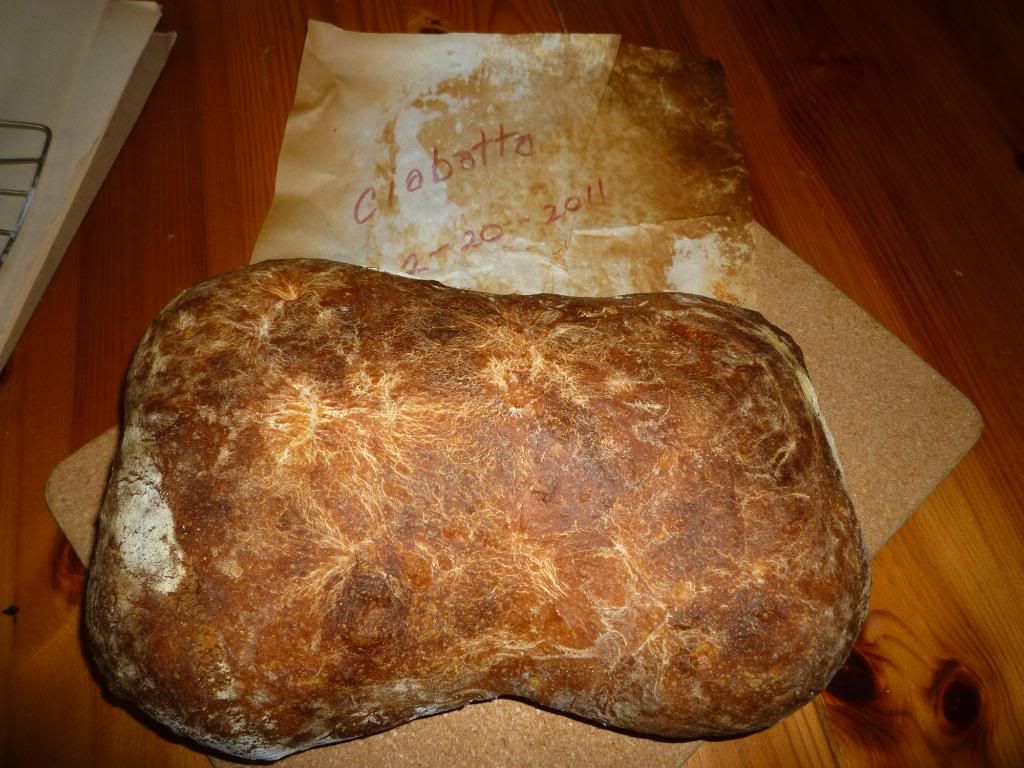
Showing posts with label ciabatta. Show all posts

Sunday, June 26, 2011

I Finally Got It Right This Time (well..mostly)

 My ciabatta was great! Very light and flavorful. As you cans see, the wholes are a little bit regular meaning that it was probably slight overproofed during the bulk fermentation, but it was wonderful all the same. And it was my own recipe! I put the recipe down as I meant to make it rather than as it was actually made (as I over-proofed it a bit.

Recipe
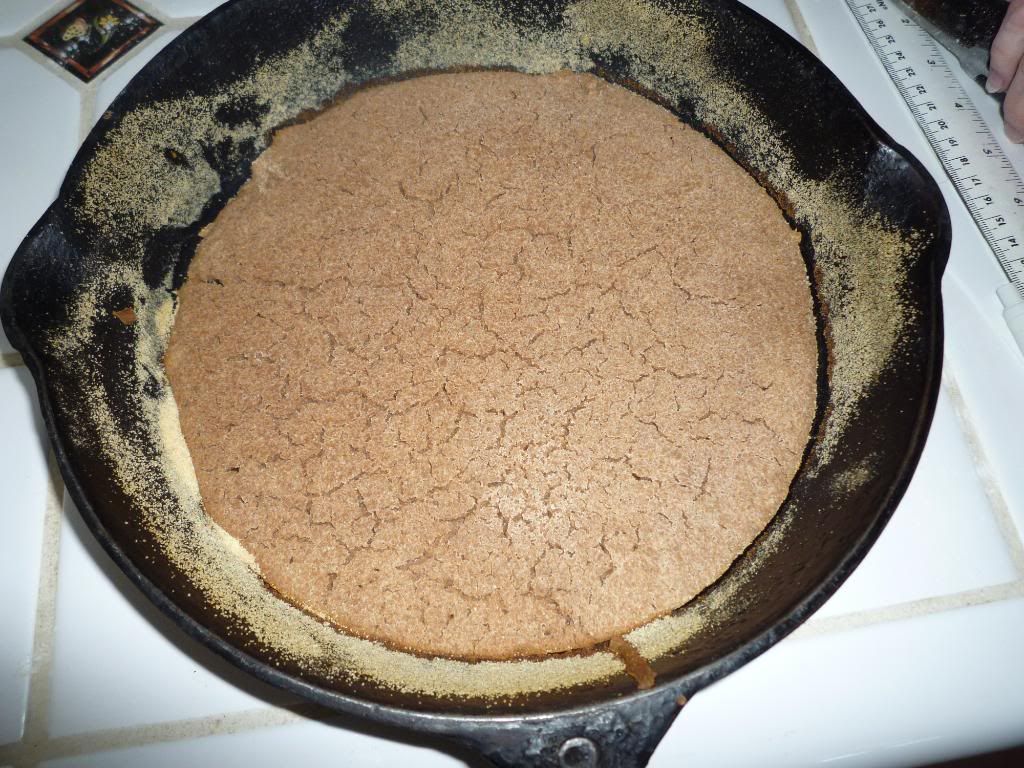
Sourdough Starter Elaboration
75g of whole wheat sourdough starter (100% hydration)
162g whole wheat flour
163g water (about 75 degrees F)

Dough
245g Bread flour
175g water (about 75 degrees F)
10g Salt (2t)
400g Poolish (all of it)
14g Olive Oil

Directions
Mix together the ingredients for the sourdough starter elaboration until they are completely incorporated. Let sit for 4-8 hours for it to almost double. If you don't want to use it immediately, put it in the refrigerator for up to four days.
 
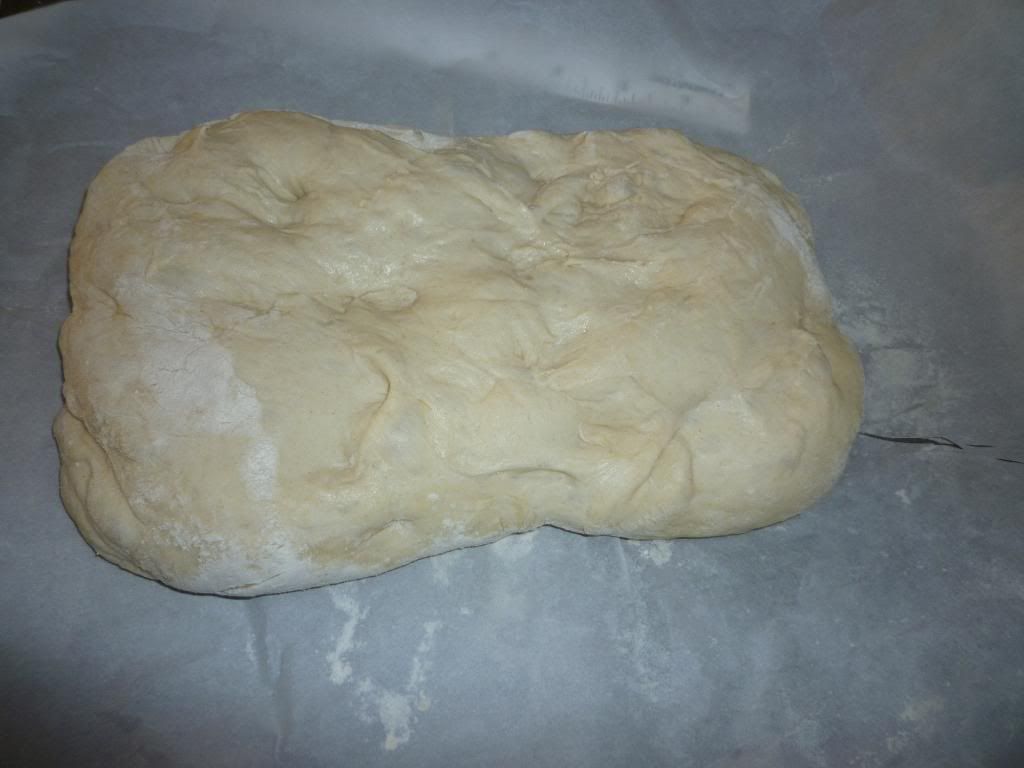
Use the starter immediately or remove it from the refrigerator and use it immediately or after it warms up. If you use it directly out of the refrigerator, use slightly warmer water. Mix the starter with the water, then mix in the flour and the salt. Mix until the dough is course and sticky. Let the dough rest for five minutes in order to fully hydrate the flour.

Drizzle the olive oil over the dough. Kneed by hand for 2 minutes. Let sit for 5 min.

The dough is stretched-and-folded 4 times over a 40 minute period (as per Reinhart's instructions).

  Place in a lightly-oiled bowl, cover with plastic wrap, and place in the refrigerator overnight.

After this initial rise, place the dough in the refrigerator overnight.

On the next day, remove the dough from the refrigerator about 4.5-5 hours (perhaps a little longer) before baking (if you let it rise at about 75 degrees). At about 1.5 hours in, go through the shaping process.

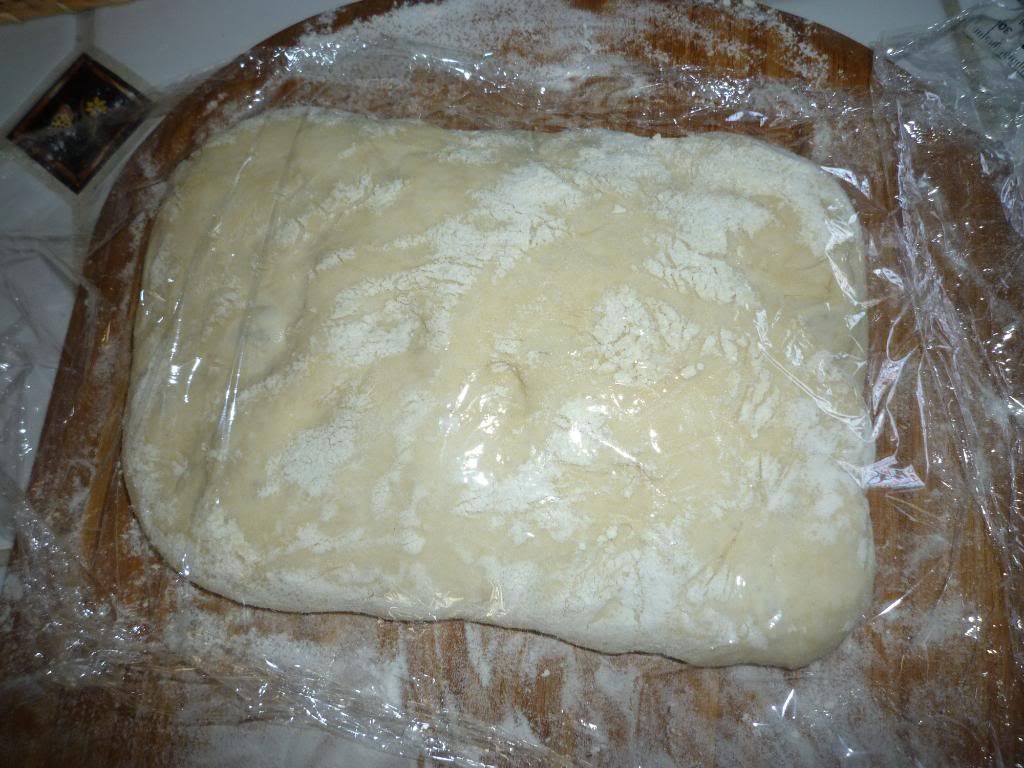
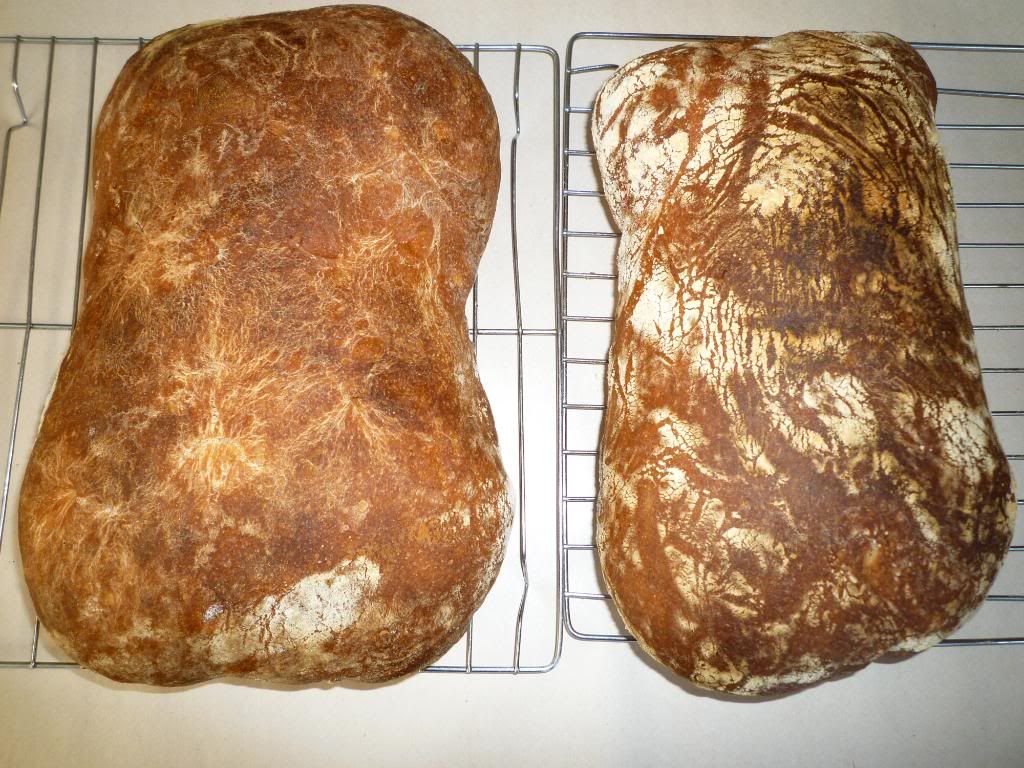
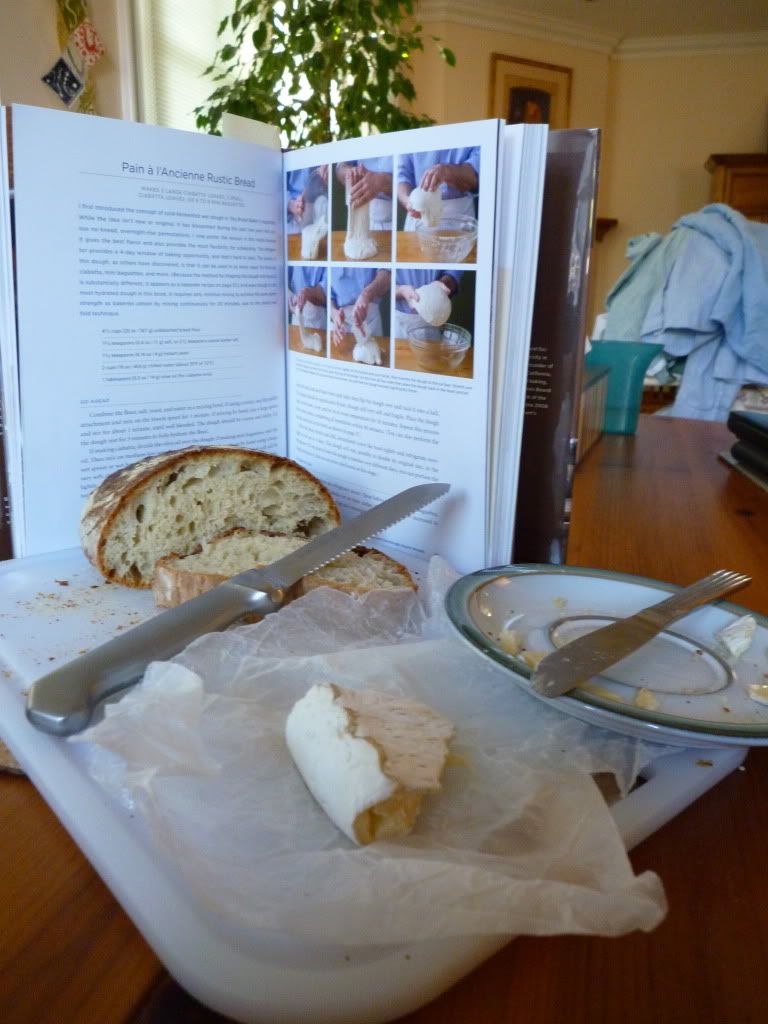
To shape, turn the dough out onto a floured surface. shape the dough into a rectangle a loose and cut into two pieces with a bench knife or a large, sharp kitchen knife. Gently, without degassing, stretch the dough a little and then fold it in thirds, placing it on a floured surface, seam side down. Dust the top with flour and place under a bowl or under plastic wrap. Let proof for an hour under plastic wrap. Turn seam-side up and stretch into loaves and pat the sides gently to make them rectangular. If you want, you can place them on lightly floured parchment paper, or proof them on the floured surface (if you plan to put the loaves directly onto a peel and then into the oven). Let proof for another two hours. Heat the stone about 30 minutes before you begin to bake. You can load directly from a peel or use a peel or a baking sheet to load one on the parchment paper. Bake at 450 degrees F (or 425 convection) for 15 minutes under steam and then turn the bread around in the oven for 15 minutes to finish. 


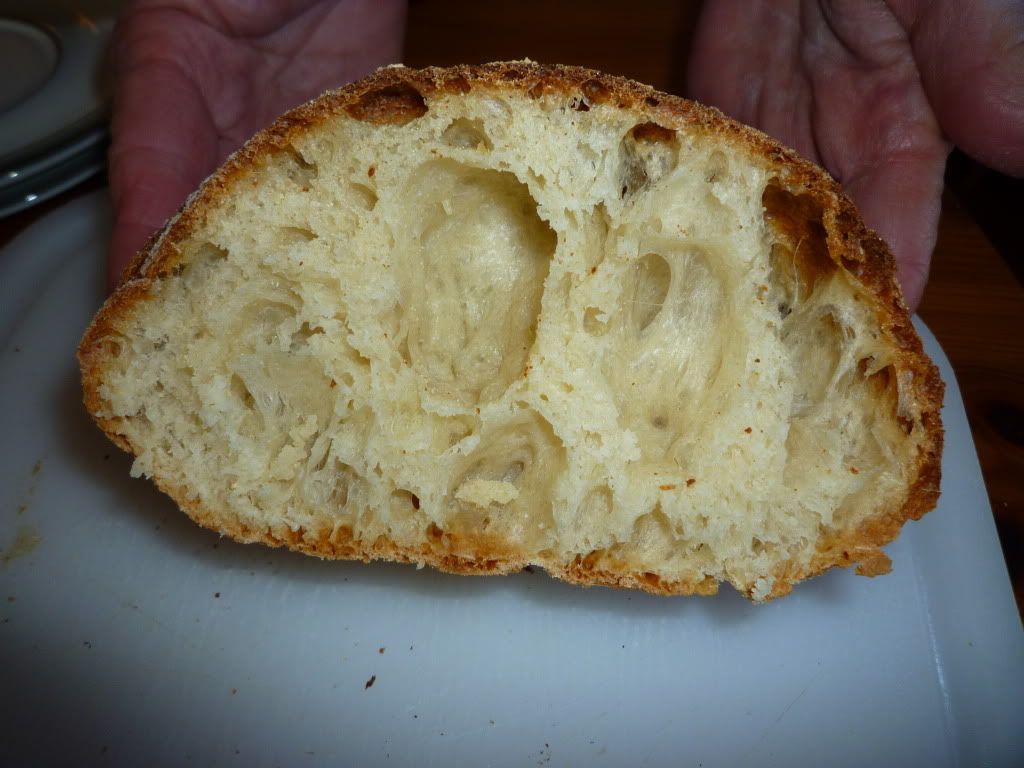
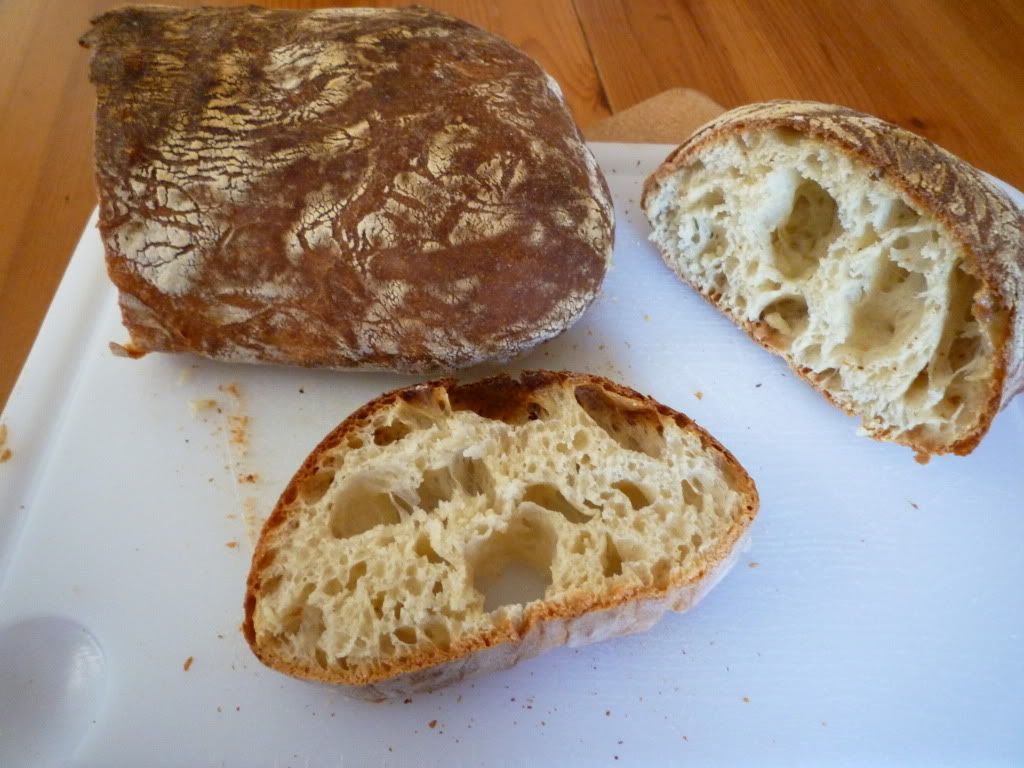
The bread was fantastic. Enjoy!

Saturday, June 25, 2011

Ciabatta - Yet Another Formula

It's been a busy couple of days. I've been doing some emergency tutoring for a student with an impending exam as well as reading Greek and getting used to studying for my German class.

As a break, I have decided to try out my half whole wheat recipe for ciabatta as my last off-the-cuff ciabatta recipe turned out so well. We shall see how it works.

Friday, June 3, 2011

Spiked Sourdough Ciabatta

Ciabatta!
My second grade teacher, who was a great influence in my life well past second grade, is moving away to be closer to her kids. I have not seen her in some years, but Servia has kept in touch with her. I wanted to go see her and bring a loaf of bread as a gift so we could all have a parting snack. I wanted to make a sourdough, but something that was not overly sour (as I do not know her tastes very well) and I wanted to make sure it was fresh. I didn't have the full three days to make Tartine Bread, so I decided to make Norwich Sourdough. Unfortunately I left my "elaborating" sourdough starter out on the counter all day until Servia reminded me about it at about 11pm. At that point, it was going to take to long to make the sourdough. Instead, I doctored the Sourdough Pizza Dough recipe to make it into ciabatta. Here was my process:

Ingredients:
Sourdough Starter
  • 100g mature sourdough starter
  • 65g bread flour
  • 65 water
Final Dough
  • 500g bread flour
  • 15g whole wheat flour
  • 400g warm water (95 degrees F)
  • 14g salt (2 tsp)
  • 1/4 tsp dry active yeast
  • 2 tablespoons olive oil
Directions
Day 1:
  • Make the sourdough starter. Let it sit for 4-12 hours.
  • Mix together the sourdough starter with the water, salt, and yeast.
  • Then mix in the flour until you have a smooth-ish mass. Let sit for 5 minutes.
  • Drizzle the olive oil over the dough and kneed the oil into the dough for about 2 minutes.
  • In the bowl or on a lightly oiled surface, use the Peter Reinhart stretch-and-fold technique: do 2 stretch and folds, wait ten minutes and repeat, wait ten minutes and repeat, and wait ten minutes and repeat.
  • Cover the dough with plastic wrap (or similar) and place it in the refrigerator overnight.
Day 2:
  • Take the dough out and place it at room temperature (70-75 degrees) for 2 hours (about 4.5 hours before baking)
  • After the two hours, turn the dough out onto a floured surface. Gently make the dough into a rectangle and fold it in half.
  • Cut that in half and separate the two pieces of dough.
  • Fold each of the two pieces and fold the dough in thirds like a letter. Turn the dough seem side down onto a piece of floured parchment paper.
  • Let the dough rise for 2.5 hours. If the dough pieces seem to small to you, after one hour gently stretch the dough into slightly larger rectangles.
  • 30 minutes before baking, heat the oven and your steaming mechanism of choice to 500 degrees.
  • When ready to bake, slide the dough, parchment and all, into the oven and bake under steam for 15 minutes. 
  • Turn the dough around and bake for another 10-12 minutes, or until the bread is 210 degrees F. It should feel hard on top and be extremely light weight.
I spiked the dough with bakers yeast in order to prevent it from becoming too sour. If you want more sour ciabatta, leave out the bakers yeast and maybe tack on another half hour to the final rise (that is a guess).


My pictures were not particularly artful, but both the crumb and the flavor of the bread was wonderful. An easy, lovely, new ciabatta.

Friday, February 25, 2011

My Very Own Sourdough Ciabatta

Many moons ago on a very early blogpost, I promised a revised version of this recipe for sourdough ciabatta. The blogger who originally posted it had little success. I had a moderate amount of success it worked 3 out of four times, I think, but I want to modify the recipe and figure it out. I am going to write my version of the recipe with running commentary.

Here is what I did:
Poolish
153 grams of whole wheat sourdough starter (100% hydration)
1/2 cup bread flour (I used her volumes, so this is 68 g bread flour)
3 tablespoons water (51 g water)
Kath's starter was 125% hydration. Mine is 100% hydration. This means that instead of the gooey paste that she describes, my poolish is much more like a wet dough. If her volume measurements are accurate, then this dough is 88.2% hydration.
Poolish

Dough
45g Whole wheat flour  (1/4C)
273g Bread flour (2C)
Water 196g (3/8C) plus 46.5 grams as a second addition (total of 370 g)
10g Salt (2t)
272g Poolish (all of it)
14g Olive Oil (1 tablespoon)

I wanted to make my entire bread 80% hydration, like the ciabatta recipe I used to such success from Reinhart's Artisan Bread's Every Day, so I changed things around a little. I am also changing up the directions. 80% hydration breads are very sticky and difficult to work with, but ciabatta is traditionally between 75-85% hydration.

Mix together the whole wheat flour, the bread flour, the 196g of water, the 10g salt, and the poolish. Let sit for five minute for the flour to hydrates. Drizzle the olive oil over. Mix by hand with the slap-and-fold technique with a 2 minute break in the middle for ten minutes. Let sit for 5 minutes. This ended up working very well.

Mix the 46.5g water into the dough using the stretch-and-fold technique, a little bit at a time. The dough is folded 4 times over a 40 minute period (as per Reinhart's instructions). This was quite problematic. The water did not want to absorb into the dough structure of the other bread. All of the gluten bonds seemed to break. I had to reknead the dough significantly and ended up taking about an hour rather than 40 minutes to do so. Anyway, I think this is why the crumb did not turn out to be what I had intended.

Let rise for 3.5 hours. My loaf almost doubled in size. It is possible I should have let it proof for longer so that it would fully double in size. I still do not have a handle on the proper uses of my sourdough starter.

After three and a half hours, shape the dough into a rectangle and cut into two pieces. Gently, without degassing, stretch the dough a little and then fold it, placing it on floured parchment, seam side down. Let proof for another hour under plastic wrap. Turn seam-side up and stretch into loaves. Let proof for another two hours. Bake at 450 degrees F for 12 minutes under steam and then turn the bread around in the oven for 15 minutes to finish. The crumb did not turn out as well as I had intended. It was a fairly dense crumb, although there were some large irregular holes throughout. However, there were small air-bubbles in the dense parts of the crumb and the flavor of the bread was nutty and mild. It's just not perfect. I don't know whether it's my sourdough starter, the recipe, or the kneading technique which is making it dense. Maybe all three? Maybe I need an overnight fermentation process instead of the poolish. If anyone is willing to try out the recipe and provide feedback, I would love to hear it.
Pretty loaves with lovely crust.

Questionable Crumb.
As you can see from this picture, the crumb is not great. Although it is soft and creamy, it's significantly denser than ciabatta should be and the irregular holes are more like tunnels from incorrect shaping than like the beautiful artisan holes of my baker's yeast loaf. However, the bread had a lovely flavor, even if it was the wrong texture. Unfortunately, I do not have enough knowledge to figure out how to fix this problem. Maybe some more experimenting. If anyone has advice, I would love to hear it by comment or email.

Sunday, February 20, 2011

Moderate Success with Pizza Goup and Frankenpatta


Today (and yesterday's) baking experiment was a learning experience, to be sure. The Reinhart ciabatta turned out well with a few small problems while the Rayner pizza dough turned out poorly with a minor upside. First, the bad news, then the good news.

Pizza Goup: Well, no matter what we did, it did not rise. I cooked it anyway. It was flat as a pancake and once it began cracking and looking like the Sahara desert. When I broke it open I was surprised: the bread inside had a light and bubbly crumb (although it was severely underdone because I was afraid to keep it in the oven any longer). I nibbled at the edge, which was cooked. It was actually good! Since I let it sit overnight, it was very sour, but I liked it. I think I might up the salt from 1.8% to 2% if I make it again and I will actually try to make it rise.
Pizza Goup: Out of the oven.
Pizza Goup: the crumb.
Ciabatta: The ciabatta from Artisan Breads Every Day, despite my hesitation, came out beautifully. I did an experiment: I did one of on parchment paper as Reinhart suggests and placed one of the loaves on the pizza peel in my traditional style. I have decided there is no reason to use the parchment paper except maybe for the first proof. I also realized that every oven is different. At least for my oven, the turning the oven to 525 degrees F (our highest setting) before turning it down to the 450 degrees F baking temperature is a terrible idea (Reinhart 54). The bread had beautiful oven spring, but after the first 12 minutes it almost immediately began to burn. After another few minutes I turned it down to 350 degrees F and
after another minute or too tented the bread with aluminum foil to prevent it from burning further. My suggestion is that if you have an oven like mine (and are using an oven stone) just heat the stone up to 450 degrees F. That being said, the bread still turned out extremely well.
The larger loaf, rising for the 3rd time.
The slightly smaller loaf rising on the pizza peel.
The two loves, out of the oven.
A nice, open, irregular crumb.
Crust and crumb!
The Aftermath.
It was lovely. I ended up eating more of it than I intended so it was lucky that I did not have much lunch. If you can get a hold of the book, this is a recipe I would highly recommend, especially with brie, a creamy soup, or as the bread for a sandwich.