Showing posts with label baking. Show all posts

Friday, October 4, 2013

70+% Easy Sourdough

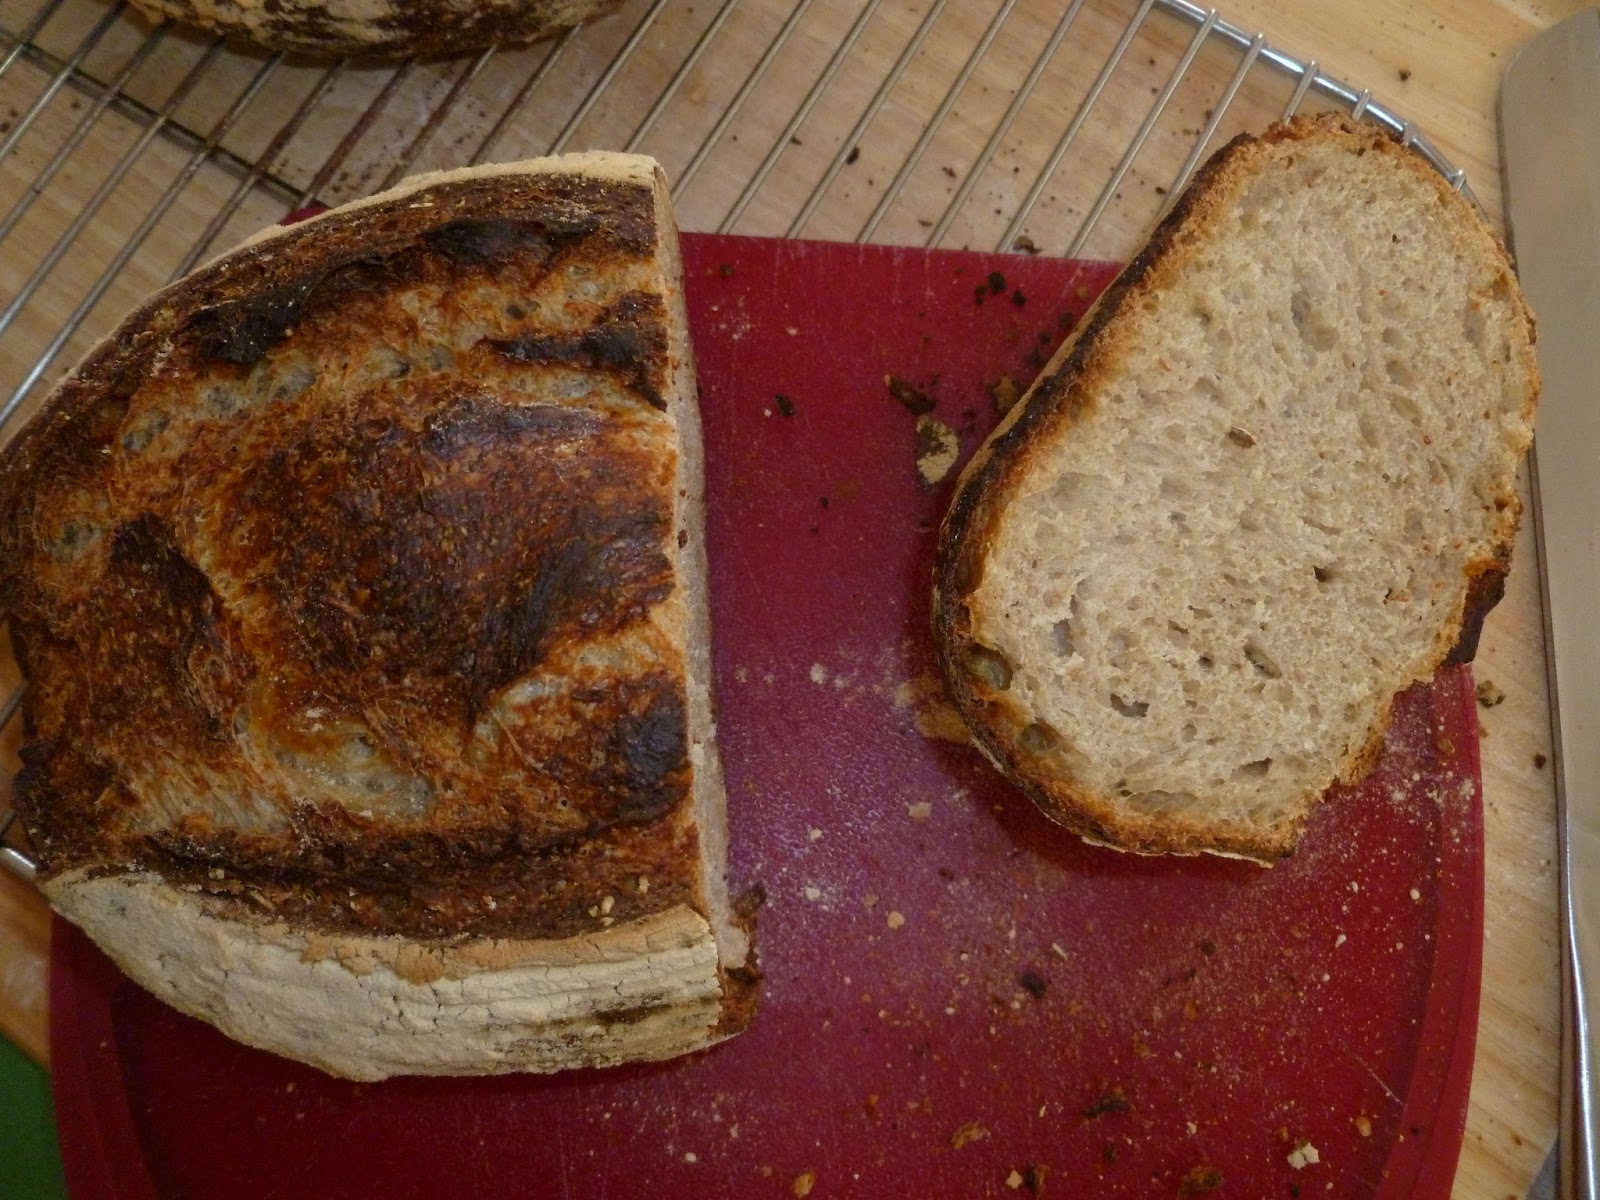
I could have also titled this post PhD bread, since it was the first bread that I made since I started my PhD program. It was somewhat difficult adjusting to my new stone (an 18x18" piece of slate) and my new oven). I think my oven runs quite hot, which means it will be good for pizza, but I burnt the bottom of the bread. Other than that, the bread was delicious. I also made a set of English muffins. On the first day, I divided the dough into two parts after the initial set of stretch-and-folds to make one part English muffins and the other part a loaf of bread.

70+% Whole Wheat Easy Sourdough 

Ingredients
  • 556 g whole wheat
  • 240 g Unbleached King Arthur All Purpose Flour
  • 400 g whole wheat starter
  • 495 g water
  • 23g salt
Method
For Bread
    Day 1
  • Mix the sourdough starter, flours, and water in a bowl. Mix until it forms a homogenous dough.
  • Let the bowl sit for a 30 minute autolyse period under plastic wrap or similar.
  • Then mix in the amarnath, salt, and water. Mix a little and then let it sit for 5-10 minutes to allow the bread to soak up the water. 
  • Knead the bread for 2-3 minutes. Then do a stretch-and-fold.
  • Wait 10 minutes and do another stretch-and-fold.
  • Wait 10 minutes and do another stretch-and-fold.
  • Wait 10 minutes and do another stretch-and-fold. (so 4 times total)
  • Cover the bowl for 45 minutes (at around 75 degrees F) and  do another stretch-and-fold.
  • Cover the bowl for 45 minutes (at around 75 degrees F) and  do a final stretch-and-fold (2 times total)
  • Cover the bowl for 20 minutes  (at around 75 degrees F) to finish the bulk fermentation.
  • Preshape the ball lightly into round.
  • Bench rest for 20 minutes. Cover them with something. If you live in a dry climate, make sure to cover them in an airtight fashion-- I usually turn large bowls over them. While they are resting, flour bannetons or similar shaping devices for the final proofing.
  • Then shape the loaves into your desired shape and place them into bannetons.
  • They need to proof for 1 hour and 45 minutes before they are placed in the refrigerator overnight.
  • Make sure they go into the refrigerator for 16 hours or less.
    Day 2
  • Preheat the oven to 475 degrees F about 30 minutes before you take the dough out of the refrigerator.
  • Take them out of the refrigerator, score them, and immediately place them into the oven under steam.
  • After 20-35 minutes under steam (depending upon how tightly the steam container closes. I would suggest trying about 25 minutes. It is done when it begins to be golden and the tips of the score marks are beginning to be brown.
  • Cook for another 10-15 minutes or until the crust is a rich brown and the internal temperature reaches 210 degrees F.
  • Cool for 45 minutes before eating.
The crumb on the bread was tighter than I might have wished
but the crumb on the English muffins was perfect

For English Muffins
    Day 1
  • Mix the sourdough starter into the water and then add the flour.
  • Mix until the dough forms a homogenous ball. You can do this either with a stand mixer or by hand.
  • Cover the dough with plastic ad let it autolyse for half an hour
  • Then add in the salt and the last 25 of water
  • Knead until medium development (passes the windowpane test). Should take about 10 minutes by hand or about 3-4 minutes by machine.
  • I found this wasn't sufficient, so I turned it a couple of times by hand and then put it in the refrigerator overnight to let the gluten develop the rest of the way on its own. 
  • It sat in the refrigerator for 12 hours. I turned it 2-3 times in the refrigerator before I went to bed with an 45-60minutes in between each term.
    Day 2
  • Take the dough out of the refrigerator and turn onto a lightly floured surface.
  • Spread it out a little, then cover it and let it sit for 10 minutes.
  • Then roll the dough out to about 1" thick.
  • Sprinkle the dough with flour and spread the four over it gently with your hands
  • Transfer the dough onto a floured cookie sheet, lightly flour the surface of the dough, and cover it with plastic
  • Let it sit for about 2.5 hours at room temperature (around 76 degrees) under plastic wrap, bowls, or something else that will prevent a skin from forming.
  • Heat up a griddle or a cast iron frying pan, lightly oiled with spray oil to about medium-low heat
  • Cut muffins of the desired size. Squares, rectangles, or circles all work. If you don't mind ugly muffins, you can take the excess and push it lightly together. If you let it sit for about 5 minutes, this will make a delicious and perfectly adequate (although not aesthetically pleasing) muffin. Make sure that you dust a little flour on both sides of each muffin. Semolina is traditional, but you can use any flour.
  • When the griddle is hot, place the muffins on it and cover with a metal lid. You do not need to oil the griddle, but you may if you wish.
  • In about 3-9 minutes the muffins should be ready to flip over. They will puff up nicely and they will have a surface on top that is not crusty, but has a skin from the heat. Unfortunately, you have to judge this by your
  • Let them brown on the other side before cooling and eating. You can eat them hot, but they will have more flavor if you let them cool. You may also toast them or let them cool and freeze them.
Enjoy!

Wednesday, August 7, 2013

85% Durum Bread

Durum Bread-- mmm...delicious

I've been away from the blog for a little while. In fact, I was a way from my computer for quite a while because my migraines were so bad that I couldn't look at the screen. I'm heading out to the neurologist in a few weeks, but things have subsided for the moment so I'm back.

Today, I baked a loaf of durum bread. I've been salivating over it ever since I saw Cordruta's recipe. I had to make sure that I had both semolina and fancy durum flour in order to make it. I usually don't have much of the fancy durum, as I can only seem to find it at King Arthur and it's fairly expensive.
Delicious-- although the crumb is much more golden in person
Cordruta said that it was it was one of the best breads she ever made. I decided only to make one in order that I should not use up too much of the precious flour. This was a mistake-- the bread is unbelievably delicious. Maybe not my favorite ever, but one of the top few. I expected it to have a warm nutty flavor, but I was wrong. While the crust has a bit of durum's usual nuttiness, the flavor has sort of a slightly sweet, creamy flavor-- smooth and delicate. It is absolutely delicious. I highly recommend this bread to all bread bakers.

The bread came out a little flat and didn't show much oven spring. However, the crumb was gorgeous (see above and below). It wasn't nearly as yellow as Cordruta's, sadly (although it was noticeably more yellow than it turned out in the pictures).
Bread is a little flat, but has beautiful exterior color.

85% Durum Bread
Ingredients
  • 140g whole wheat sourdough starter
  • 225g fancy grind durum flour
  • 170g semolina flour
  • 280g water (separated into 260g + 20g water)
  • 9g salt
Directions
Day 1:
  • Mix the starter, flours, and 260g water until they form some sort of homogenous mixture
  • Autolyse the dough for 30 minutes at room temperature (around 76 degrees)
  • Mix the salt into the remaining 20g of water and gently incorporate this into the dough. Be very careful not to disrupt the gluten. Also, don't over-knead the dough-- it should develop nicely on its own over time. 
  • Fold the edges of the dough into the center around 2-3 times. Be gentle with the dough.
  • Let the dough rest for 3 hours, Make a set of turns (going once around the dough, folding the edges in) every half an hour for the first 2 hours.
  • Turn the dough out onto a lightly floured surface, shape it, and put it int a banneton. Put it into the refrigerator overnight.
Day 2:
  • Bring the bread out. I found that my loaf needed about 2 hours out after 12 hours in the refrigerator.
  • Preheat the oven to 500 degrees F.
  • Put the bread in and lower the heat to 490 degrees F for 30 minutes
  • Remove the steam and reduce the temperature to 460 degrees F for the final 13 minutes.
  • Let cool for at least 1 hour before slicing.
Seriously, this bread is amazing.
Absolutely wonderful open crumb structure
I highly recommend it.

This is just a cool picture of the scoring on the bread.
Cool picture
All photos by Servia.

Sunday, June 30, 2013

English Muffins, Reprised: Oat and Barley Varieties

Today it is 103 degrees F. Seriously. Even with fans and a little bit of air conditioning. The last few days have been a hot spell, which has given me more of a chance to experiment with English Muffins.
Barley English Muffin
While English Muffins are traditionally made with recipes that include fat and sweetner, any dough that isn't too wet to hold a clear shape is fine for English Muffins. If you want the English Muffins to have characteristic nooks and crannies, as I've mentioned before, the best way is to make sure that you have a fairly dry dough that yields and open crumb, such as baguette dough.

English Muffins, 2 options
These, as before, are based upon Susan from Wild Yeast Blog's Norwich More Sourdough, but with a modification of the method and the grains. These are wonderful. The barley ones (option 2) especially, although the oat ones are great as well. I think I might try making some with spelt at some point.

Ingredients
Option 1:
Oat English Muffins
  • 480g 100% Hydration whole wheat sourdough starter (red whole wheat)
  • 300g bread flour
  • 475g Red Whole Wheat Flour
  • 180g Oat Flour
  • 650g water
  • 23g Salt

Option 2:
Barley English Muffins
  • 480g 100% Hydration whole wheat sourdough starter (red whole wheat)
  • 300g bread flour
  • 475g White Whole Wheat Flour
  • 180g barley flour
  • 650g water
  • 23g Salt
Method
Day 1:
  • Mix the sourdough starter into 625g of the water and then add the flour.
  • Mix until the dough forms a homogenous ball. You can do this either with a stand mixer or by hand.
  • Cover the dough with plastic ad let it autolyse for half an hour
  • Then add in the salt and the last 25g+ of water
  • Knead until medium development (passes the windowpane test). Should take about 10 minutes by hand or about 3-4 minutes by machine.
  • I found this wasn't sufficient, so I turned it a couple of times by hand and then put it in the refrigerator overnight to let the gluten develop the rest of the way on its own. 
  • It sat in the refrigerator for 12 hours. I turned it 2-3 times in the refrigerator before I went to bed with an 45-60minutes in between each term.
Day 2:
  • Take the dough out of the refrigerator and turn onto a lightly floured surface.
  • Spread it out a little, then cover it and let it sit for 10 minutes.
  • Then roll the dough out to about 1" thick.
  • Sprinkle the dough with flour and spread the four over it gently with your hands
  • Transfer the dough onto a floured cookie sheet, lightly flour the surface of the dough, and cover it with plastic
  • Let it sit for about 2.5 hours at room temperature (around 76 degrees).
  • Heat up a griddle or a cast iron frying pan, lightly oiled with spray oil to about medium-low heat
  • Cut muffins of the desired size. Squares, rectangles, or circles all work. If you don't mind ugly muffins, you can take the excess and push it lightly together. If you let it sit for about 5 minutes, this will make a delicious and perfectly adequate (although not aesthetically pleasing) muffin. Make sure that you dust a little flour on both sides of each muffin. Semolina is traditional, but you can use any flour.
  • When the griddle is hot, place the muffins on it and cover with a metal lid. You do not need to oil the griddle, but you may if you wish.
  • In about 3-9 minutes the muffins should be ready to flip over. They will puff up nicely and they will have a surface on top that is not crusty, but has a skin from the heat. Unfortunately, you have to judge this by your
  • Let them brown on the other side before cooling and eating. You can eat them hot, but they will have more flavor if you let them cool. You may also toast them.
These are delicious and won't heat up your kitchen. Keep in mind, this makes a LOT of English muffins. So, once they are fully cooled, place them in ziplock baggies and freeze them (except for the ones you will eat over the next 2-3 days).


I sent this into Yeast Spotting.

Wednesday, June 19, 2013

Serious Bakers, Serious Mistakes

Mistake Bread

Mistake bread

I think of myself as a pretty decent baker. I make a lot of bread, most of which is reasonably aesthetic (in a rustic sort of way) and pretty tasty. While I haven't made bread in a while (mostly making things like English Muffins more recently), I still figured that I would be able to make something decent.

I decided to make a version of my old favorite bread-- Bread Cetera's Pain de Compagne. I modified it by replacing the poolish with starter, but leaving the regular yeast in. I'm not sure what the problem was but the dough simply would not coalesce into, well, dough. It was a sticky mess. It also didn't rise quite as much as I had hoped.

As a last resort, I stuck the dough into a loaf pan and baked it at a low temperature. It did have some amount of oven spring, as you can see from the dome in the middle of the loaf. It also had a sort of sandwich-loaf-like texture, although it was a bit heavier (even though, oddly, the holes in it were a bit bigger). I didn't get a picture of the crumb--I forgot. It tasted reasonably decent with almond butter, but I'm still not sure what went wrong.

Maybe my commercial yeast is dying. Maybe my starter was too wet. Who knows what the problem was. I'll probably buy some new yeast and try it again when it's cool enough to use the oven. In the mean time, I think I'll make some more English muffins.

Monday, April 1, 2013

No Salt

Ever forgotten the salt in bread? It doesn't taste very good, to be quite honest. Even though I put the salt out on the counter (mis en place), I forgot to add it to the bread when I was supposed to. Oops.

Anyway, I'm trying to come up with some good ways to deal with the bread. If I put a whole tonnage of brie or salted butter, it's ok, but I don't want to get any wider. So, I'm trying to come up with things to bake with it. Thoughts, anyone?

I figured if I put some salt in the oil, we could make some croutons, but two loaves makes a lot of croutons. Comment or email me if you think of anything.

Thursday, March 28, 2013

Pumpkin Seed Bread (a work in progress)

Pumpkin Seed Bread
When I was in Ireland, Egnatius' father brought home some bread. Usually, I'm not a big fan of sandwich bread, but this bread was fantastic. Really fantastic. It was some kind of multigrain or whole grain bread with pumpkin seeds. However, I couldn't figure out what was in it.

Scrolling though Yeast Spotting, I discovered this bread which looked exactly like it. So, I thought, why not try it?

Pumpkin Seed Spelt Sandwich Bread
Ingredients
  • 250 g whole wheat 100% starter
  • 200 g water + a little bit extra for adjustments and soaking the grains (maybe 50g extra?)
  • 300 g fresh ground spelt flour
  • 50 g bread flour
  • 1 tablespoon flax seeds
  • 1 tablespoon amarneth
  • 4 tablespoons pumpkin seeds (mine were dry roasted, but you can do either)
  • 6 g salt
  • 1 tablespoon honey
  • 2 tablespoons olive oil
Directions
  • Place all ingredients except salt, oil and honey in the bowl of the mixer. Mix for a minute low, cover and let stand 15 minutes. 
  • Repeat a minute of mixing and 15-minute rest. I would do this by hand, because my mixer didn't like the dough for some reason.
  • Add salt and honey and mix on low speed (or mix by hand), when they are integrated add oil, a tablespoon at a time, or five minutes when we got a soft dough up a little speed and knead for another minute. 
  • Remove the dough and place it in a bowl, cover and leave for two hours doing slightly folded table in the same bowl every half hour, a total of three sets of folds. 
  • Remove the dough to a lightly floured surface and spread with the palms of your hands into a rectangle, roll a way that is somewhat shorter than the mold that will be used. 
  • Grease the mold slightly and place the bread inside, paint the surface with water and place a handful of pumpkin seeds over lightly pressing them to make them stick to the wet dough, and cover.
  • Place it in the refrigerator overnight.
  • In the morning, let it sit out for about half an hour while the oven heats up.
  • Bake in preheated oven at 390 ° F, and bake five minutes and lower the temperature to 350 ° -375° F, bake half an hour in total, first 15 minutes under steam.
Bread
The bread still needs a lot of work. If anyone has ideas, I'd love to hear them. While the final proofing was certainly sufficient, I think that the bulk fermentation didn't quite work. Furthermore, I think that I'm still not quite getting the best results out of my home-ground flour. Supposedly adding diastatic malt powder will help. However, I'm up for any ideas.

Also, I think my pumpkin seeds were a bit old so they weren't quite as flavorful as I might have hoped.  I also cooked it way too hot because I wasn't paying proper attention and I didn't steam it properly.

The original version was much lighter and arier, but that might have been because she used white spelt and vital wheat gluten. I think this bread has potential, but I need to do some experimentation.

Wednesday, March 27, 2013

Overnight Challah, the Results

Challah Braid with Flax Seeds

Who caught the error in yesterday's post? Anyone? Well, I didn't and so things went a little differently then I'd planned.
Braided dough in a ring

Let me illustrate the problem. This was the original ingredient list (before modification) for Peter Reinhart's Challah in Artisan Breads Every Day:
  • 510g lukewarm water (about 95 degrees F)
  • 1.5 tablespoons of yeast (14g)
  • 8-10 egg yokes (170g)
  • 5 tablespoons vegetable oil (71g)
  • 4.5 tablespoons honey (85g)
  • 964g unbleached bread flour
  • 19g salt
1.5 tablespoons (14g) is an awful lot of yeast. I'm not sure what Reinhart had in mind for this bread, but I made the bread around 6pm and by about midnight the dough had tripled in size (I was using a half batch and I used less than half of the yeast he asked for-- 0.5tbsp + a small pinch) and was on the verge of collapse. To keep this in perspective, 1.5 tablespoons is the same amount it takes for my old version of challah to raise the bread in 2.5 hours at around 70-72 degrees, which means that the same amount of rising should happen in about 6 -7hours (in my refrigerator which is slightly too warm because it is very old). To be fair, I did also have a bit of sourdough in the dough, but it was primarily for flavoring and usually the sourdough is inhibited by such a large amount of instant yeast. Something obviously went wrong, but I'm not sure what it was.
Servia's traditional braided Challah
So, around 1am, I decided to shape the dough. I was going to stay up and wait for it, but I was too tired, so I put it back in the refrigerator overnight and crossed my fingers that it didn't overproof.
Close up on braiding
Fortunately, when I came down this morning, all seemed to be well. The bread cooked nicely, although the one that was steamed lost its egg sheen during the steaming.
Crumb shot 1

Crumb Shot 2
It doesn't have the same open crumb structure as Reinhart's. Maybe I should have let it rise longer? Who knows. Maybe I'll experiment again sometime. However,  it's not as easy to experiment with challah because it's highly caloric and Servius doesn't like it (i.e. experimentation entails weight gain). However, maybe I'll try it again at some point.
Braiding Close-Up
The Challah tastes amazing. The sourdough didn't taste sour at all, but did definitely add some richness to the flavor.

Tuesday, March 26, 2013

Overnight Challah

In general, I'm not a huge fan of enriched doughs, but I do love Challah. When I was a kid, most of my friends were Jewish so I went to about 52 barmitzvahs and batmitzvahs over the course of 2.5 years. While I enjoyed parts of the ceremonies, I often looked forward to grabbing a piece of challah afterward.

Challah also was one of the first breads that I made back in my early days of bread baking at school. It was the first no-knead bread I ever baked. Most importantly, it was the first successful bread that I made upon returning home after graduation after a series of incredibly disappointing failures. Mostly out of nostalgia, I have always used this recipe, which was the first one I found. However, I decided to try Peter Reinhart's recipe from Artisan Breads Every Day. Except I couldn't help myself-- I had to modify the recipe (quite substantially).


Challah from Artisan Breads Every Day (significantly adapted)
Makes 1 large loaf or 2 small loaves
Ingredients
  • 130g lukewarm water (about 95 degrees F)
  • 1/2 tablespoon + a pinch dry active yeast (approximately 5g)
  • 4-5 egg yokes (85g) Instead, I used 2 egg yokes and 1 egg. However, had I read the recipe notes, I should have realized that I needed to reduce the amount of water. I didn't so I ended up incorporating a lot more flour. If you want to use whole eggs, reduce the water by about 28g per egg. So in reality, I should have used 2 egg yokes and 2 eggs with 74g water
  • 2.5 tablespoons vegetable oil (35g)
  • 2.25 tablespoons honey (43g)
  • 357g bread flour
  • 250g white sourdough starter, 100% hydration
  • 1.25 teaspoons salt (9.5g)
  • 1 egg white and 2 tablespoons water for egg wash
Directions
Day 1:
  • Combine the dry active yeast and the water in a mixing bowl and stir with a whisk to dissolve.
  • Add egg yokes (or eggs or both), oil, and honey. Stir to break up the egg yokes.
  • Add in the sourdough starter, the flour, and the salt and then mix. In a mixer, mix for about 2 minutes on the lowest speed. By hand, mix with a dough whisk or a wooden spoon for a minuter or two until you form a course, shaggy dough.
  • Let the dough rest for 5 minutes.
  • If using a mixer, switch to a dough hook for about 4 minutes on medium-low speed. Or, mix by hand or with a wooden spoon for about 4 minutes. Make sure your hands or the spoon are wet.
  • Turn the dough onto a very lightly floured surface and knead for 1-2 minutes, or until it passes the windowpane test. Incorporate as much flour as needed to make the dough tacky but not sticky.
  • Then, let the dough sit out for about half an hour. It should rise just a little bit. Then put it in the refrigerator overnight or for up to 2 days.
Day 2
  •  Remove the dough for the refrigerator 2h10 before baking.
  • Transfer the dough onto a lightly floured work surface and cut it into the desired number of pieces. Challah loaves are traditionally braided so if you are making 2 small loaves, divide the dough into 6 equal pieces. 
  • Roll the pieces into ropes. The length depends on your own aesthetic, although you want all of the pieces to be the same length. Consider that the bread will increase about 1.5-2 times in size, so don't roll your ropes too thin or too thick.
  • Braid the loaves. Braid out from the middle toward each side. This will ensure the proper tapering of your loaves.
  • Let the loaves rise, covered, for 2 hours.
  • Preheat the oven to 350 degrees F (300 degrees F convection) about 15 minutes before the bread is ready to go in the oven.
  • Brush the loaves with egg wash and sprinkle seeds if desired. You can then either load them onto a pan or a peel to be baked on a stone.
  • Bake for 35-50 minutes, until the internal temperature is 190 degrees F and the bottom sounds hollow when thumped. If you want, you can steam for the first 20 minutes, but it's probably unnecessary. I will steam one and not steam the other so I can demonstrate the difference.
I haven't finished this project. The loaves will come out of the oven tomorrow so I will post pictures then.

Monday, March 25, 2013

Pumpernickel

A while ago, I bought some pumpernickel flour to make some pumpernickel with a group of friends. I was confused when I looked online and in books and found a variety of variation that demonstrated not only a variety of origins, but also a fundamental disagreement between various parties on the nature of pumpernickel.

The pumpernickel bread that I remember from my childhood was really dark rich brown and kind of sweet. I didn't love the flavor-- and now I realize that it was the rye that I didn't like in it-- but I ate it from time to time and understood it's appeal. I remember that my mother used to use it to make grilled cheese sandwiches.

When I went looking for pumpernickel, I found that the recipes split into two distinct varieties: a German pumpernickel and an American pumpernickel. American pumpernickel was what I grew up with and assumed was the real version. I didn't even know that the bread-- in name at least-- came from Europe. German pumpernickel is an entirely different animal. It is a dark, dense and made with wild yeast and without molasses. I believe that this is the kind of rye that my grandfather liked. My dad used to say that if you dropped the bread on the floor, the tiles would crack. I couldn't figure out why two such different loaves had the same name.

Recently, I acquired a copy of Jeffrey Hamelman's Bread: A Baker's Book of Techniques and Recipes. After the initial slew of grad school rejections, I think Servia was trying to cheer me up. Anyway, I didn't get a chance until now to read it. As I was reading this morning, I found a highly vitriolic passage in his book that provided some insight.
"Once it was removed from the pans, the the bread was a rich dark brown, almost black. Over the course of the long slow bake, the starches in the rye were converted to sugars, which provided the intensity of aroma and color. These breads, true pumpernickels, have long been considered in Europe to be highly beneficial to infants and old folks because their starches have undergone so much of a transformation that they are quite easily digested. In any case, how did this time-honored method of bread production become bastardized in the United States and why? I think that few bakers were willing to take the time to produce what at first glance appears to be a fragrant brick. Rather than make the effort to bake using the traditional overnight technoique, American bakers found they could get even blacker bread by the simple addition of caramel color. Apparently the complete  lack of taste was not deemed sufficient reason to  consider abandoning this style of baking." (Hamelman 39)
While I think that Hamelman's prejudice might be clouding his palette, he does provide a pretty good explanation of the difference between the two main types of pumpernickel bread. Whether or not these two distinct loaves should have the same name, they are both legitimate types of bread.

Amusingly enough, the first pumpernickel that I found was in Bernard Clayton's New Complete Book of Breads. It was made with baking soda; I wonder what kind of a diatribe Hamelman would let loose hearing that.

Friday, March 8, 2013

100% Spelt Bread

100% Spelt Bread; All pictures by Servia

My plan this weekend was to make some 100% Whole Wheat bread to continue the 100% Whole Wheat project. However, I got sidetracked.
Wondermill Junior Delux
As I mentioned, Egnatius gave me a grain mill for Christmas. I also mentioned that the tork on the grinder was threatening to break the table. Well, Servia went down to our garage and out that we hard a workbench-type-table that we hadn't seen in a few years (because it was upside down). So, we hauled it upstairs and, lo-and-behold, the grain mill works!
When I came back from mixing the dough, Gorgo was by the grain mill
Little Gorgo was so entranced she wanted to pose by it.

Anyway, I bought some whole spelt kernels at whole foods the other day. They were much cheaper than buying the flour, interestingly enough. So I decided to try out the grinder on the workbench last night. And it worked really well! The flour was a little coarser than one might get in a bag (I have had to use the metal grinders instead of the stone ones because there is still grit in anything ground by the stones). However, it was still awesome.
Hand-ground spelt
My father and his friend who was over for dinner said it was the best bread they've ever tasted. I thought it was delicious, but it was a little sweet for me.

First, I'd like to share my research. I decided to make the bread because of txfarmer's amazing bread. I decided that I wanted to make this, but the loaf looked like it was going to be quite small so I doubled it. I didn't want to double the sweetener, though, so I just used 40g of agave. I also stole a few tricks from the breadtopia recipe that she referenced.

Ingredients:
210g Spelt starter (100% hydration)
596g Spelt Flour
400g water
40g agave necter (you can replace this with honey).
14g  salt

Directions:
  •  If you don't have a spelt starter, take a spoonful of your usual starter and feed it with X water and X spelt. Let it ripen until it passes the float test. If you have a spelt starter, skip this step
  • Combine starter, flour, water, salt, and agave in a mixing bowl and mix until completely combined. I mixed a vitamin C tablet in with mine, but I actually don't think this helped the gluten like I thought it would. It didn't seem to negatively impact the flavor.
My new mortar and pestle that I used to crush the vitamin C tablet
  • Let the bread autolyse for 20-60 minutes. I let it for 60 minutes because the kitchen was fairly cold.
  • I did a few stretch-and-folds and then let the bread rise for 2h at 80 degrees F, with a stretch-and-fold every half hour.
  • Then I put the bread, covered tightly with plastic wrap, in the refridgerator overnight.
The next morning:
  • I took the bread out and did a preshape.
  • I let the bread bench rest for 45 minutes.
  • Then I did a final shaping and put it in the banneton.
  • I let it do a final proof for 2.5h at 80 degrees.
  • Then I baked it at 440 degrees F convection, under steam for the first 35 minutes and then for another 15 minutes. Unfortunately, this was far too hot, so I had to cover the bread with tin foil and then let it finish until it read at 212 degrees.


Servius and his friend said it was the best bread they've ever had. More information soon.

Wednesday, February 13, 2013

Amazing French Toast

So remember when I gave Oatmeal Bread 3.5 stars? Well, that may be true but it makes 5 star French toast.
Commercial Bread (right), Oatmeal Brad (left)
These days, my family buys little to no bread. I make almost all of what we consume. However, with grad apps and school, we bought a loaf of multigrain bread a while ago. It was a little old, so we decided to make French Toast for dinner. We did a side-by-side comparison: my bread vs. the store bought bread. While the store-bought bread made good French Toast, there was no contest-- my bread was head-and-shoulders above the commercial bread.

This brought up some of the issues that Andrew Whitely discusses in his lecture on bread. The commercial bread I used was about 2 weeks old and it was still fairly squishy...that is frightening, he's right. My bread, while it took a little bit of time to make, made better and more wholesome French Toast. While I realize not everyone can make their own bread, Whitley brings up some pressing issues about the current state of commercial baking.
Enjoy!

Saturday, February 9, 2013

A New Kind of "Oat" Bread

I've wanted to make this recipe ever since I received Peter Reinhart's Whole Grain Breads. I finally made it two weeks ago.

Oat Bran Broom Bread

My apologies; I forgot to take a shot of the crumb. However, it was quite a tight crumb...slightly tighter than the other sandwich bread's I've made, but I don't think it was as tight as the picture in Reinhart's book.

Recipe for Oat Bran Broom Bread (modified from original):
Ingredients:
Soaker
  • 184g whole wheat flour (medium to fine grind)
  • 28g Oat Bran (4tbsp)
  • 14g flax seeds (1.5tbsp)
  • 4g salt (1/2 tsp)
  • 198g water
Starter (or starter straight out of the jar if your starter is fairly vital and 75%)
  • 50g starter (100% hydration)
  • 177g whole wheat flour
  • 120g water
Final Dough:
  • All the soaker (429g)
  • All the starter (or 398g starter)
  • 56.5g whole wheat flour
  • 5g salt
  • 1tsp dry active yeast (3g)
  • 20 g water
  • 2 tbsp honey (42.5g)
  • 1 tbsp olive or vegetable oil
Method: 
Day 1: 
  • Mix all of the ingredients for the soaker together in a bowl until they form a reasonably wet dough. Cover it with plastic wrap and let it sit for 12-24 hours. If it will be longer than that, place it in the refrigerator.
  • Mix all of the starter ingredients together and mix them until they form a fairly stiff dough. Knead for a minute or two in the bowl before covering with plastic wrap. Refrigerate for 8-48 hours.
Day 2:
  • About 2 hours before mixing the final dough, take any refrigerated ingredients out of the refrigerator.
  • Chop or tare the soaker and the starter into pieces and dust them with the flour.
  • Hydrate the yeast in a cup or bowl (no need to make it bubble, just mix it with the water). Pour the hydrated yeast, the oil, and the honey over the dough. Mix with wet hands or with a spoon. If you don't like the stickiness, you can also slightly oil your hands. Add water or flour for adjustments-- due to the different protein content of whole wheat flours, you may need to adjust. The dough should be soft and slightly (but not very) sticky.
  • Knead the dough for about two minutes in the bowl.
  • Lightly flour your hands and a work surface with whole wheat flour. Coat the dough in flour and knead by hand for 3-4 minutes. Try to incorporates little flour. I found this step very frustrating. My hands got sticky and the dough didn't cooperate well, so I changed the next few steps from the book.
  • Put the dough in a clean bowl and do a stretch-and-fold. Do the stretch and folds with wet hands.
  • Wait 5 minutes and then do another stretch-and-fold.
  • Wait 10 minutes and do another stretch-and-fold.
  • Wait 10 minutes and do a final stretch-and-fold. By this point, the gluten should be adequately developed.
  • Let the dough rise under plastic wrap for about 2 hours at 75 degrees F.
  • After the 2 hours, turn the dough onto a floured surface.
  • Gently stretch it out into a rectangle and roll it up; then seal the seem.
  • Place it seem-side down into a loaf pan (I tend to spray my loaf pans with oil and then lightly flour them so the dough doesn't stick, but this might be overkill).
  • Let the dough rise for another 2 hours in the loaf pan.
  • 30 minutes before you're ready to bake, preheat the oven to 425 degrees F. If you would like to bake under steam, prepare whatever you will use for steam (this is not really necessary, but I baked it under steam).
  • When ready to bake, turn the oven down to 350 degrees F and place it in the oven for 20 minutes. At the 20 minute mark, take off the steam (if you chose to use it), and rotate the pan 180 degrees. Then bake for another 20 minutes (so 40 minutes altogether).
  • Check the loaf to make sure it's at least 190 degrees F.
  • Transfer the bread to a cooling rack and cool for at least 1 hours before slicing and serving.

Review of Oat Bran Broom Bread: 3 Stars
One of the things that really bothers me about this book is that Reinhart puts absolutely absurd amounts of yeast in everything. It's really unnecessary and it doesn't give the dough the time to develop that wonderful flavor. With bread, quick and delicious very rarely coincide (except maybe with sourdough crumpets). So I slowed this bread down. But even then, it didn't have the flavor I wanted. I need to play with the recipe.

Furthermore, the bread doesn't taste anything like oats. The oat bran in it is minimal. I've decided I will rewrite the recipe and try again.

Monday, February 4, 2013

The Confession: More on Oat Bread

Oat Bread; Photocredit: Servia

So I have a confession to make. I think I switched the dough of the English Muffins and my traditional oat bread. This would explain the fact that the English Muffins didn't taste sweet at all while the bread is sweet and delicious. But it's not sweet in the way that bread sweetened with honey or sugar tastes...it's like the sweetness of barley. Because, well, it is. Non-diastatic malt powder is made out of roasted barley. It's the sweetener that is used in bagels, but this bread is far better than any bagel I've ever had. It tastes like a barley oat bread and it's lovely and moist on the inside (from the oil). This would probably make far better English muffins even then the ones I made with the unaltered dough.
The bread was not nearly as burnt as it looks in this picture-- that was the lighting; Photocredit: Servia
The dough is delicious. I will include a version the recipe because it is so good, you should make it into bread as well as English Muffins. Seriously, you'll love this bread.
Baking in my new combo cooker; Photocredit: Servia
Sulpicia's Sourdough Oat English Muffins (in testing)
Ingredients:

Preferment:
  • 100g starter (very active) 100% hydration white or whole wheat based upon preference
  • 100g whole wheat flour
  • 50g water

Final Dough:
  • All the preferment (250g)
  • 450g bread flour
  • 150g whole wheat flour
  • 130g rolled oats (thickly rolled is better)
  • 470g cold water
  • 17g salt
  • 1.5 tablespoon  non-diastatic malt powder
  • approximately 15g vegetable oil

Day 1:
  • Prepare the pre-ferment by dissolving the starter in water and then mixing in the flour. When it is fully mixed, cover the container and put it in the refrigerator.
  • Let it sit in the refrigerator for 18-24 hours. It should have almost doubled in bulk and it should pass the float test.

Day 2:
  • When the starter is ready to be used, leave it in the refrigerator for one extra hour.
  • Mix together the bread flour, whole wheat flour, rolled oats, non-diastatic, and water together in a bowl into a dough.
  • Let it sit for 1 hour.
  • Then mix in the starter, salt, and oil by hand.
  • Knead by hand for 3-4 minutes.
  • Wait 15 minutes. Then do 1-2 stretch-and-folds.
  • Wait 15 minutes. Then do 2-3 stretch-and-folds.
  • Wait 15 minutes. Then do 1-2 stretch-and-folds.
  • Wait 30 minutes. Then do 1-2 stretch-and-folds. Then put the bowl, covered with plastic wrap, into the refrigerator for 15-18 hours.

Day 3:
  • 1 hour before handling (3.5 hours before baking), take the dough out of the refrigerator.
  • Divide the dough into two pieces and shape each into a boule or batard. Place them into floured bannetons or a bowl lined with a floured linen.
  • Dust with flour and cover with plastic for 2.5 hours (at about 75 degrees F).
  • At the two hour mark, heat the oven to 460 degrees F (435 degrees F convection).
  • At 2.5 hours, scored the dough and put the dough into a combo cooker or onto a baking stone.
  • Bake under steam for 35 minutes. When done, it should be a light golden color with darker brown along the scoring mark.
  • Then, turn the over down to 440 degrees F (415 degrees F convection) and bake for 15 minutes or until it registers an internal temperature of 210 degrees F. Remove the bread from the oven.
  • Let it cool at least 1 hour before slicing and eating.

Sunday, February 3, 2013

English Muffins, Part 2

My English Muffins worked! They were actually quite amazing. So were Sue's.

English Muffins, Photocredit: Servia
I took the hypothesis from Tartine Bread that one needs to use some kind of dough that has a reasonably low hydration but also produces a bread with fairly large holes. Corudata's Oat Bread was perfect (which was the base for my English Muffin Recipe) because it is a low hydration bread that acts like a high hydration bread (see crumb shot of oat bread).
English Muffins, Photocredit: Servia

English Muffins, Exterior; Photocredit: Servia
Muffins baking in the skillet, the ugly one was made from leftover dough; Phodocredit: Servia

Sue and I had a day planned to do a taste test between sourdough and commercial yeast English Muffins as I mentioned in yesterday's post. It was a lot of fun. Both of our muffins turned out amazingly, although hers turned out much prettier than mine (see below). Totally coincidentally, both of us added oats to the recipe. Sue also added buckwheat to hers which gave them a delicious earthy flavor and a beautiful color.
Sue's English Muffins; Photocredit: Servia
We both ended up baking them on griddles (her on a real griddle, me in a my great-grandfather's cast iron skillet-- yes, the really do last that long). I was convinced it could never work, but it worked great.
Sue's Crumb; Photocredit: Servia
Sue's muffins, cooking on the griddle; Photocredit: Servia
Try these for yourself. I highly recommend it. And/Or try Sue's recipe. I posted this to Yeast Spotting.

Saturday, February 2, 2013

English Muffins, Part 1

So a long time ago I promised that I would make English Muffins with Sue. She is going to make muffins with commercial yeast and I was going to make muffins with sourdough so that we could compare the flavors. I thought it would be a really interesting experiment, especially since I found so many different versions of the recipes online.

However, when I looked more closely, I realized that almost all of them have a chemical rising agent such as baking powder or baking soda which entirely ruins the quest for the difference in taste between sourdough and commercial yeast muffins, so I realized that I had to come up with something different.

When I was thinking about it, I wasn't sure what kind of dough I could use to make good English Muffins. I've never made them before and I'm simply not sure what makes them work. However, I knew that the dough had to be fairly stiff, so that it could survive the cutting, and probably would need to be slightly sweetened. Now that I think about it, the recipe should have oil to soften the crust, but I forgot to put that in at the beginning. In this instantiation of the recipe I will just oil my hands for kneading, but next time I will probably add some into the dough itself to make things easier.

Sulpicia's Sourdough Oat English Muffins (in testing)
Ingredients:

Preferment:
  • 100g starter (very active) 100% hydration white or whole wheat based upon preference
  • 100g whole wheat flour
  • 50g water

Final Dough:
  • All the preferment (250g)
  • 450g bread flour
  • 150g whole wheat flour
  • 130g rolled oats (thickly rolled is better)
  • 470g cold water
  • 17g salt
  • 1.5 tablespoon  non-diastatic malt powder
  • approximately 15g vegetable oil

Day 1:
  • Prepare the pre-ferment by dissolving the starter in water and then mixing in the flour. When it is fully mixed, cover the container and put it in the refrigerator.
  • Let it sit in the refrigerator for 18-24 hours. It should have almost doubled in bulk and it should pass the float test.

Day 2:
  • When the starter is ready to be used, leave it in the refrigerator for one extra hour.
  • Mix together the bread flour, whole wheat flour, rolled oats, non-diastatic, and water together in a bowl into a dough. I put the non-disastatic malt powder in with the salt because I forgot to put it in earlier.
  • Let it sit for 1 hour.
  • Then mix in the starter, salt, and oil by hand. I put in the oil later because I forgot it.
  • Knead by hand for 3-4 minutes.
  • Wait 15 minutes. Then do 1-2 stretch-and-folds.
  • Wait 15 minutes. Then do 2-3 stretch-and-folds.
  • Wait 15 minutes. Then do 1-2 stretch-and-folds.
  • Wait 30 minutes. Then do 1-2 stretch-and-folds. Then put the bowl, covered with plastic wrap, into the refrigerator for 15-18 hours.

Day 3:
  • 1 hour before handling (3.5 hours before baking), take the dough out of the refrigerator.
  • Thoroughly flour a towel or a piece of parchment
  • Turn the dough onto the floured surface and press it into a 1" thick disk from the center outward
  • Dust with flour and cover with plastic for 2.5 hours.
  • Use a cookie cutter about 3" in diameter or a bench knife to cut 3" squares (if you don't mind the odd shape) and cut the muffins.
  • Coat the bottom of the pan with vegetable oil and heat on medium-low heat.
  • Once the pan is hot, add the muffins. Cover them with a lid.
  • In 5-6 minutes, they should puff 2" high. When the undersides are golden brown, flip the muffins and cook until the other side is golden brown/
I am doing the third day stuff today. Cross your fingers that it works!

Sunday, January 27, 2013

Christmas Bread


Barley Bread
Christmas is my favorite holiday because I have a quiet morning with family followed but a large dinner with family and friends. In the middle, there is a lot of cooking, cleaning, and moving. This year, for that middle period, I decided I was in charge of morale. It's a bit job getting everything in order, but it's still Christmas so we should have a little fun: a lovely picnic.

Pretty much everyone in the family gets a bit hypoglycemic; if we don't eat, we get tired, cranky, panicky, and, if things get really bad, trembley. So, food at lunch time was in order. There was some nice cheese for later so I stole a bit of that and combined it with one of the five loaves of bread I made and some carrots and brought a plate to each person in various places around the house. That loaf of bread was eaten so quickly that I didn't manage to get a picture of it, but you can see the rest below.
Whole Wheat Boule

Whole Wheat Batard
I made three kinds of bread (five loaves total) for two reasons. One, so that we could have plenty of delicious bread left over for the next few days. Two, something seems to always go wrong if you're making bread for an event, so it's always better to have extra. This time, the whole wheat and the Barley bread (my experimental loaf) turned out marvelously, but the country loaf was the tiniest bit underproofed and, as a consequence, it retained more of the water during the baking process and was denser because it had less oven spring. It looked beautiful, but it was best enjoyed toasted (as underproofed breads usually are).
Country Loaf Ear

Country Loaf
The bread was delicious. The barley bread, specifically, was a revelation. I often use barley to sweeten the crust and add depth of flavor, but this was something entirely new to me. I will post the recipe in the next few days.
Whole Wheat and Country Loaf, used for decoration and eaten over the next few days
Ultimately, Chirstmas, both bread and everything was a great success thanks to lovely friends and the amazing team effort of my family. It just shows that bread, cheese, and carrots are the perfect combination.

Saturday, January 26, 2013

The Wonders of Oat Bread

Oat Bread
I made Cordata's amazing oat bread twice over winter break. I cannot reiterate enough how much I love this bread. It has an amazing depth of flavor, it takes very little work, it's beautiful, and it's simply delicious. I usually substitute whole wheat starter for both the white an the rye starter.
Two Loaves Again
Crumb
Usually, when I make this bread, I make it in the Kitchen Aid and I add extra water so the kitchen aid can manage to knead the bread (if it's too stiff, the it simple sits on the kitchen aid turns around-and-around).  However, the recipe says not to add more water and to mix it by hand. However, I was suspicious that this might not work. However, while the crumb was a tiny bit smaller, the bread turned out quite well. However, I shaped it slightly oddly so it looked kind of funny. See below.
This loaf didn't shape correctly, but it bloomed beautifully

The crumb was pretty open for such a stiff dough

If you haven't tried this bread, try it now. It's really quite amazing. Oats have a ton of flavor potential.