Showing posts with label Whole Wheat. Show all posts

Saturday, February 23, 2013

The Beauty of Freezers

85% Whole Wheat Bread
Before the advent of refrigeration and freezing, bread baking must have been much harder. One of the things that allows me to bake bread as much as I do is that I know if I need to slow down the fermentation time to fit my schedule I can throw it in the refrigerator for a few hours and, so long as I do my math correctly, the bread will turn out fine-- and sometimes better because the slower fermentation allows time for the enzymes and bacteria to work and provide more flavor to the bread. Previously, bread was subject to the whims of the weather.

However, more importantly, freezers allow me to bake large amounts of bread without worrying about waste. At the moment, I have loaves of amaranth, oat, and 85% whole wheat bread sitting in my freezer as well as crumpets and waffles, and balls of pizza dough. This is fantastic because I can make new bread at my leisure, without worrying that I will run out, but I also don't worry that any of it will go stale or go to waste. The best part of this is that here, where I live, it often gets too hot to turn an oven up to 500 degrees F so a freezer full of bread means that there is fresh bread whenever I need it.

When bread is fully cooled, it can be wrapped tightly and frozen. It will be as fresh as when you put it in the freezer when it comes out. leave it for 5-12 hours to thaw-- no need to bake it. The crust will not be quite as good due to the freezing process, however if you toast the bread as needed (or crisp chunks of it in the oven or toaster oven), it can be just as delicious.

Friday, February 22, 2013

The 100% Whole Wheat Project, Part I

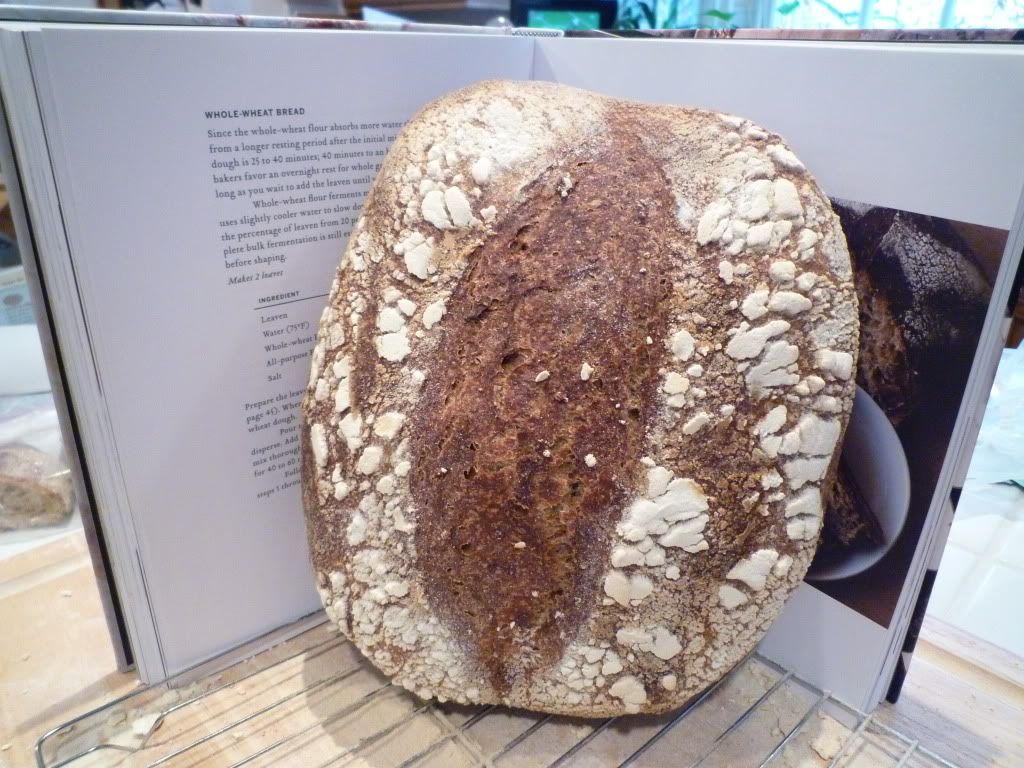
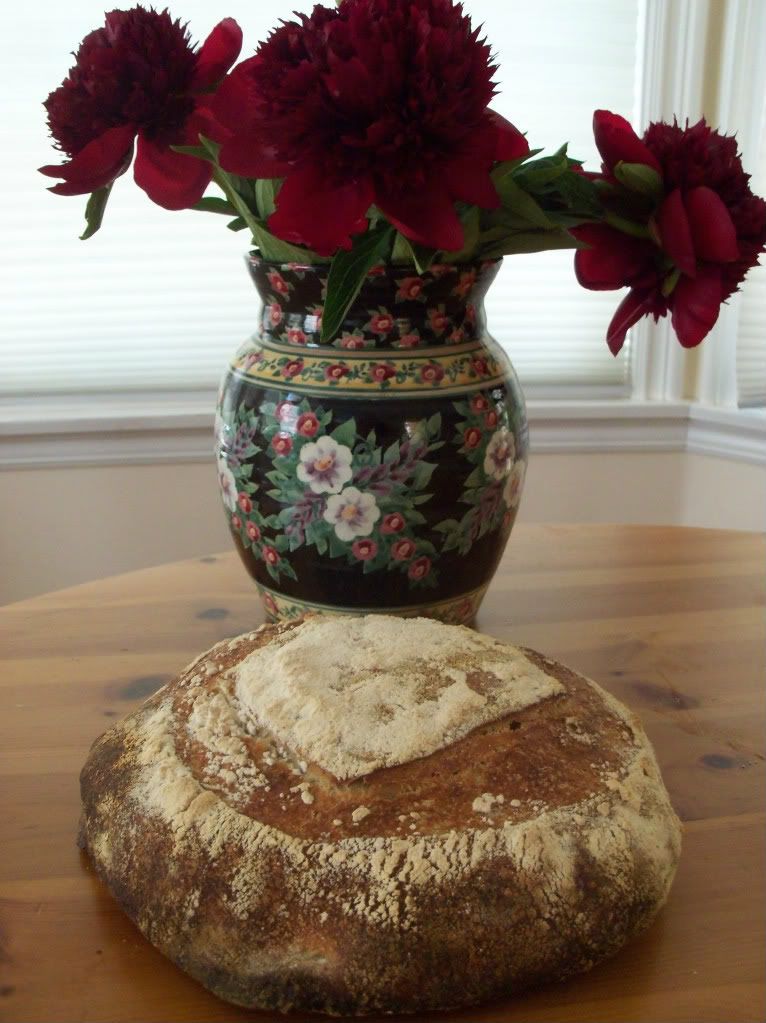
85% Whole Wheat Loaves
So everyone knows that 100% whole grain bread if the most nutritious. For a long time, I have wanted to make a 100% whole wheat bread that tastes delicious, but I've run into issues. Red whole wheat tends to be bitter when in levels above 70% or so. And, honestly, I just don't like the flavor of white whole wheat on it's own, so when I use it I supplement it with red whole wheat and other grains like barley which tends to ameliorate the distasteful flavor. I did this with great success in my last loaves.
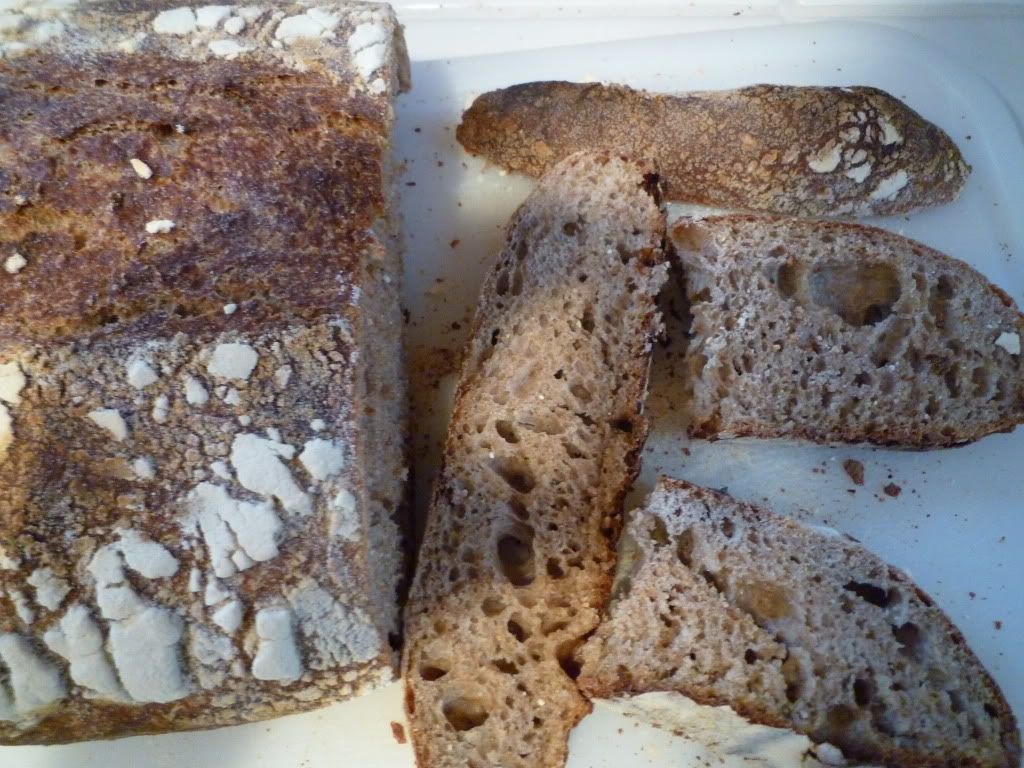
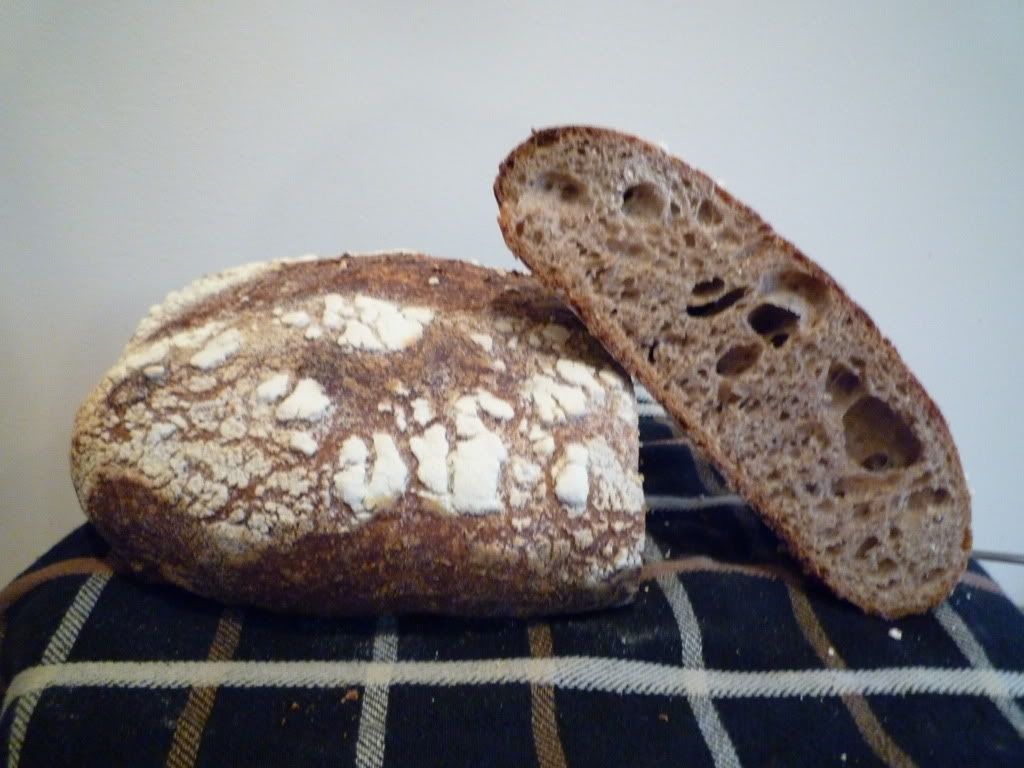
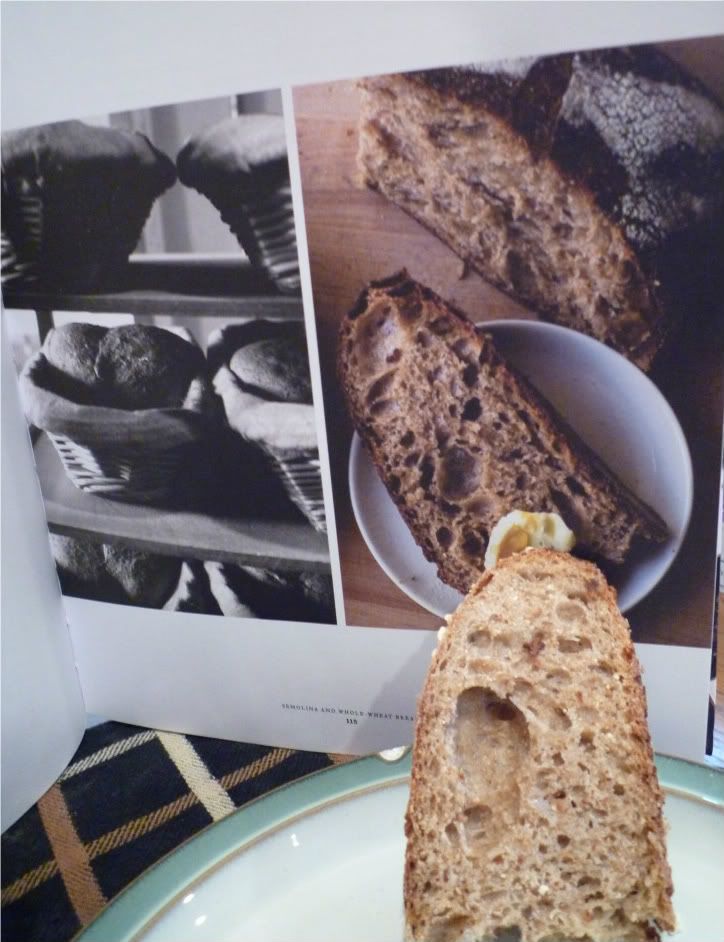
Crumb shot
However, I still wanted to work out a 100% Red Whole Wheat loaf. Not yet satisfied with the loaves from Reinhart's Whole Grain Breads, although the book is an unbelievably rich resource for information about bread baking (a topic to which I will return in a forthcoming post), I looked for other possibilities. My goal, ultimately, is to make a 100% whole wheat bread with an irregular, open crumb, a crunchy crust, and a hearty, complex, wheaty, but not bitter, flavor. The catch is that I want to make the bread out of only wheat, flour, salt, and sourdough starter. Can it be done? I don't know, but I'm going to find out.
Amazing Bloom on the Loaf
I was very excited when I noticed a 100% whole wheat in Jeffrey Hamelman's Bread. However, when I actually stared reading the recipe, it sounded very much like one of my favorite recipe's, Tartine's 70% whole wheat bread, with the notable exception that it was 100% whole wheat. So I figured that I would start by changing the Tartine version into an 85% loaf, and if it seemed to go well, I would make a 100% loaf. It did go very well, although the crumb was not quite as open as I had hoped, either because of my folding method or because I left it for 16 hours in the fridge instead of 12. Also, the bottom crust was a little too bitter, but it was good.

Ingredients
  • 200g Leaven (1tbsp starter, 100g whole wheat flour, 100g water)
  • 850g +50g water (75 degrees F)
  • 150g unbleached bread flour
  • 850g whole wheat flour
  • 20g salt
Directions
 The Leaven ("young" starter)

  1. Take 1 tablespoon of mature starter and put it in a small bowl.
  2. Add 100g water (about 75degrees F) to the starter.
  3. Then add 2000g whole wheat flour and mix them into the water and starter until it comes together as a dough.
  4. Cover the bowl with plastic wrap or similar and let sit until it passes the float test. This should take about 12 hours, depending upon the vitality of your starter. When it is ready, it should smell very sweet-- like overripe fruit.
  5. There will probably be 10-20 grams left over. You can add these in or use them to mix a new starter.
The Final Dough
  1. Mix the leaven (all of it) with the 850g water.
  2. Then add the whole wheat and bread flours and mix until the dough comes together.
  3. Cover the dough with plastic wrap or equivalent and let rest (autolyse) for 45-60 minutes.
  4. After the autolyse, add the salt and the last 50g of water in a little bit at a time, using the water to help the salt dissolve and incorporate into the dough. Make sure that you pinch the dough around the salt and incorporate it throughout the dough. Try not to tear the dough, but you do want to vigorously incorporate the salt.
  5. Move the dough into a heavy glass or plastic bowl, preferably a deep on with a fairly small diameter on the opening in order to keep the heat in.
  6. Stretch the dough and bring it in toward the center like this. Be careful not to degas the dough too much. Do this all the way around the dough to make sure that you develop the dough evenly.
  7. Place the dough in a place between 78 and 82 degrees F. You can improvise a proofbox by placing a pot of boiling water in an unheated oven beside the dough.
  8. After 30 minutes, stretch and fold the seeds, oats, and germ into the dough. Incorporate them a few into each fold.
  9. Repeat the stretch and fold this procedure every 30 minutes for 3-4 hours. In general, the wheat rises faster and only needs 3 hours. As the dough rises, be more careful not to degas the dough. The dough should become very billowy on top.
  10. When the bulk rise is complete, turn the dough out onto a floured surface.
  11. Fold the dough in half so that the outer surface is lightly floured (although you want to incorporate as little flour as possible into the dough).
  12. Fold the dough like an envelope. Fold the bottom up 1/3 over the dough. Then fold the left side in 1/3 and the right side over it. Fold the top all the way over the bottom  and pinch it slightly into the bottom.
  13. Turn the dough seam side down and let it sit under an overturned bowl for 20 minutes.
  14. After the 20 minute bench rest, do the final shaping. I usually shape my dough into a boule. To do this, follow the same pattern as the pre-shape, and then gather the corners together to tighten the surface tension and pinch them together.
  15. Put the boule seam side up in a floured branneton or a bowl lined with a floured cloth. Use both wheat and rice flour because the rice flour soaks up more water and prevents the dough from sticking.
  16. Let the dough sit for half an hour and then put it in the refrigerator for 8-12 hours.
  17. To bake the dough, 30 minutes before baking take the dough out of the refrigerator and preheat the oven with either a stone and a oven-safe pot or a combo cooker.
  18. When the oven is heated, turn the dough onto a peel and score it. Put it onot the stone or into the combo cooker and put the broth pot or lit over it.
  19. Bake for 35 minutes and then remove the lid. Bake for another 10-15 minutes until the outside is an chestnut brown and the interior temperature reads 212 degrees F.
  20. Wait at least 30 minutes before cutting.
Enjoy!

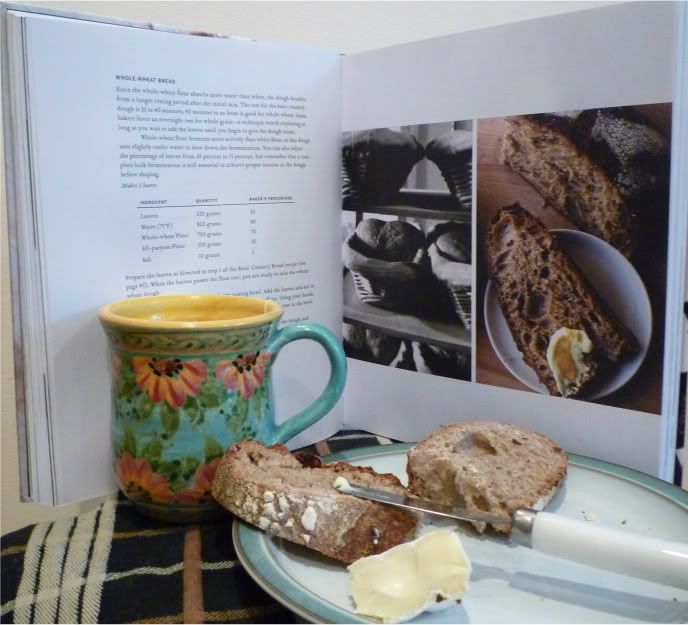
Some more pictures:


More posts to come on all of this whole wheat stuff!
 

Friday, February 15, 2013

Amarnath Wheat Sourdough

Boule
One of the bread recipes that I use for experimentation is Wild Yeast's Norwich-More Sourdough. It's a wonderfully easy recipe, once I realized a few things (such as that it requires 20-35 minutes under steam rather than the 8 in the recipe and, in my oven at least, it needs a higher oven temperature), things actually work out fairly well. Usually, I just post modifications, but today because the bread is so good and is quite different from the recipe.

Crust and Crumb
 Amarnath Wheat Sourdough
Ingredients
  • 480g of sourdough starter 100% hydration (I used about 75% white starter and 25% whole wheat starter) May I suggest using some fairly lively sourdough starter. Mine was about 50-50 of starter from the refrigerator and starter that had been newly refreshed a few hours before.
  • 500g white whole wheat starter
  • 175g bread flour I ended up using bleached because I bought it by accident but, as always, I suggest unbleached
  • 150g barley flour This gives a lovely sweetness to the crust. Delicious, seriously.
  • 130g red whole wheat flour
  • 610g + 50g water around 75 degrees F (total 660g)
  • 50g Amarnath (the seeds, not flour)
  • 23g salt
Directions
Day 1:
  • Mix the sourdough starter, flours, and 610g water in a bowl. Mix until it forms a homogenous dough.
Dough
  • Let the bowl sit for a 30 minute autolyse period under plastic wrap or similar.
  • Then mix in the amarnath, salt, and water. Mix a little and then let it sit for 5-10 minutes to allow the bread to soak up the water. 
  • Knead the bread for 2-3 minutes. Then do a stretch-and-fold.
  • Wait 10 minutes and do another stretch-and-fold.
  • Wait 10 minutes and do another stretch-and-fold.
  • Wait 10 minutes and do another stretch-and-fold. (so 4 times total)
  • Cover the bowl for 45 minutes (at around 75 degrees F) and  do another stretch-and-fold.
  • Cover the bowl for 45 minutes (at around 75 degrees F) and  do a final stretch-and-fold (2 times total)
  • Cover the bowl for 20 minutes  (at around 75 degrees F) to finish the bulk fermentation.
  • Turn the dough onto a lightly floured surface and divide into 3 medium loaves or 2 quite large loaves.
  • Preshape the balls lightly into round.
  • Bench rest for 20 minutes. Cover them with something. If you live in a dry climate, make sure to cover them in an airtight fashion-- I usually turn large bowls over them. While they are resting, flour bannetons or similar shaping devices for the final proofing.
  • Then shape the loaves into your desired shape and place them into bannetons.
  • They need to proof for 1 hour and 45 minutes before they are placed in the refrigerator overnight.
  • Make sure they go into the refrigerator for 16 hours or less.
Day 2:
  • Preheat the oven to 475 degrees F about 30 minutes before you take the dough out of the refrigerator.
  • Take them out of the refrigerator, score them, and immediately place them into the oven under steam.
  • After 20-35 minutes under steam (depending upon how tightly the steam container closes. I would suggest trying about 25 minutes. It is done when it begins to be golden and the tips of the score marks are beginning to be brown.
Golden with a hint of brown on the tips of the score marks.
  • Cook for another 10-15 minutes or until the crust is a rich brown and the internal temperature reaches 210 degrees F.
  • Cool for 45 minutes before eating.
Bread with Brie (it also goes well with almond butter)
Flavor Notes: I totally forgot (until a comment reminded me) that I hadn't talked about the flavor of this bread. it is absolutely delicious. It's wheaty (from the white whole wheat), but it doesn't have that usual bitterness that I associate with white whole wheat. Instead it's got this warm, complex, nutty richness too it (which I believe comes from the amarnath) and a hint of sweetness (from the barley). Five stars.

While I share with you the wonderful success I had today, I should also explain two things that went wrong (although they didn't keep it from being a success).

First, a small mistake, I messed up the autolyse period (I extended it it an hour because I wasn't paying attention). As such, when I mixed in the salt, water and amarneth, I messed up the gluten structure. Being a reasonably practiced at breadmaking, I was able to manipulate the dough in such a way that I got the gluten structure back together (mostly), but the crumb was still a lot tighter than it should have been.
Tight Crumb
However, the crumb did have a wonderful gelatinized structure and it was moist and delicious.
Cool picture of the crumb
I highly suggest making this bread and the crumb structure will be a lot better if you don't make mistakes :)

Second, I messed up on the shaping of the two batards. At first, I thought that I had underproofed the dough, but I quickly realized that I had not when the boule came out fine. This is what happens when you don't shape a batard well. Seriously, I need lessons. Advice anyone?
Comparison of the two loaves
Even the less pretty one will taste delicious.

Tasting Note 02/18/13: This bread makes some of the best toast that I have ever tasted. Toasting brings out the barley sweetness of the bread creating an amazing depth of flavor with the warm wheaty taste. Seriously delicious. You will not regret making this bread, I promise. I'm so excited that I have two more loaves of this in my freezer!

I am submitting this to Yeast Spotting.

Saturday, February 9, 2013

A New Kind of "Oat" Bread

I've wanted to make this recipe ever since I received Peter Reinhart's Whole Grain Breads. I finally made it two weeks ago.

Oat Bran Broom Bread

My apologies; I forgot to take a shot of the crumb. However, it was quite a tight crumb...slightly tighter than the other sandwich bread's I've made, but I don't think it was as tight as the picture in Reinhart's book.

Recipe for Oat Bran Broom Bread (modified from original):
Ingredients:
Soaker
  • 184g whole wheat flour (medium to fine grind)
  • 28g Oat Bran (4tbsp)
  • 14g flax seeds (1.5tbsp)
  • 4g salt (1/2 tsp)
  • 198g water
Starter (or starter straight out of the jar if your starter is fairly vital and 75%)
  • 50g starter (100% hydration)
  • 177g whole wheat flour
  • 120g water
Final Dough:
  • All the soaker (429g)
  • All the starter (or 398g starter)
  • 56.5g whole wheat flour
  • 5g salt
  • 1tsp dry active yeast (3g)
  • 20 g water
  • 2 tbsp honey (42.5g)
  • 1 tbsp olive or vegetable oil
Method: 
Day 1: 
  • Mix all of the ingredients for the soaker together in a bowl until they form a reasonably wet dough. Cover it with plastic wrap and let it sit for 12-24 hours. If it will be longer than that, place it in the refrigerator.
  • Mix all of the starter ingredients together and mix them until they form a fairly stiff dough. Knead for a minute or two in the bowl before covering with plastic wrap. Refrigerate for 8-48 hours.
Day 2:
  • About 2 hours before mixing the final dough, take any refrigerated ingredients out of the refrigerator.
  • Chop or tare the soaker and the starter into pieces and dust them with the flour.
  • Hydrate the yeast in a cup or bowl (no need to make it bubble, just mix it with the water). Pour the hydrated yeast, the oil, and the honey over the dough. Mix with wet hands or with a spoon. If you don't like the stickiness, you can also slightly oil your hands. Add water or flour for adjustments-- due to the different protein content of whole wheat flours, you may need to adjust. The dough should be soft and slightly (but not very) sticky.
  • Knead the dough for about two minutes in the bowl.
  • Lightly flour your hands and a work surface with whole wheat flour. Coat the dough in flour and knead by hand for 3-4 minutes. Try to incorporates little flour. I found this step very frustrating. My hands got sticky and the dough didn't cooperate well, so I changed the next few steps from the book.
  • Put the dough in a clean bowl and do a stretch-and-fold. Do the stretch and folds with wet hands.
  • Wait 5 minutes and then do another stretch-and-fold.
  • Wait 10 minutes and do another stretch-and-fold.
  • Wait 10 minutes and do a final stretch-and-fold. By this point, the gluten should be adequately developed.
  • Let the dough rise under plastic wrap for about 2 hours at 75 degrees F.
  • After the 2 hours, turn the dough onto a floured surface.
  • Gently stretch it out into a rectangle and roll it up; then seal the seem.
  • Place it seem-side down into a loaf pan (I tend to spray my loaf pans with oil and then lightly flour them so the dough doesn't stick, but this might be overkill).
  • Let the dough rise for another 2 hours in the loaf pan.
  • 30 minutes before you're ready to bake, preheat the oven to 425 degrees F. If you would like to bake under steam, prepare whatever you will use for steam (this is not really necessary, but I baked it under steam).
  • When ready to bake, turn the oven down to 350 degrees F and place it in the oven for 20 minutes. At the 20 minute mark, take off the steam (if you chose to use it), and rotate the pan 180 degrees. Then bake for another 20 minutes (so 40 minutes altogether).
  • Check the loaf to make sure it's at least 190 degrees F.
  • Transfer the bread to a cooling rack and cool for at least 1 hours before slicing and serving.

Review of Oat Bran Broom Bread: 3 Stars
One of the things that really bothers me about this book is that Reinhart puts absolutely absurd amounts of yeast in everything. It's really unnecessary and it doesn't give the dough the time to develop that wonderful flavor. With bread, quick and delicious very rarely coincide (except maybe with sourdough crumpets). So I slowed this bread down. But even then, it didn't have the flavor I wanted. I need to play with the recipe.

Furthermore, the bread doesn't taste anything like oats. The oat bran in it is minimal. I've decided I will rewrite the recipe and try again.

Thursday, December 20, 2012

Sourdough Crumpets

So have you ever wondered what to do with your left over sourdough starter? If you're like me, you hate throwing out a whole bunch of sourdough starter every time you feed it. Also, I have trouble getting rid of starter to refresh my starter if it's sat for too many days (and therefore is overly sour [1]). However, this starter is not always the best for bread and it will make waffles or pancakes taste like vinegar. So, make crumpets.

I used very sour starter when I made these and they tasted great. This recipe is slightly modified from the recipe on Chocolate & Zucchini.

Whole Wheat Sourdough Crumpet


Sourdough Crumpets:
  • 270g sourdough starter (I used whole wheat, but you can use white or a mix)
  • 1 tablespoon honey
  • 1/2 teaspoon salt
  • 1/2 tsp baking soda
  • vegetable oil for greasing pan and rings
Note: you don't have to use crumpet rings, but I tried this and the crumpets really don't look much like crumpets. I don't have crumpet rings, I have some kind of egg rings for making breakfast sandwiches or something. They seem to work fine. When I made yeasted crumpets in college I used a can with both the top and bottom cut off of it. This works too.

  • Grease the pan and the rings and then heat them to medium. Be very careful with temperature. It is easy to burn the bottom of the crumpets if you're not careful, so be ready to regulate.
  • When hot, fill each ring with batter so that you can see half a centimeter of ring over the top. They will puff up.
  • Then, wait until they bubble. When you see that the edges are cooked, extract them from the rings and flip them over.
Mixture bubbling
Mixture bubbling with cooked edges

  • Wait until they finished cooking (there should be some brown among the bubble as shown in the picture at the top), take them off, and repeat the process with the rest of the dough.
  • Crumpets can be eaten hot plain or with butter or jam. After fully cooled, they can be saved in an airtight container for a few days and toasted or frozen in an airtight container (preferably a baggie) and then toasted.
These are delicious. They have that wonderful honey-wheat flavor. They're only very slightly sour, even when using very sour starter.

This post is a prelude to my post on English Muffins which will be coming soon. I plan on making sourdough English Muffins with a friend of the family who is going to make a version with commercial yeast so we can compare and contrast.

NOTES:
  1. Keep in mind that sourdough that smells really weird or is crusty or moldy should be discarded. Unless it's molded all the way through, you don't need to discard the whole thing. Just make sure you carefully discard anything around/under/touching the mold and then feed the starter a bunch. If it smells bad, you can try taking a single tablespoon of it out and creating a "new" starter out of that with plenty of flour and water. If it still seems off, throw it out and start over. In order to prevent issues like this, if you need to leave it for long periods of time, freeze it in an airtight container.

Tuesday, January 17, 2012

Whole Wheat Success

Whole Wheat Batard
I got some new Bannetons for the holidays so I decided to make some wonderful loaves of Tartine 70% Whole Wheat. The flavor is absolutely fantastic. I simply don't understand people who dislike whole wheat bread. The taste is complex and hearty with subtle hints of sweetness and nuttiness. Yum.

Part of the Triumph here is that the last few times I made it I overproofed it during the bulk rise. I guess I just wasn't watching the time carefuly enough. This one was perfectly proofed . All the same, it's lovely and the loaf bloomed fantastically in the oven. This is the most fantastic whole wheat loaf I have ever made. It is beautiful and tasty.

The other loaf was a boule, and I must have over-handledit because it was not quite as perfect:


If only my school work could be that successful...

Sunday, November 20, 2011

The Smell of Bread in the Morning

Early-Morning Bread
I got up early to bake bread this morning, so Servia woke up to the smell of  a crust caramelizing on a (mostly) whole wheat loaf. I went back to sleep while the oven was heating, but after I put the bread in, I drank a cup of tea and went over my Greek flash cards.
Crust
The reason that I got up so early to bake bread was that I went to my morning step-aerobics class at the gym. It's been a couple weeks, as I had a cold, and so I was really out of shape. As tiring as it was, I came back to a wonderful loaf of healthy-ish bread that tasted heavenly and the crazy dance moves and hundred or so sit-ups didn't seem so bad.
Post-Workout Snack
I think this is the most open crumb of all of my attempts at the Tartine Whole Wheat Country loaf. It's not like the one posted by txfarmer,  but I think that is partially due to my shaping/scoring difficulties. Although I've been baking bread for almost two full years now, I'm still a neophyte.

Sunday, July 17, 2011

Happy Birthday Servius


Today we celebrated Servius' birthday with a lovely brunch of fresh-baked bread, his favorite, grapes, raspberries, cheese, and carrots. Instead of having the picnic outside as originally planned, we watched the Japan-USA final match of the women's' soccer World Cup. The game was fantastic. It was exciting and I was rooting for Japan, because the country has had a really bad year and certainly deserves some national spirit.
I love this swirl pattern!
I took the idea for this scoring pattern from the beautiful work at the Tartine Bread Experiment.

Saturday, July 16, 2011

A Fond Memory

It's been a while since I have made any bread. I haven't had much time. Tomorrow is Servius' birthday so I thought I would make some bread so we could have a picnic lunch on the porch. I am making his favorite: my usual whole wheat Tartine bread with steel cut oats, flax seeds, and sunflower seeds.

While I was making the bread and some pizza dough for tonight, Servia and I were talking about the Harry Potter phenomenon. These last two movies which dramatize book 7 have been theonly two for which we did not attend the midnight showing (and I have not seen the final movie yet). We all have been really busy and book 7 is by a mile my least favorite of the set. Servia mentioned she missed going to the movie, but I really miss the pageantry of the books coming out. Even by the time that the second book came out in Britain (we rush ordered it because it took a lot longer to arrive in the USA), I was old enough to realize that the writing was not particularly good, but I enjoyed the pageantry of the whole thing. When the books came out, Servia and I would make apple pie for Servius as he read the books outloud to us. We drank tea and made plot predictions. Those summers on the porch are some of the happiest moments from my childhood (and beyond) and lining up to get the books at midnight made it seem like this happiness and vigor was widespread. I was considering this afternoon how much I wish there were another equally-appreciated series that would once again have people of every age and personality lined up at book stores all over the world. Maybe someday...

Sunday, June 26, 2011

I Finally Got It Right This Time (well..mostly)

 My ciabatta was great! Very light and flavorful. As you cans see, the wholes are a little bit regular meaning that it was probably slight overproofed during the bulk fermentation, but it was wonderful all the same. And it was my own recipe! I put the recipe down as I meant to make it rather than as it was actually made (as I over-proofed it a bit.

Recipe
Sourdough Starter Elaboration
75g of whole wheat sourdough starter (100% hydration)
162g whole wheat flour
163g water (about 75 degrees F)

Dough
245g Bread flour
175g water (about 75 degrees F)
10g Salt (2t)
400g Poolish (all of it)
14g Olive Oil

Directions
Mix together the ingredients for the sourdough starter elaboration until they are completely incorporated. Let sit for 4-8 hours for it to almost double. If you don't want to use it immediately, put it in the refrigerator for up to four days.
 
Use the starter immediately or remove it from the refrigerator and use it immediately or after it warms up. If you use it directly out of the refrigerator, use slightly warmer water. Mix the starter with the water, then mix in the flour and the salt. Mix until the dough is course and sticky. Let the dough rest for five minutes in order to fully hydrate the flour.

Drizzle the olive oil over the dough. Kneed by hand for 2 minutes. Let sit for 5 min.

The dough is stretched-and-folded 4 times over a 40 minute period (as per Reinhart's instructions).

  Place in a lightly-oiled bowl, cover with plastic wrap, and place in the refrigerator overnight.

After this initial rise, place the dough in the refrigerator overnight.

On the next day, remove the dough from the refrigerator about 4.5-5 hours (perhaps a little longer) before baking (if you let it rise at about 75 degrees). At about 1.5 hours in, go through the shaping process.

To shape, turn the dough out onto a floured surface. shape the dough into a rectangle a loose and cut into two pieces with a bench knife or a large, sharp kitchen knife. Gently, without degassing, stretch the dough a little and then fold it in thirds, placing it on a floured surface, seam side down. Dust the top with flour and place under a bowl or under plastic wrap. Let proof for an hour under plastic wrap. Turn seam-side up and stretch into loaves and pat the sides gently to make them rectangular. If you want, you can place them on lightly floured parchment paper, or proof them on the floured surface (if you plan to put the loaves directly onto a peel and then into the oven). Let proof for another two hours. Heat the stone about 30 minutes before you begin to bake. You can load directly from a peel or use a peel or a baking sheet to load one on the parchment paper. Bake at 450 degrees F (or 425 convection) for 15 minutes under steam and then turn the bread around in the oven for 15 minutes to finish. 


The bread was fantastic. Enjoy!

Saturday, June 25, 2011

Ciabatta - Yet Another Formula

It's been a busy couple of days. I've been doing some emergency tutoring for a student with an impending exam as well as reading Greek and getting used to studying for my German class.

As a break, I have decided to try out my half whole wheat recipe for ciabatta as my last off-the-cuff ciabatta recipe turned out so well. We shall see how it works.

Thursday, June 2, 2011

The Bread Sings Again: Tartine Style


One of the indications of bread perfection is "the song of the bread" or the bread crust crackling as it hits the cold air coming out of the oven. I have only achieved this once, when my Pain de Campagne was slightly over-proofed during the first fermentation. Once again, somehow, I slightly over-proofed a loaf of Tartine Country Bread during the initial rising period. The bread sang. It was wonderful. It was light and fluffy and tasted amazing. It did not have the irregular crumb that usually characterizes Tartine loaves (as the bulk fermentation was too long), but it's pretty good.
Crust
Crumb
I also made a version of what I have begun to call my "breakfast bread" which is the 70% Whole Wheat Tartine bread with flax seeds and steel-cut oats.
Over-proofed dough.
I hope the whole wheat one is decent.

Saturday, May 21, 2011

Whole Wheat Bread with Oats and Flax Seeds

Wheat Bread with Steel-Cut Oats and Flax Seeds
Let me just say that this bread is fantastic! There is the lovely wheat flavor of the 70% Whole Wheat Tartine Bread and the added flavor of flax seeds and steel but oats. Even my father (who is not the same devotee of whole wheat bread that I am) said that there was "that special something" that added something fantastic to the flavor. I agree. It's fantastic.
Crust
Nice Ear
 Next time, I would add a little more water to ensure the crumb was more open.
Crumb-- not quite as open as I wanted.
 Ingredients

  • 100g Leaven (see instructions)
  • 400g +25g water (75 degrees F)
  • 150g unbleached all-purpose flour
  • 350g whole wheat flour
  • 10g salt
  • 1/6 cup flax seeds
  • 1/6 cup steel cut oats
The Leaven ("young" starter)

  1. Take 1 tablespoon of mature starter and put it in a small bowl.
  2. Add 50g water (about 75degrees F) to the starter.
  3. Then add 50g whole wheat flour and mix them into the water and starter until it comes together as a dough.
  4. Cover the bowl with plastic wrap or similar and let sit until it passes the float test. This should take about 12 hours. When it is ready, it should smell very sweet-- like overripe fruit.
  5. There will probably be 10-20 grams left over.
The Final Dough

  1. Mix 100g of starter (this should be all of it) with the 350g water.
  2. Then add the 500g of flour and mix until the dough comes together.
  3. Cover the dough with plastic wrap or equivalent and let rest (autolyse) for 45-50 minutes.
  4. After the autolyse, add the salt and the last 25g of water in a little bit at a time, using the water to help the salt dissolve and incorporate into the dough. Make sure that you pinch the dough around the salt and incorporate it throughout the dough.
  5. Move the dough into a heavy glass or plastic bowl, preferably a deep on with a fairly small diameter on the opening in order to keep the heat in.
  6. Toast some flax seeds and let them cool.
Directions
  1. Stretch the dough and bring it in toward the center like this. Be careful not to degas the dough too much. Do this all the way around the dough to make sure that you develop the dough evenly.
  2. Place the dough in a place between 78 and 82 degrees F. You can improvise a proofbox by placing a pot of boiling water in an unheated oven beside the dough.
  3. After 30 minutes, stretch and fold the toasted flax seeds into the dough. Incorporate them a few into each fold.
  4. Repeat the stretch and fold this procedure every 30 minutes for 3-4 hours. As the dough rises, be more careful not to degas the dough. The dough should become very billowy on top.
  5. When the bulk rise is complete, turn the dough out onto a floured surface.
  6. Fold the dough in half so that the outer surface is lightly floured (although you want to incorporate as little flour as possible into the dough).
  7. Fold the dough like an envelope. Fold the bottom up 1/3 over the dough. Then fold the left side in 1/3 and the right side over it. Fold the top all the way over the bottom  and pinch it slightly into the bottom.
  8. Turn the dough seam side down and let it sit under an overturned bowl for 20 minutes.
  9. After the 20 minute bench rest, do the final shaping. I usually shape my dough into a boule. To do this, follow the same pattern as the pre-shape, and then gather the corners together to tighten the surface tension and pinch them together.
  10. Put the boule seam side up in a floured branneton or a bowl lined with a floured cloth.
  11. Let the dough sit for half an hour and then put it in the refrigerator for 10-16 hours.
  12. To bake the dough, 30 minutes before baking take the dough out of the refrigerator and preheat the oven with either a stone and a oven-safe pot or a combo cooker.
  13. When the oven is heated, turn the dough onto a peel and score it. Put it onot the stone or into the combo cooker and put the broth pot or lit over it.
  14. Bake for 20 minute sand then remove the lid. Bake for another 20-25 minutes until the outside is an amber color and the interior temperature reads 212 degrees F.
  15. Wait at least 30 minutes before cutting.
Enjoy!

My second loaf was a traditional Country Tartine Loaf. I don't know what happened. It turned out a bit misshapen.
Funny, Mishapen Loaf
Nice Ear

I think I will Yeast Spot this.