It's just been one of those days where nothing goes as planned. It seems to be some kind of math curse. I studied for the exam for the whole weekend. I made a study guide and did practice problems of each of the ypes that my professor enumerated were on the exam. Unfortunately, I was deceived. At least three of of the 13 questions on the exam were of a sort I had never seen. It was one of those days.
I think I will go back over the math. I have books that will take me up through multivariable calculus. It may be harder to teach myself, but at least I will know when I know the information and I cannot get blindsided by an exam that makes no sense. Ultimately, I am learning for my own sake anyway, so there is little downside to teaching myself.
I had a lovely dinner of samosa's my mother bought. I will resume bread baking tomorrow...
Tuesday, May 31, 2011
Sunday, May 29, 2011
Wine Snob: Alemos Argentinian Malbec

During spring break, a friend of mine came to stay with us for a few days. Her family are old friends, and they nicely sent some wine to the family as a thank you gift (although, of course, seeing an old friend was a gift in itself). We opened the first one at dinner tonight. It was a 20087 Alemos Malbec from the Mendoza region of Argentina.
I liked the wine quite a bit. The color was ruby tinged with purple. Overall, the wine was jammy and on the heavy side of the medium body. The flavor was primarily of blackberries and raspberries with a sprinkling of sel gris and a pinch of white pepper in the middle. It was round with a fairly quick finish. I really enjoyed it.
A pictures is forthcoming...
Saturday, May 28, 2011
General Thoughts...
I'm taking my math final on Tuesday and I just finished up my latest SAT prep class so I will not resume posting in depth for a few days. I am spending my time writing a study guide for the class.
I took the leftover pancake batter from the other day and made apple and cheese crepes for dinner and dark chocolate crepes for dessert. They were great, except I think that next time I will simply used the sourdough for crepes instead of adding the baking soda. Also, I noticed that the slight sour flavor of the crepes requires something with a strong flavor inside-- e.g. the crepes with sharp cheddar and apples were better than those with brie and apples. I forgot to take a photo, but this was the first time I ever made crepes (Servia makes great ones) so they were perhaps not as photogenic as another attempt might be.
I took the leftover pancake batter from the other day and made apple and cheese crepes for dinner and dark chocolate crepes for dessert. They were great, except I think that next time I will simply used the sourdough for crepes instead of adding the baking soda. Also, I noticed that the slight sour flavor of the crepes requires something with a strong flavor inside-- e.g. the crepes with sharp cheddar and apples were better than those with brie and apples. I forgot to take a photo, but this was the first time I ever made crepes (Servia makes great ones) so they were perhaps not as photogenic as another attempt might be.
Friday, May 27, 2011
Math: An Experiment in Relearning
Retaking calculus after six years has proved an odd experience. Concepts that came to me so easily back in high school are much more difficult now. On the other hand, those concepts that I did not learn then or that I did not understand fully come much more easily. I am spending the next four days studying for my final. I am using my old technique of creating a comprehensive study guide.
Concerning math, I listened to a pretty cool podcast from In Our Time with Melvyn Bragg which discusses imaginary numbers. Enjoy.
Concerning math, I listened to a pretty cool podcast from In Our Time with Melvyn Bragg which discusses imaginary numbers. Enjoy.
Wednesday, May 25, 2011
Croissants!
 |
| My Little Croissant! |
The first time I made croissants, they peeled off layer by layer, but they were not fluffy and light in the same way. Cerinthus said "they're not bad, but they're not croissants." Even Cerinthus would have to admit that these are croissants. Sure, they don't have the perfect honeycomb crumb, but they still look and taste as ordered:
 |
| Croissants |
 |
| Light and Fluffy Interior |
 |
| Crumb-- a better photo |
Tuesday, May 24, 2011
Sourdough Pancakes: with or without baking soda
I took the recipe from King Arthur Flour and modified it. Here is what I did:
Overnight sponge
Waffle or pancake batter
The night before eating the pancakes, made the sponge. First distribute the sourdough starter into the milk and then add the flour and sugar. Mix until a batter forms and leave on the counter overnight, covered with plastic wrap or similar. I made the mistake of putting it in the refrigerator, which meant that I ended up having pancakes for lunch instead of breakfast because it was not bubbly and ready.
The next morning beat the egg whites until stiff and set them aside. Mix together the egg yoke, the vanilla, the salt, and the oil. Then mix it into the sponge. Fold the mixture gently into the egg whites. If lighter pancakes are desired, mix in the baking soda.
The pancakes are pretty tasty. I had them with syrup. About 1/4 of the mixture or less made a full lunch for Servia and I, so this recipe is huge. I saved the rest of it for further experimentation. More thoughts to come.
As a preview, tomorrow I bake these lovely croissants. I think I may have made some serious mistakes, so wish me luck. But they look pretty cute!
More tomorrow...
 |
| Pancakes with Baking Soda |
- 1 cups King Arthur Unbleached All-Purpose Flour
- 1 tablespoons sugar
- 1 cups 2% Milk + lemon juice
- 0.66 cup sourdough starter, straight from the refrigerator (not fed)
- 1/3 cup of hydrated rolled oats
Waffle or pancake batter
- all of the overnight sponge
- 2 large egg whites
- 1 egg yoke
- 1/8 cup vegetable oil or melted butter
- 1/2 teaspoon salt
- [0.5 tsp baking soda] optional
- [1 tsp vanilla] optional
The night before eating the pancakes, made the sponge. First distribute the sourdough starter into the milk and then add the flour and sugar. Mix until a batter forms and leave on the counter overnight, covered with plastic wrap or similar. I made the mistake of putting it in the refrigerator, which meant that I ended up having pancakes for lunch instead of breakfast because it was not bubbly and ready.
 |
| Sourdough Mixture |
The pancakes are pretty tasty. I had them with syrup. About 1/4 of the mixture or less made a full lunch for Servia and I, so this recipe is huge. I saved the rest of it for further experimentation. More thoughts to come.
As a preview, tomorrow I bake these lovely croissants. I think I may have made some serious mistakes, so wish me luck. But they look pretty cute!
 |
| Mini Tartine Croissants |
Monday, May 23, 2011
Sourdough Pancakes?
I spent tonight on the first phase of croissants for my class. I forgot the reason I made croissants only once: they're hard. I think I made a whole bunch of mistakes, but I won't find out until I make them on Wednesday.
In order to try to soften the blow in case the croissants didn't work out just right, I made some sourdough pancake batter to try in the morning. I took the recipe from King Arthur Flour and substituted 2% milk plus a teaspoon of lemon juice for the buttermilk. I also added about 1/3 cup of hydrated rolled oats and I will explain the few other modifications I am making in the next post.
In order to try to soften the blow in case the croissants didn't work out just right, I made some sourdough pancake batter to try in the morning. I took the recipe from King Arthur Flour and substituted 2% milk plus a teaspoon of lemon juice for the buttermilk. I also added about 1/3 cup of hydrated rolled oats and I will explain the few other modifications I am making in the next post.
Saturday, May 21, 2011
Whole Wheat Bread with Oats and Flax Seeds
 |
| Wheat Bread with Steel-Cut Oats and Flax Seeds |
 |
| Crust |
 |
| Nice Ear |
 |
| Crumb-- not quite as open as I wanted. |
- 100g Leaven (see instructions)
- 400g +25g water (75 degrees F)
- 150g unbleached all-purpose flour
- 350g whole wheat flour
- 10g salt
- 1/6 cup flax seeds
- 1/6 cup steel cut oats
- Take 1 tablespoon of mature starter and put it in a small bowl.
- Add 50g water (about 75degrees F) to the starter.
- Then add 50g whole wheat flour and mix them into the water and starter until it comes together as a dough.
- Cover the bowl with plastic wrap or similar and let sit until it passes the float test. This should take about 12 hours. When it is ready, it should smell very sweet-- like overripe fruit.
- There will probably be 10-20 grams left over.
- Mix 100g of starter (this should be all of it) with the 350g water.
- Then add the 500g of flour and mix until the dough comes together.
- Cover the dough with plastic wrap or equivalent and let rest (autolyse) for 45-50 minutes.
- After the autolyse, add the salt and the last 25g of water in a little bit at a time, using the water to help the salt dissolve and incorporate into the dough. Make sure that you pinch the dough around the salt and incorporate it throughout the dough.
- Move the dough into a heavy glass or plastic bowl, preferably a deep on with a fairly small diameter on the opening in order to keep the heat in.
- Toast some flax seeds and let them cool.
- Stretch the dough and bring it in toward the center like this. Be careful not to degas the dough too much. Do this all the way around the dough to make sure that you develop the dough evenly.
- Place the dough in a place between 78 and 82 degrees F. You can improvise a proofbox by placing a pot of boiling water in an unheated oven beside the dough.
- After 30 minutes, stretch and fold the toasted flax seeds into the dough. Incorporate them a few into each fold.
- Repeat the stretch and fold this procedure every 30 minutes for 3-4 hours. As the dough rises, be more careful not to degas the dough. The dough should become very billowy on top.
- When the bulk rise is complete, turn the dough out onto a floured surface.
- Fold the dough in half so that the outer surface is lightly floured (although you want to incorporate as little flour as possible into the dough).
- Fold the dough like an envelope. Fold the bottom up 1/3 over the dough. Then fold the left side in 1/3 and the right side over it. Fold the top all the way over the bottom and pinch it slightly into the bottom.
- Turn the dough seam side down and let it sit under an overturned bowl for 20 minutes.
- After the 20 minute bench rest, do the final shaping. I usually shape my dough into a boule. To do this, follow the same pattern as the pre-shape, and then gather the corners together to tighten the surface tension and pinch them together.
- Put the boule seam side up in a floured branneton or a bowl lined with a floured cloth.
- Let the dough sit for half an hour and then put it in the refrigerator for 10-16 hours.
- To bake the dough, 30 minutes before baking take the dough out of the refrigerator and preheat the oven with either a stone and a oven-safe pot or a combo cooker.
- When the oven is heated, turn the dough onto a peel and score it. Put it onot the stone or into the combo cooker and put the broth pot or lit over it.
- Bake for 20 minute sand then remove the lid. Bake for another 20-25 minutes until the outside is an amber color and the interior temperature reads 212 degrees F.
- Wait at least 30 minutes before cutting.
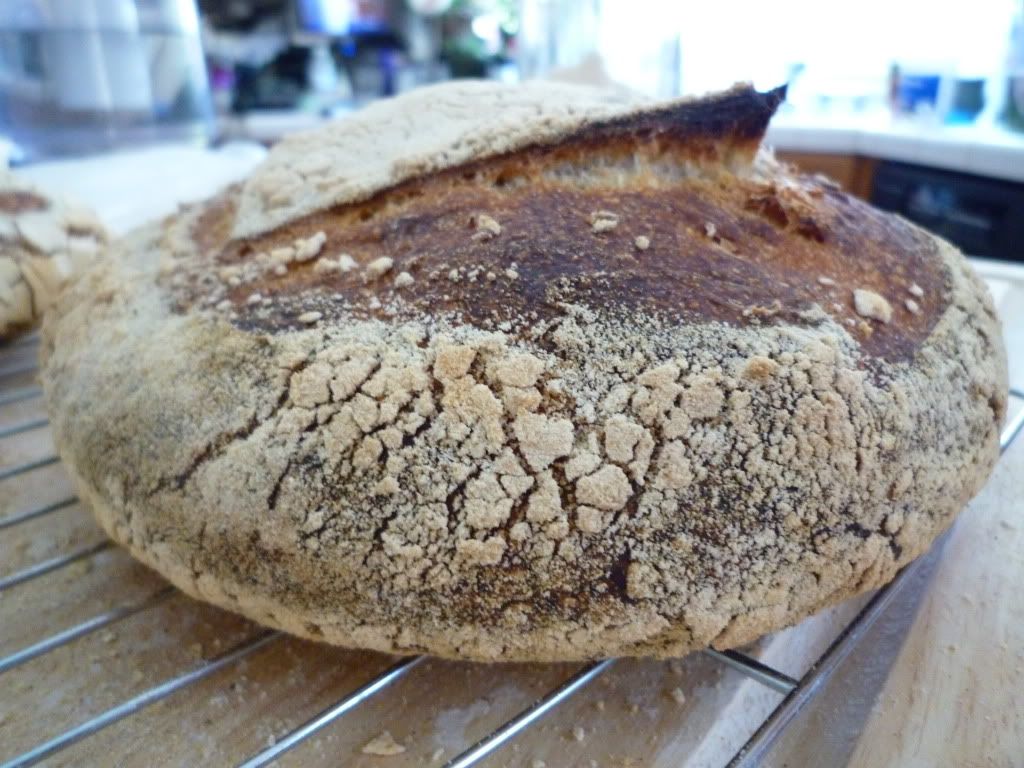
My second loaf was a traditional Country Tartine Loaf. I don't know what happened. It turned out a bit misshapen.
 |
| Funny, Mishapen Loaf |
 |
| Nice Ear |
I think I will Yeast Spot this.
Friday, May 20, 2011
Book Review: Life From Scratch
I downloaded Life from Scratch for free from Amazon a few days ago. After reading a couple of scholarly article on the last exam I proctored, I decided to switch to something lighter. It was a quick and easy read. I finished it in a total of 3-4 hours.

 I started reading the book in the first place because I thought the idea of resurrecting a life through cooking (kind of like I did-- although i did mine by Sparkpeople with exercise and healthy cooking) sounded interesting to me-- I did not look closely enough to realize that it was not a true story. However, I quickly realized the story was fictional (due to timeline irregularities). In general, it was a vapid account of two-dimensional characters that ended in a totally unrealistic and trite manner. I would not particularly recommend it.
Thursday, May 19, 2011
Bread Shaping
This week has been pretty hectic. I took my math exam today and it seemed to go ok so I came home and immediately set up some levain so I can make bread tomorrow. I also promised that I would make croissants for my SAT class. While I was browsing around for inspiration, I found a video online that demonstrates another technique for shaping a boule.
How to Shape a Round Loaf of Bread from Apartment Therapy: The Kitchn on Vimeo
Another book review coming soon!
How to Shape a Round Loaf of Bread from Apartment Therapy: The Kitchn on Vimeo
Another book review coming soon!
Wednesday, May 18, 2011
More Math...
I have a math exam and I have realized that even though I took calculus before, I actually need to study for exams. Anyway, in a scientific vein, enjoy this article about orphaned giant planets as food for thought until I post again tomorrow...
Tuesday, May 17, 2011
Book Review: The Alchemist

I cannot say that I highly recommend the book. It had some of the elements of Spanish writing that I seem to like-- that fantastical gifted phrasing that makes words seem magical-- but it lacked a complicated plot or believable characters. Every person seemed to have a unified core that appeared unmediated through their actions with the world almost as if the main character had invented them to entertain him during long nights in the desert. Furthermore, although the character went through some hardships, I do not think I have ever encountered a self-discovery story where the path was so clear or the journey so easy. Maybe this is my view from reading too many books where authors torture their characters, but it seems like omens/God/happenstance/luck (all things to which the main character's first person narrative constantly refer) provide such easy roadmaps.
The book was enjoyable and moderately charming, but not something I could highly recommend.
Monday, May 16, 2011
The Bibliophiles' Pilgrimage
This morning, in the midst of our craziness (we had a water leak under the house), my mother found an amazing article which cheered us up. Salon created a slideshow of the world's greatest bookstores and they look fantastic! We decided that as we visit these cities we should go on a pilgrimage to each of them. Check out the pictures for youself here.
Sunday, May 15, 2011
Indian Food Part II: From Sulpicia's Kitchen
For the leftovers, I decided to make some of my own naan. I found a recipe in Peter Reinhart's Whole Grain Bread . It was pretty good. Cerinthus (who sadly left today) gave it a "solid 8 out of 10" which is pretty good for my first try. I was not particularly rigorous in my picture-taking, but I will post the recipe from Whole Grain Bread page 80 (modified, as is my tradition).
As Cerinthus is not the greatest fan of whole wheat, I used 50% whole wheat, 50% all purpose flour. It worked quite well. I also used canola oil instead of butter and 2% milk instead of yogurt.
Ingredients
Right after the naan came out of the oven, I brushed it with olive oil (mixed with a pinch of white pepper and garlic salt) and crushed fresh garlic as well as chopped cilantro. I thought it was heavenly.
As Cerinthus is not the greatest fan of whole wheat, I used 50% whole wheat, 50% all purpose flour. It worked quite well. I also used canola oil instead of butter and 2% milk instead of yogurt.
Ingredients
- 227g Whole Wheat Flour
- 227g Unbleached All-Purpose Flour
- 380g 2% Milk
- 3g salt
- 1 teaspoon table salt
- 2 tablespoons canola oil
- Mix together the flour and the salt.
- Mix together the milk and the yeast, fully hydrating the yeast, and the mix the milk into the dry ingredients. Let it hydrate for 5 minutes.
- Put the dough in a lightly oiled bowl. Use the 40-minute stretch-and-fold technique.
- Place the dough in the refrigerator overnight.
- Remove the dough from the refrigerator.
- Turn it onto a floured surface and divide it into five pieces.
- Gather the pieces into balls and let them sit under plastic wrap or an overturned bowl.
- Let rise for 2 hours at 70 degrees or about 1.5 hours at 75 degrees.
- Preheat the oven with an ovenstone to 500 degrees F.
- Stretch the pieces into disks about 1/4 inch thick.
- Go back to the first piece and stretch it about 1/8 of an inch thick.
- Punch a lot of holes in the dough with a fork. Make sure the holes go all the way through.
- Load the naan onto a peel and let it cook for 3 minutes or until it puffs up significantly and is dappled with brown. If it puffs to much, dock it again with the fork.
- Brush with toppings and eat while hot.
 | ||
| My Garlic Naan |
Friday, May 13, 2011
Indian Food
Cernithus and I went to my favorite Indian place of all time tonight. It was amazing. I kept half of it for tomorrow and started a batch of naan to eat with it. I am really excited to try it. I have been drooling over the recipe from Peter Reinhart's Whole Grain Breads. Yum.
 I will report on the verdict.
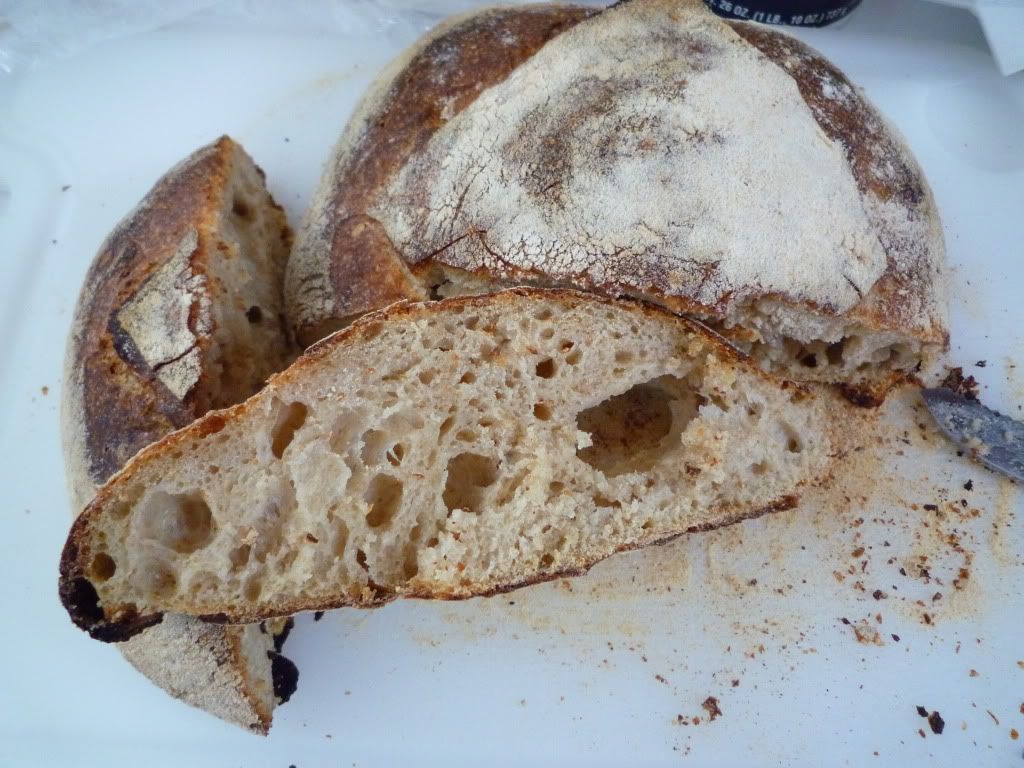
Pain au Levain Success
 |
| Crust and Crumb |
 |
| Nice Open Crumb |

We gobbled it up. It was fantastic. Another loaf waits in the fridge so I can bake it in the morning.
 |
| What Remained... |
More soon...
Wednesday, May 11, 2011
It's Been a While...
It's been quite a while since my last post. In between trying to get into classics classes at the local university, being sick, and going up to celebrate the end of the year with Cerinthus and my friends, I did not get to post much.
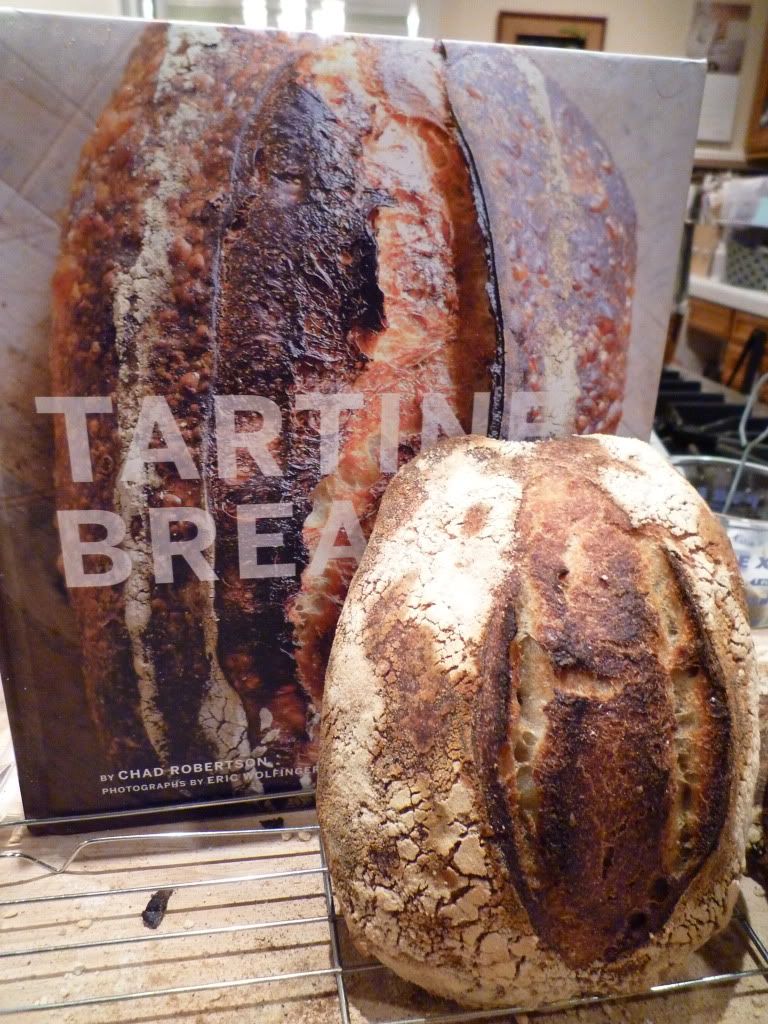
Before I went up to my Alma Mater, I baked 5 mini loaves of bread. I remembered that Messalla liked my bread a lot so I thought I would bring him a loaf. I left one loaf with my parents and took these four loaves with me:
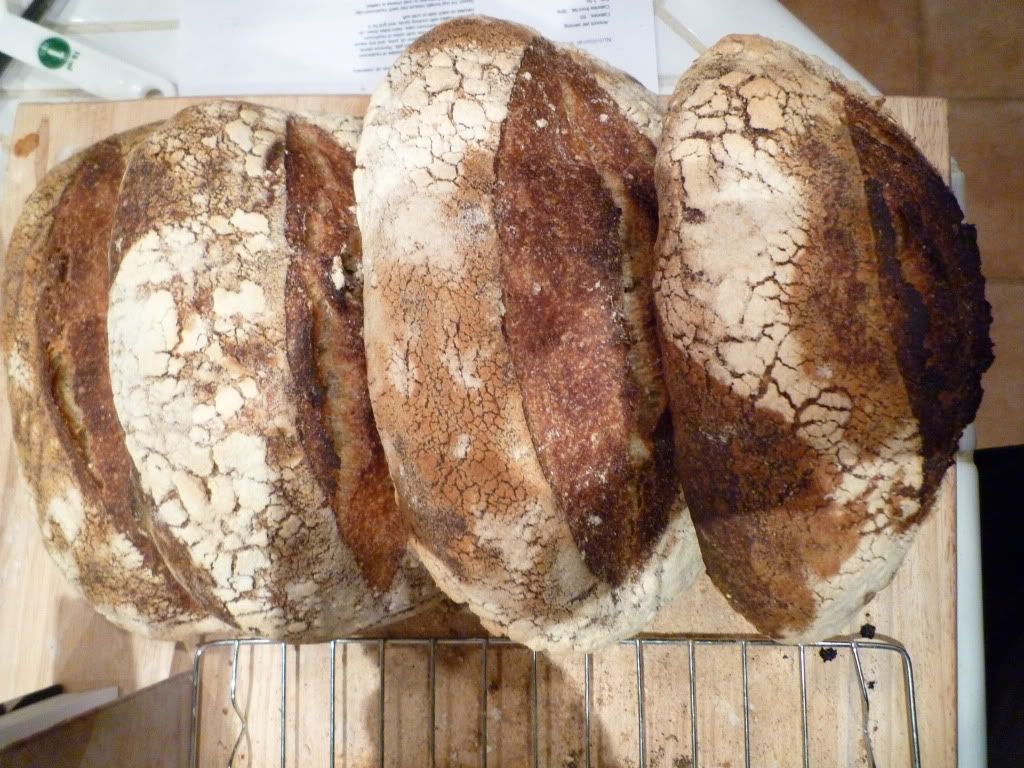
 |
| Crust |
 |
| Crust and Crumb |
Monday, May 2, 2011
An Extremely Modified Transitional Multigrain Hearth Bread
 |
| Multigrain Bread |
Day 1: Soaker and Starter
Soaker
- 170g water
- 56.5g red whole wheat flour
- 56.5g rolled oats (I used steel cut by accident)
- 56.5g semolina flour (I didn't have any cornmeal around)
- 42.5g white whole wheat flour
- 7g flax seeds, whole or ground (I used toasted whole flax seeds)
- 7g wheat or oat bran
- 4 salt
- Mix soaker ingredients together in a bowl for about 1 minute. It will form a dough that resembles thick porrage.
- Cover loosely with plastic wrap at room temperature for 12-24 hours.
- 200g mature starter (unbleached flour)
- 100g unbleached bread flour
- 128g water
- 28g whole wheat flour
- Blend ingredients together until fully hydrated.
- Cover tightly with plastic wrap and place in the refrigerator for 12-24 hours.
Final Dough
- 456g starter (all of it)
- 400g soaker (all of it)
- 100g whole wheat flour
- 5g salt
- 20g sunflour seeds
- 20g pumpkin seeds
- 20g sesame seeds
- You may need a little bit of extra whole wheat flour for adjustments
- Take the starter out of the refrigerator
- Toast the sunflower, pumpkin, and sesame seeds. Let them cool.
- Mix together the starter and soaker until fully combined. Warning: this was an oddly challenging process, but it does work. I used a danish dough whisk. The dough will be very wet and sticky.
- Add in the whole wheat flour a little bit at a time and mix it into the dough.
- Let the dough rest for 5 minutes.
- Mix in the salt and the seeds. Make sure the dough fully absorbs the salt.
- Using wet hands (the dough is very sticky) need the dough for two to three minutes.
- Use the Peter Reinhart stretch-and-fold technique, but do two stretch and folds in a row every ten minutes for 40 minutes. This dough is very troublesome. Note that it will probably not come completely together until the second stretch and fold and it should become significantly silkier by the fourth stretch and fold. [1]
- Let the dough rise between 78-82 degrees for four hours. Do a stretch-and-fold after the first, second, and third hours of the rise.
- After four hours, turn the dough out onto a floured surface and fold it in half so both sides are lightly floured.
- Then gently stretch it into a rectangle. Fold it up 2/3 of the way, and then fold the left side over 2/3 of the way. Fold the right side directly over the left side and pull the top down over the bottom to develop surface tension. Turn the dough seam side down and let rest under a large overturned bowl.
- Let the dough bench rest for 20 minutes.
- If the gluten structure seems weak, repeat this process again. If the dough spreads out with fairly even thickness, proceed to the final shaping.
- Shape the dough any way you like for the final shaping. I decided to make a large batard. My shaping skills are pretty terrible, so I would suggest looking at some videos (e.g. Bread Cetera) for shaping suggestions. Place in a banneton or in a bowl or pan lined with a floured dishcloth.
- Let the dough sit out at room temperature for 1 hour under plastic wrap or similar
- Then, place the dough in the refrigerator for 8-16 hours.
- Preheat the oven to 500 degrees with a combo cooker or brothpot and stone.
- Take the bread out of the refrigerator 20 minutes before you are ready to bake.
- When you are ready to bake, turn the bread onto a floured peel and score it.
- Put the oven down to 450 degrees F and bake under steam for 20-25 minutes.
- Remove the lid for keeping the steam in and bake for another 20-30 minutes until the outside of the bread is a rich brown and the internal temperature reads 212 degrees F.
- Wait at least 1 hour before slicing.
 |
| Crust |
 |
| Crumb |
The bread is great. It's very hearty and seedy and it has a lovely, rich, nutty flavor. I will most definitely make it again.
I am sending this into Yeast Spotting. I hope it doesn't look like too much of an ugly duckling among the beautiful breads.
Endnotes
- I did mixing techniques by trial and error which is why I don't think my bread rose as much as it could have it did not develop quite the crumb I was hoping. I am hoping to have better luck with this technique as written.
Subscribe to:
Posts (Atom)