 |
| Sourdough English Muffins; Photocredit: Sue |
Tuesday, February 5, 2013
More on English Muffins


Monday, February 4, 2013
The Confession: More on Oat Bread
 |
| Oat Bread; Photocredit: Servia |
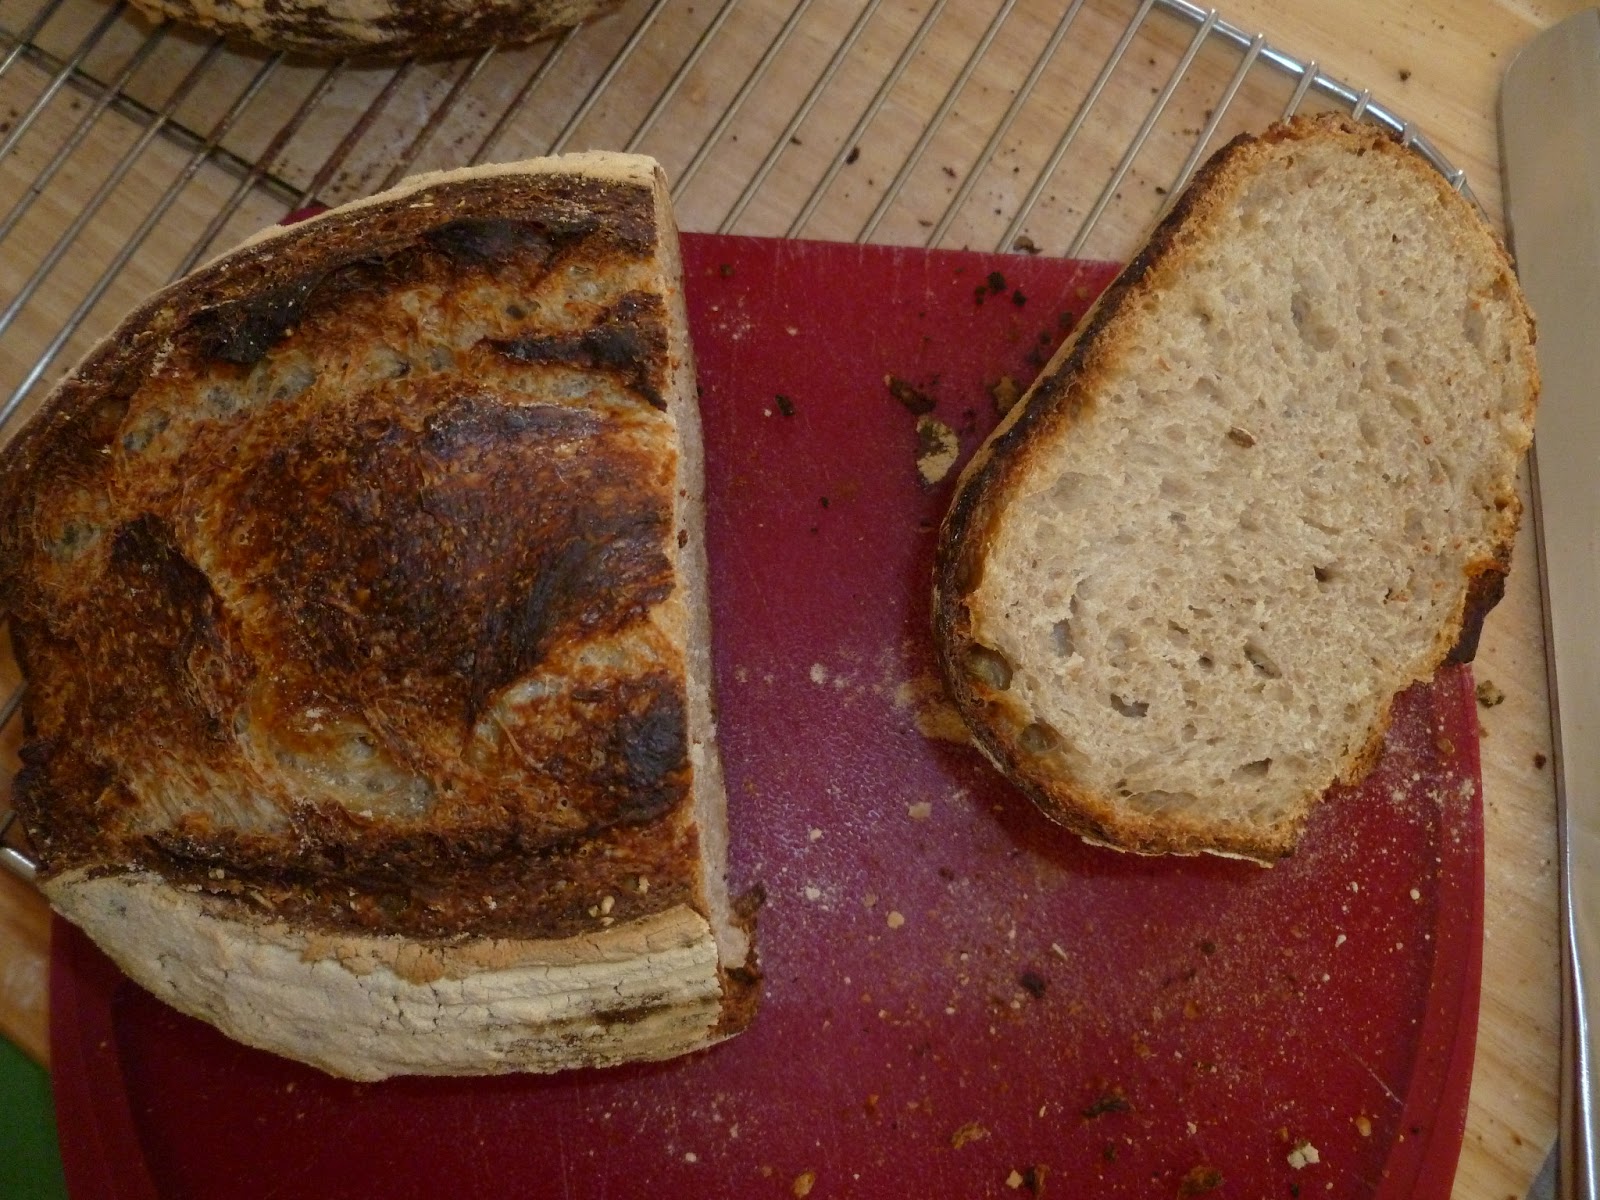
So I have a confession to make. I think I switched the dough of the English Muffins and my traditional oat bread. This would explain the fact that the English Muffins didn't taste sweet at all while the bread is sweet and delicious. But it's not sweet in the way that bread sweetened with honey or sugar tastes...it's like the sweetness of barley. Because, well, it is. Non-diastatic malt powder is made out of roasted barley. It's the sweetener that is used in bagels, but this bread is far better than any bagel I've ever had. It tastes like a barley oat bread and it's lovely and moist on the inside (from the oil). This would probably make far better English muffins even then the ones I made with the unaltered dough.
 |
| The bread was not nearly as burnt as it looks in this picture-- that was the lighting; Photocredit: Servia |
 |
| Baking in my new combo cooker; Photocredit: Servia |
Sulpicia's Sourdough Oat English Muffins (in testing)
Ingredients:
Preferment:
- 100g starter (very active) 100% hydration white or whole wheat based upon preference
- 100g whole wheat flour
- 50g water
Final Dough:
- All the preferment (250g)
- 450g bread flour
- 150g whole wheat flour
- 130g rolled oats (thickly rolled is better)
- 470g cold water
- 17g salt
- 1.5 tablespoon non-diastatic malt powder
- approximately 15g vegetable oil
Day 1:
- Prepare the pre-ferment by dissolving the starter in water and then mixing in the flour. When it is fully mixed, cover the container and put it in the refrigerator.
- Let it sit in the refrigerator for 18-24 hours. It should have almost doubled in bulk and it should pass the float test.
Day 2:
- When the starter is ready to be used, leave it in the refrigerator for one extra hour.
- Mix together the bread flour, whole wheat flour, rolled oats, non-diastatic, and water together in a bowl into a dough.
- Let it sit for 1 hour.
- Then mix in the starter, salt, and oil by hand.
- Knead by hand for 3-4 minutes.
- Wait 15 minutes. Then do 1-2 stretch-and-folds.
- Wait 15 minutes. Then do 2-3 stretch-and-folds.
- Wait 15 minutes. Then do 1-2 stretch-and-folds.
- Wait 30 minutes. Then do 1-2 stretch-and-folds. Then put the bowl, covered with plastic wrap, into the refrigerator for 15-18 hours.
Day 3:
- 1 hour before handling (3.5 hours before baking), take the dough out of the refrigerator.
- Divide the dough into two pieces and shape each into a boule or batard. Place them into floured bannetons or a bowl lined with a floured linen.
- Dust with flour and cover with plastic for 2.5 hours (at about 75 degrees F).
- At the two hour mark, heat the oven to 460 degrees F (435 degrees F convection).
- At 2.5 hours, scored the dough and put the dough into a combo cooker or onto a baking stone.
- Bake under steam for 35 minutes. When done, it should be a light golden color with darker brown along the scoring mark.
- Then, turn the over down to 440 degrees F (415 degrees F convection) and bake for 15 minutes or until it registers an internal temperature of 210 degrees F. Remove the bread from the oven.
- Let it cool at least 1 hour before slicing and eating.
Sunday, February 3, 2013
English Muffins, Part 2
My English Muffins worked! They were actually quite amazing. So were Sue's.
I took the hypothesis from Tartine Bread that one needs to use some kind of dough that has a reasonably low hydration but also produces a bread with fairly large holes. Corudata's Oat Bread was perfect (which was the base for my English Muffin Recipe) because it is a low hydration bread that acts like a high hydration bread (see crumb shot of oat bread).
Sue and I had a day planned to do a taste test between sourdough and commercial yeast English Muffins as I mentioned in yesterday's post. It was a lot of fun. Both of our muffins turned out amazingly, although hers turned out much prettier than mine (see below). Totally coincidentally, both of us added oats to the recipe. Sue also added buckwheat to hers which gave them a delicious earthy flavor and a beautiful color.
We both ended up baking them on griddles (her on a real griddle, me in a my great-grandfather's cast iron skillet-- yes, the really do last that long). I was convinced it could never work, but it worked great.
Try these for yourself. I highly recommend it. And/Or try Sue's recipe. I posted this to Yeast Spotting.
 |
| English Muffins, Photocredit: Servia |
 |
| English Muffins, Photocredit: Servia |
 |
| English Muffins, Exterior; Photocredit: Servia |
 |
| Muffins baking in the skillet, the ugly one was made from leftover dough; Phodocredit: Servia |
Sue and I had a day planned to do a taste test between sourdough and commercial yeast English Muffins as I mentioned in yesterday's post. It was a lot of fun. Both of our muffins turned out amazingly, although hers turned out much prettier than mine (see below). Totally coincidentally, both of us added oats to the recipe. Sue also added buckwheat to hers which gave them a delicious earthy flavor and a beautiful color.
 |
| Sue's English Muffins; Photocredit: Servia |
 |
| Sue's Crumb; Photocredit: Servia |
 |
| Sue's muffins, cooking on the griddle; Photocredit: Servia |
Saturday, February 2, 2013
English Muffins, Part 1
So a long time ago I promised that I would make English Muffins with Sue. She is going to make muffins with commercial yeast and I was going to make muffins with sourdough so that we could compare the flavors. I thought it would be a really interesting experiment, especially since I found so many different versions of the recipes online.
However, when I looked more closely, I realized that almost all of them have a chemical rising agent such as baking powder or baking soda which entirely ruins the quest for the difference in taste between sourdough and commercial yeast muffins, so I realized that I had to come up with something different.
When I was thinking about it, I wasn't sure what kind of dough I could use to make good English Muffins. I've never made them before and I'm simply not sure what makes them work. However, I knew that the dough had to be fairly stiff, so that it could survive the cutting, and probably would need to be slightly sweetened. Now that I think about it, the recipe should have oil to soften the crust, but I forgot to put that in at the beginning. In this instantiation of the recipe I will just oil my hands for kneading, but next time I will probably add some into the dough itself to make things easier.
Preferment:
Final Dough:
Day 1:
Day 2:
Day 3:
However, when I looked more closely, I realized that almost all of them have a chemical rising agent such as baking powder or baking soda which entirely ruins the quest for the difference in taste between sourdough and commercial yeast muffins, so I realized that I had to come up with something different.
When I was thinking about it, I wasn't sure what kind of dough I could use to make good English Muffins. I've never made them before and I'm simply not sure what makes them work. However, I knew that the dough had to be fairly stiff, so that it could survive the cutting, and probably would need to be slightly sweetened. Now that I think about it, the recipe should have oil to soften the crust, but I forgot to put that in at the beginning. In this instantiation of the recipe I will just oil my hands for kneading, but next time I will probably add some into the dough itself to make things easier.
Sulpicia's Sourdough Oat English Muffins (in testing)
Ingredients:
Preferment:
- 100g starter (very active) 100% hydration white or whole wheat based upon preference
- 100g whole wheat flour
- 50g water
Final Dough:
- All the preferment (250g)
- 450g bread flour
- 150g whole wheat flour
- 130g rolled oats (thickly rolled is better)
- 470g cold water
- 17g salt
- 1.5 tablespoon non-diastatic malt powder
- approximately 15g vegetable oil
Day 1:
- Prepare the pre-ferment by dissolving the starter in water and then mixing in the flour. When it is fully mixed, cover the container and put it in the refrigerator.
- Let it sit in the refrigerator for 18-24 hours. It should have almost doubled in bulk and it should pass the float test.
Day 2:
- When the starter is ready to be used, leave it in the refrigerator for one extra hour.
- Mix together the bread flour, whole wheat flour, rolled oats, non-diastatic, and water together in a bowl into a dough. I put the non-disastatic malt powder in with the salt because I forgot to put it in earlier.
- Let it sit for 1 hour.
- Then mix in the starter, salt, and oil by hand. I put in the oil later because I forgot it.
- Knead by hand for 3-4 minutes.
- Wait 15 minutes. Then do 1-2 stretch-and-folds.
- Wait 15 minutes. Then do 2-3 stretch-and-folds.
- Wait 15 minutes. Then do 1-2 stretch-and-folds.
- Wait 30 minutes. Then do 1-2 stretch-and-folds. Then put the bowl, covered with plastic wrap, into the refrigerator for 15-18 hours.
Day 3:
- 1 hour before handling (3.5 hours before baking), take the dough out of the refrigerator.
- Thoroughly flour a towel or a piece of parchment
- Turn the dough onto the floured surface and press it into a 1" thick disk from the center outward
- Dust with flour and cover with plastic for 2.5 hours.
- Use a cookie cutter about 3" in diameter or a bench knife to cut 3" squares (if you don't mind the odd shape) and cut the muffins.
- Coat the bottom of the pan with vegetable oil and heat on medium-low heat.
- Once the pan is hot, add the muffins. Cover them with a lid.
- In 5-6 minutes, they should puff 2" high. When the undersides are golden brown, flip the muffins and cook until the other side is golden brown/
Sunday, January 27, 2013
Christmas Bread
 |
| Barley Bread |
Pretty much everyone in the family gets a bit hypoglycemic; if we don't eat, we get tired, cranky, panicky, and, if things get really bad, trembley. So, food at lunch time was in order. There was some nice cheese for later so I stole a bit of that and combined it with one of the five loaves of bread I made and some carrots and brought a plate to each person in various places around the house. That loaf of bread was eaten so quickly that I didn't manage to get a picture of it, but you can see the rest below.
 |
| Whole Wheat Boule |
 |
| Whole Wheat Batard |
 |
| Country Loaf Ear |
 |
| Country Loaf |
 |
| Whole Wheat and Country Loaf, used for decoration and eaten over the next few days |
Saturday, January 26, 2013
The Wonders of Oat Bread
 |
| Oat Bread |
 |
| Two Loaves Again |
 |
| Crumb |
 |
| This loaf didn't shape correctly, but it bloomed beautifully |
 |
| The crumb was pretty open for such a stiff dough |
Friday, January 25, 2013
Rye Bread
 |
| My First Rye |
The recipe appears here in the comments portion of a post on the Fresh Loaf. I used regular water, whole wheat starter (because I didn't have any rye starter) and dark rye flour. I also cut the recipe in half.
Sadly, I didn't like the rye bread. Egnatius and my father liked it, although they said it had too many caraway seeds (I would suggest 5g or less instead of 10g if you're making a half-recipe). It is supposed to be very good with jam (according to the rest of my family).
I seem to have lost my crumb shot. Sorry about that. The crumb was fairly tight, but moist, toothsome, and creamy. It was a very nice texture.
Anyway, it seems like a very good rye recipe, if you like that sort of thing. It was a fun recipe to make, even if I didn't like it.
News
While I'm still waiting to hear from all of my institutions, I have some good news from others. Egnatius just got accepted to a big university in Canada for a PhD! That's pretty cool. He is still waiting to hear from everywhere else. Also, a friend of mine in the program got accepted to one big-name California school and has an interview via Skype and a campus visit each with big Ivy League schools. It would undermine anonymity to provide any more information, but I'm really excited for them, and since no one seems to be posting on the Grad Café, it seemed right to let people know that certain schools were out.
While I wait, I have some breads I'm planning on making, so I'll keep you updated on that as well.
While I wait, I have some breads I'm planning on making, so I'll keep you updated on that as well.
Subscribe to:
Posts (Atom)